(still in the process of writing everything up to post it)
Contents
- Overview
- Materials
- Wood Cutting & Routing
- Frame Assembly & Preparation
- Finishing with Stain & Polyurethane
- Wiring Components
- Paracord Handle & Latch
Overview
After my Hori Fighting Commander broke, I figured for my next controller I'd choose an fightstick to save my thumb from more calluses. The initial plan was to buy a cheap one like the Mayflash F300 and then swap in better quality Sanwa parts, but I wasn't satisfied with the position of the available buttons. For Guilty Gear it would be fine, but Tekken requires you hit both Select and A (cross on Play Station) to reset its training mode and none of the fightsticks I browsed had their Select button in a convenient place for this. After checking out the price of fightstick printed circuit boards, I figured it might be better to just build my own instead. The end result, while not much cheaper than a premium fightstick, was designed to my liking.
I arrived at my final design after making some considerations. One goal of course was to lay out more convenient button placements for the games I would mainly be playing with it (Guilty Gear & Tekken). Another goal was to keep number of wood cuts minimal and use as many pre-cut selections of wood board as possible, as making straight cuts with a hand saw is a lot tougher than it looks and when I put this project together I didn't have access to a miter saw. I also wanted a larger surface area and various other conveniences.

The finished product measures 12" x 24" x 3.5" (L x W x H) excluding the thin acrylic layer and protruding joystick and buttons. It has two hinges along the length of the left side that allow the top panel to open outwards and a clasp on the right side made of wood and paracord that uses 3M Dual Lock strips to hold it closed. The fightstick itself uses a detachable USB cable that can be stored inside the frame when not in use, and the acrylic panel allows for custom artwork to be placed underneath it.
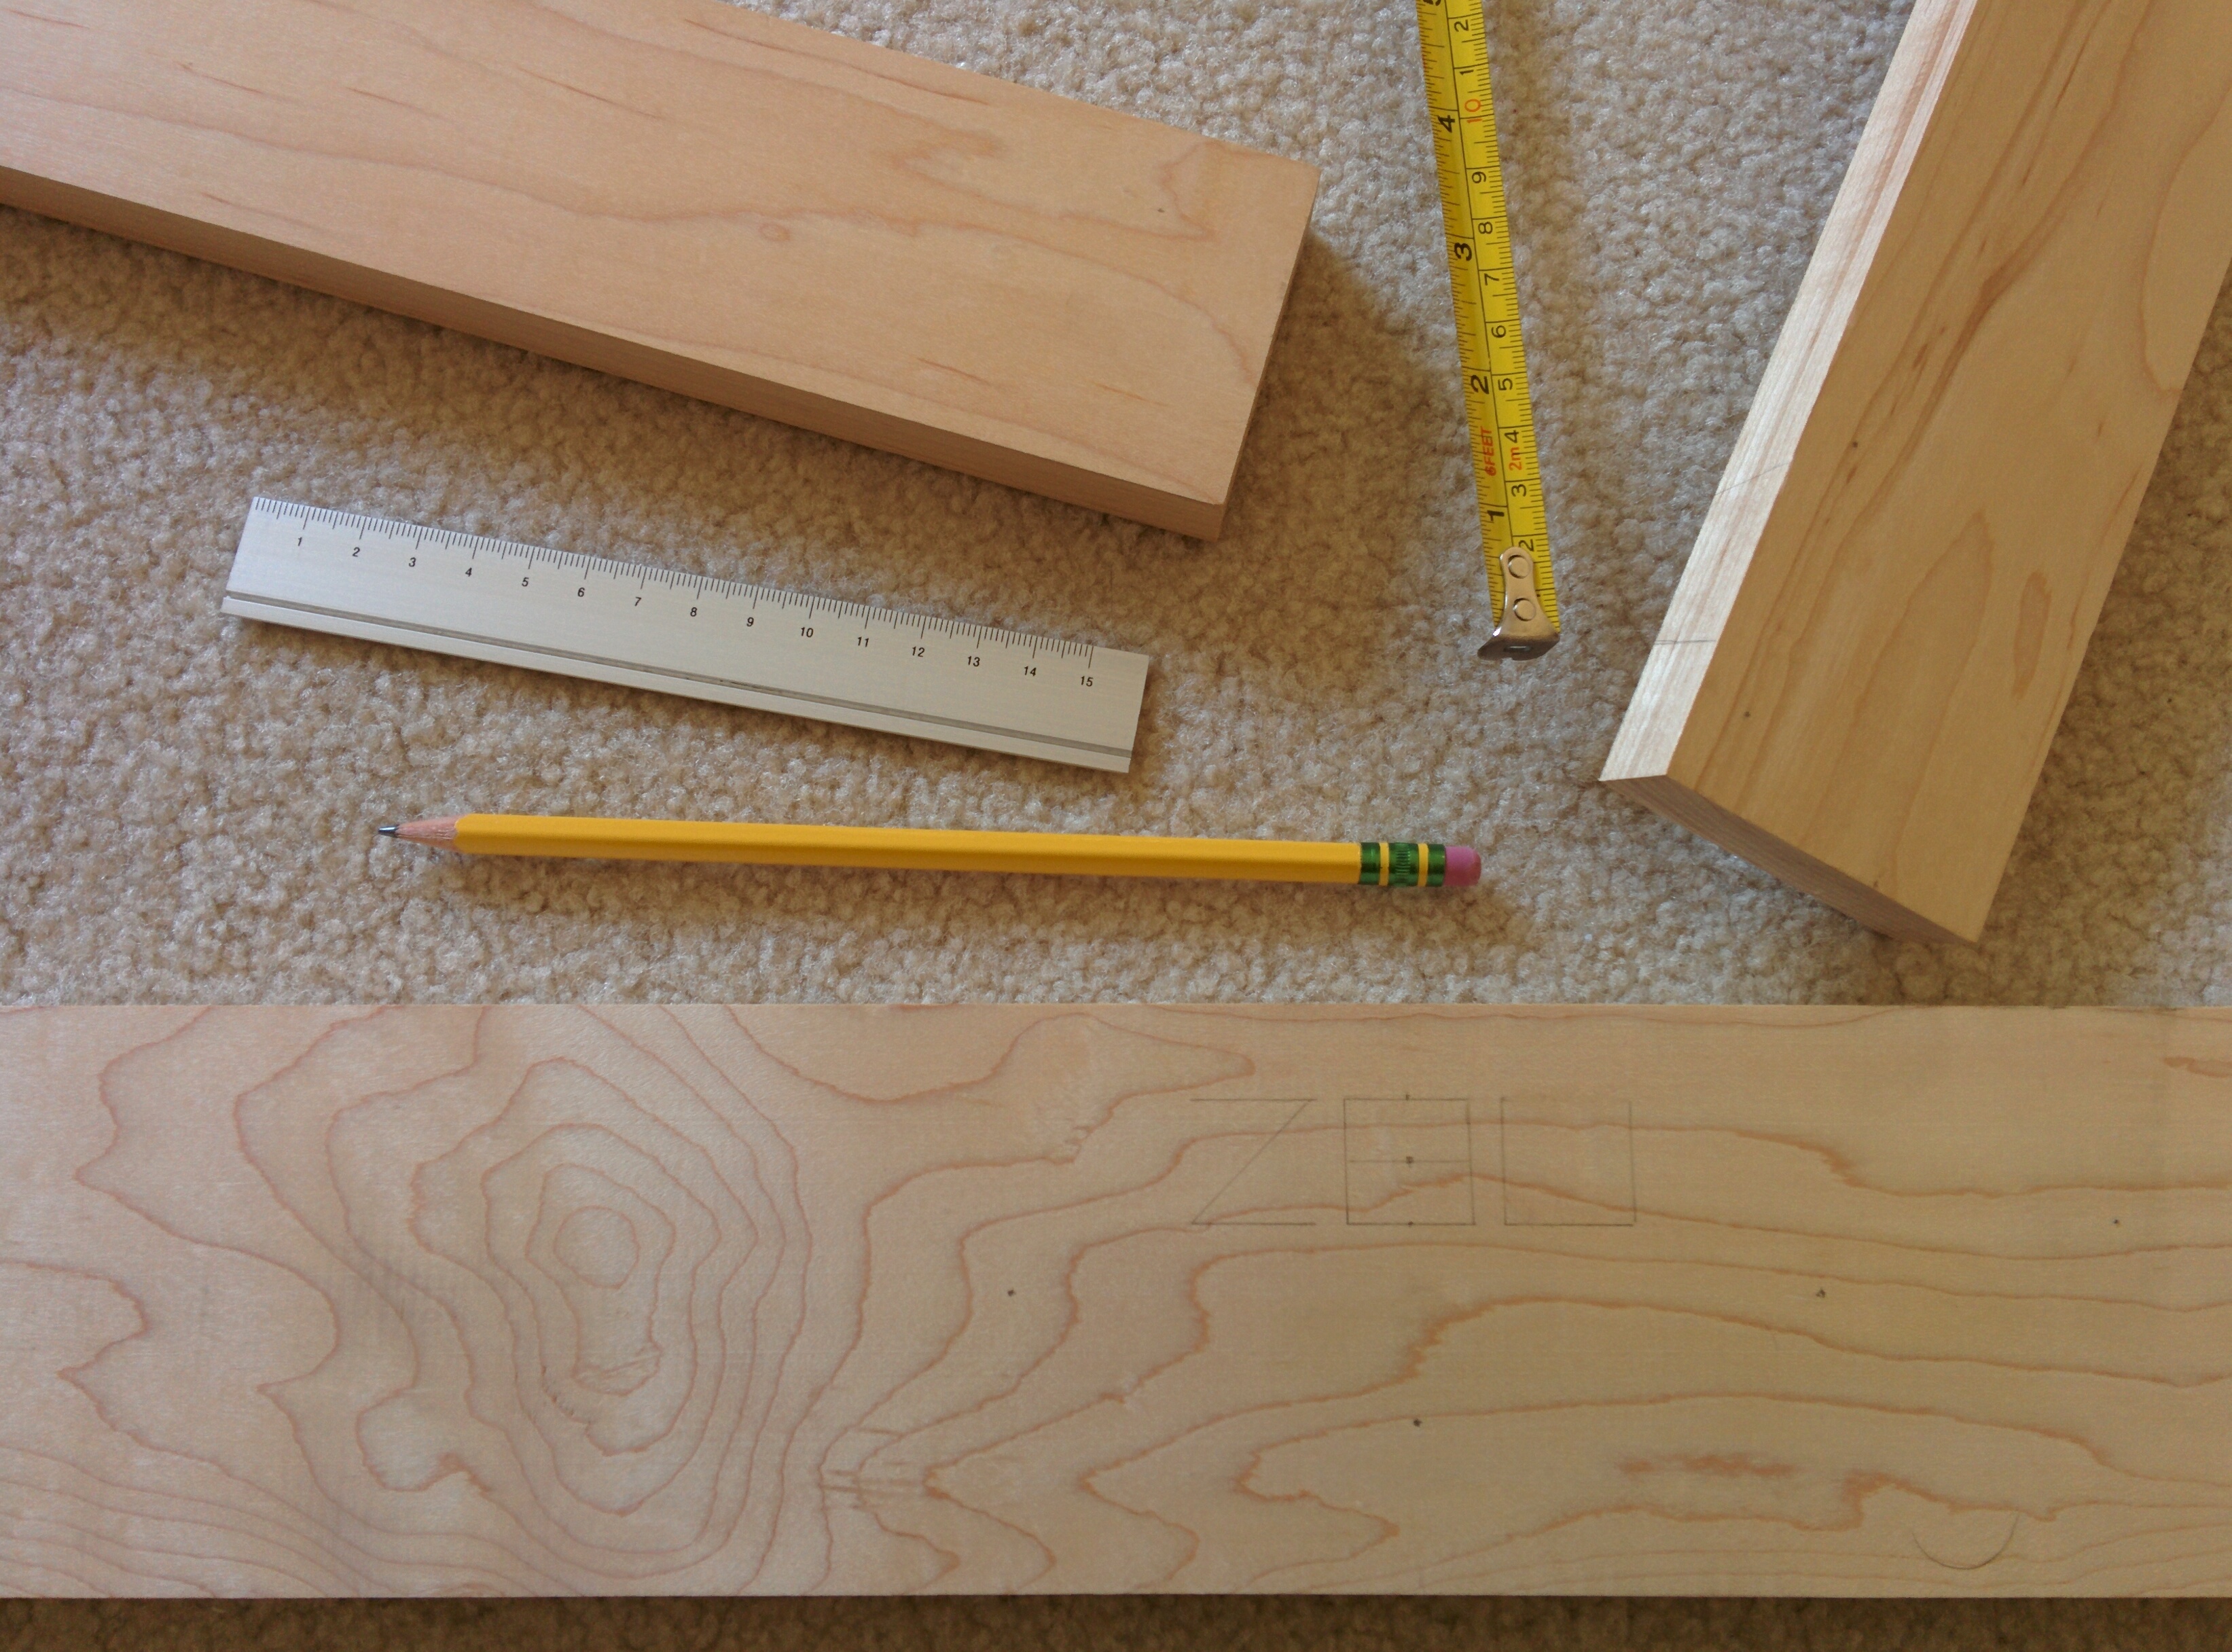
Here is the template I created for the top panel of the stick, showing all relevant reference measurements. A shoutout and huge thanks goes to slagcoin. The owner has been maintaining that website since early 2008 and has long, detailed writeups about different aspects of DIY fightstick construction. The base template for the major buttons was taken from the site's Standard Layouts subsection (I went with the standard Japanese arcade design with 36.5mm spacing).
↿ Back to top ↾Materials
Components that went into final fightstick are listed below, along with their quantity and price at time of purchase if applicable. Some of the actual fightstick components were cheaper for me from TaoBao due to shipping costs, however depending on where you live they may be less expensive and arrive much more quickly if you purchase them from Focus Attack or Paradise Arcade Shop. Do also note that some linked items are not necessarily the exact same products I purchased in-store, they may be identical or very similar items I found listed on various other online stores.
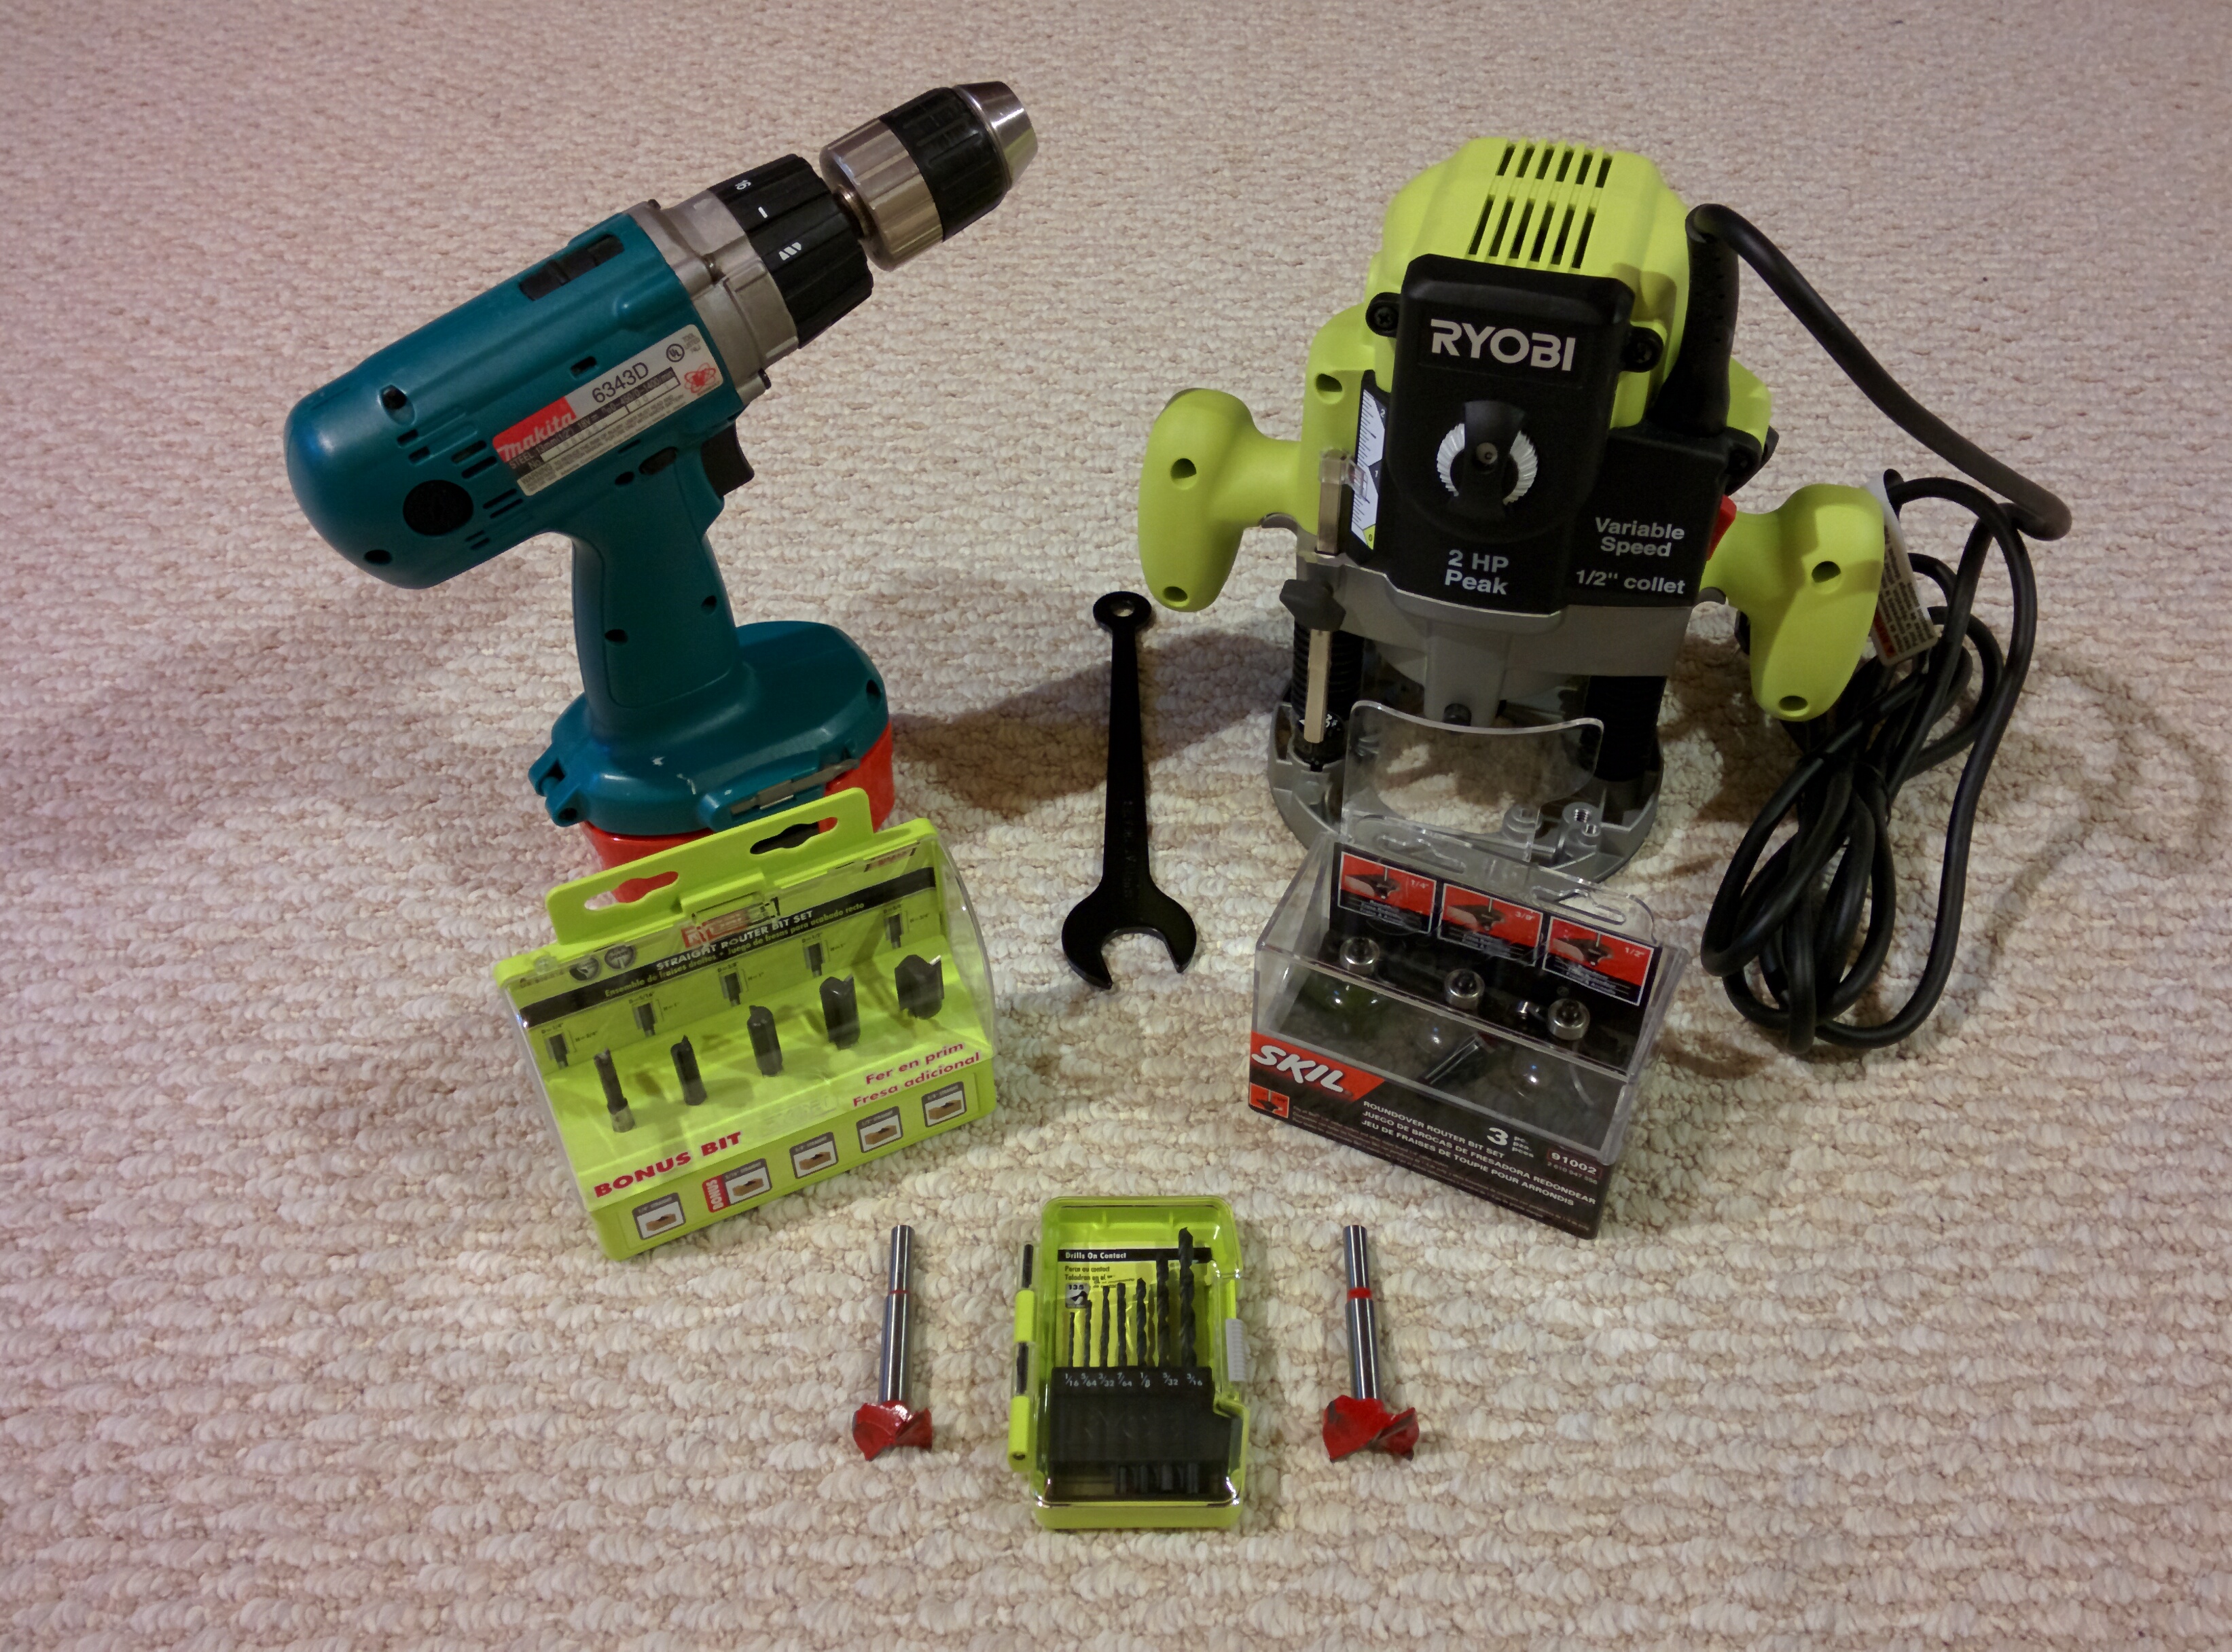
Tools and items used (most already owned):
- Painter's Tape
- Hand Saw
- Miter Box
- various clamps
- Makita 6343D Cordless Drill
- 1/16" Drill Bit (for drilling pilot holes)
- 3/32" Drill Bit (for drilling PCB mounting holes)
- 5/32" Drill Bit (for drilling #6 and M4 holes)
- 30mm Forstner Bit (for drilling 30mm button holes)
- 25mm Forstner Bit (for drilling 24mm button & USB Feedthrough holes, size difference negligible)
- Ryobi RE180PL1G Plunge Base Router
- 1/4" Straight Router Bit (for general routing & edge straightening)
- 3/8" Straight Router Bit (for routing nut compartments)
- 1/4" Roundover Router Bit (for rounding corners)
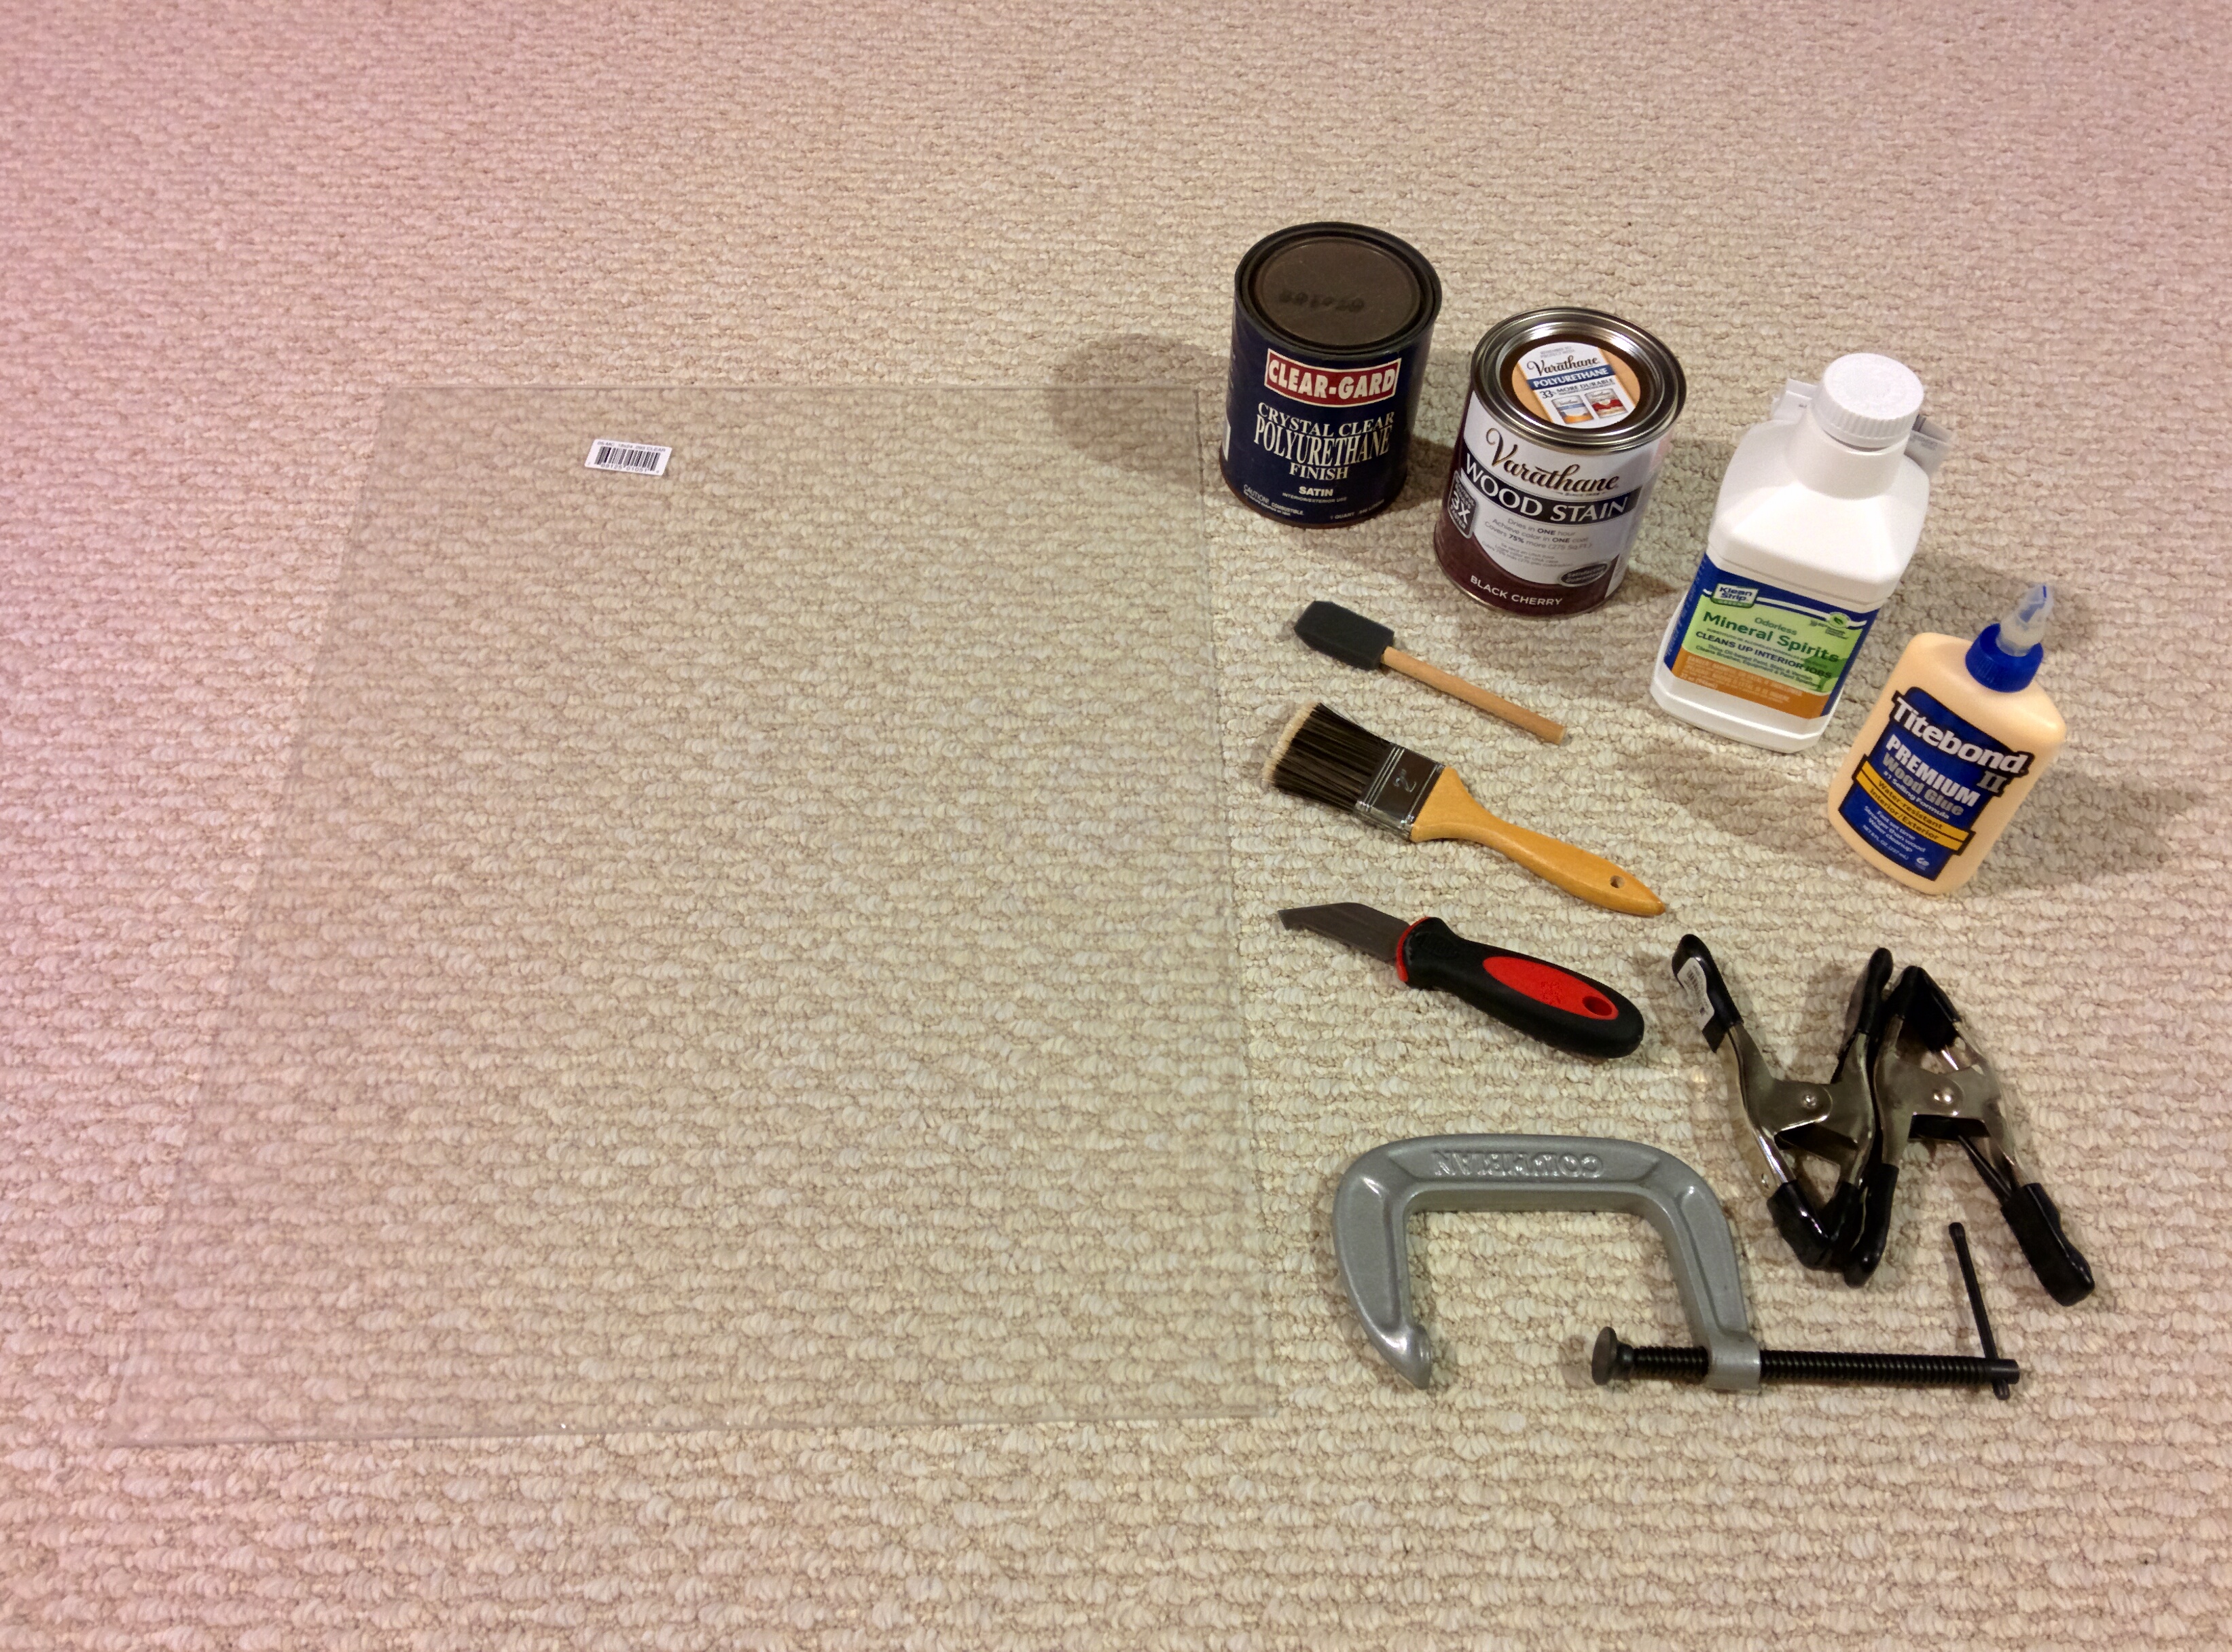
- Geliahao 302 Two-Component Acrylate Adhesive
- 80-Grit Sandpaper
- 120-Grit Sandpaper
- 220-Grit Sandpaper
- Nicholson Miniature Files
- Acrylic Scoring Knife
- Foam Brush (for stain)
- Weller WLC100 40-Watt Soldering Station
- 60-40 Tin Lead Rosin Core Solder Wire
Other Items:
- scrap wood to prevent blowout when drilling
- old rags (lint-free) for wiping stain and polyurethane
- spare aluminum angle bar to act as a straight edge and routing fence
- spare dowel rod to help sand tight spots
I wanted to use a hardwood for the frame for durability, so I went with maple boards for the walls and oak plywood for the top and bottom panels. Maple and oak are both hardwoods, with maple being slightly smoother to the touch, and plywood is very sturdy and resists warping due to its multi-layer construction. I was hoping to use walnut due to its darker color, but could not find any workable sizes at my local hardware stores, so I decided to just stain my pieces instead. MDF was briefly considered for the top and bottom panels, but it has a number of disadvantages, the main one being that it sags over time, something that would eventually become very noticable on a fightstick as large as mine.
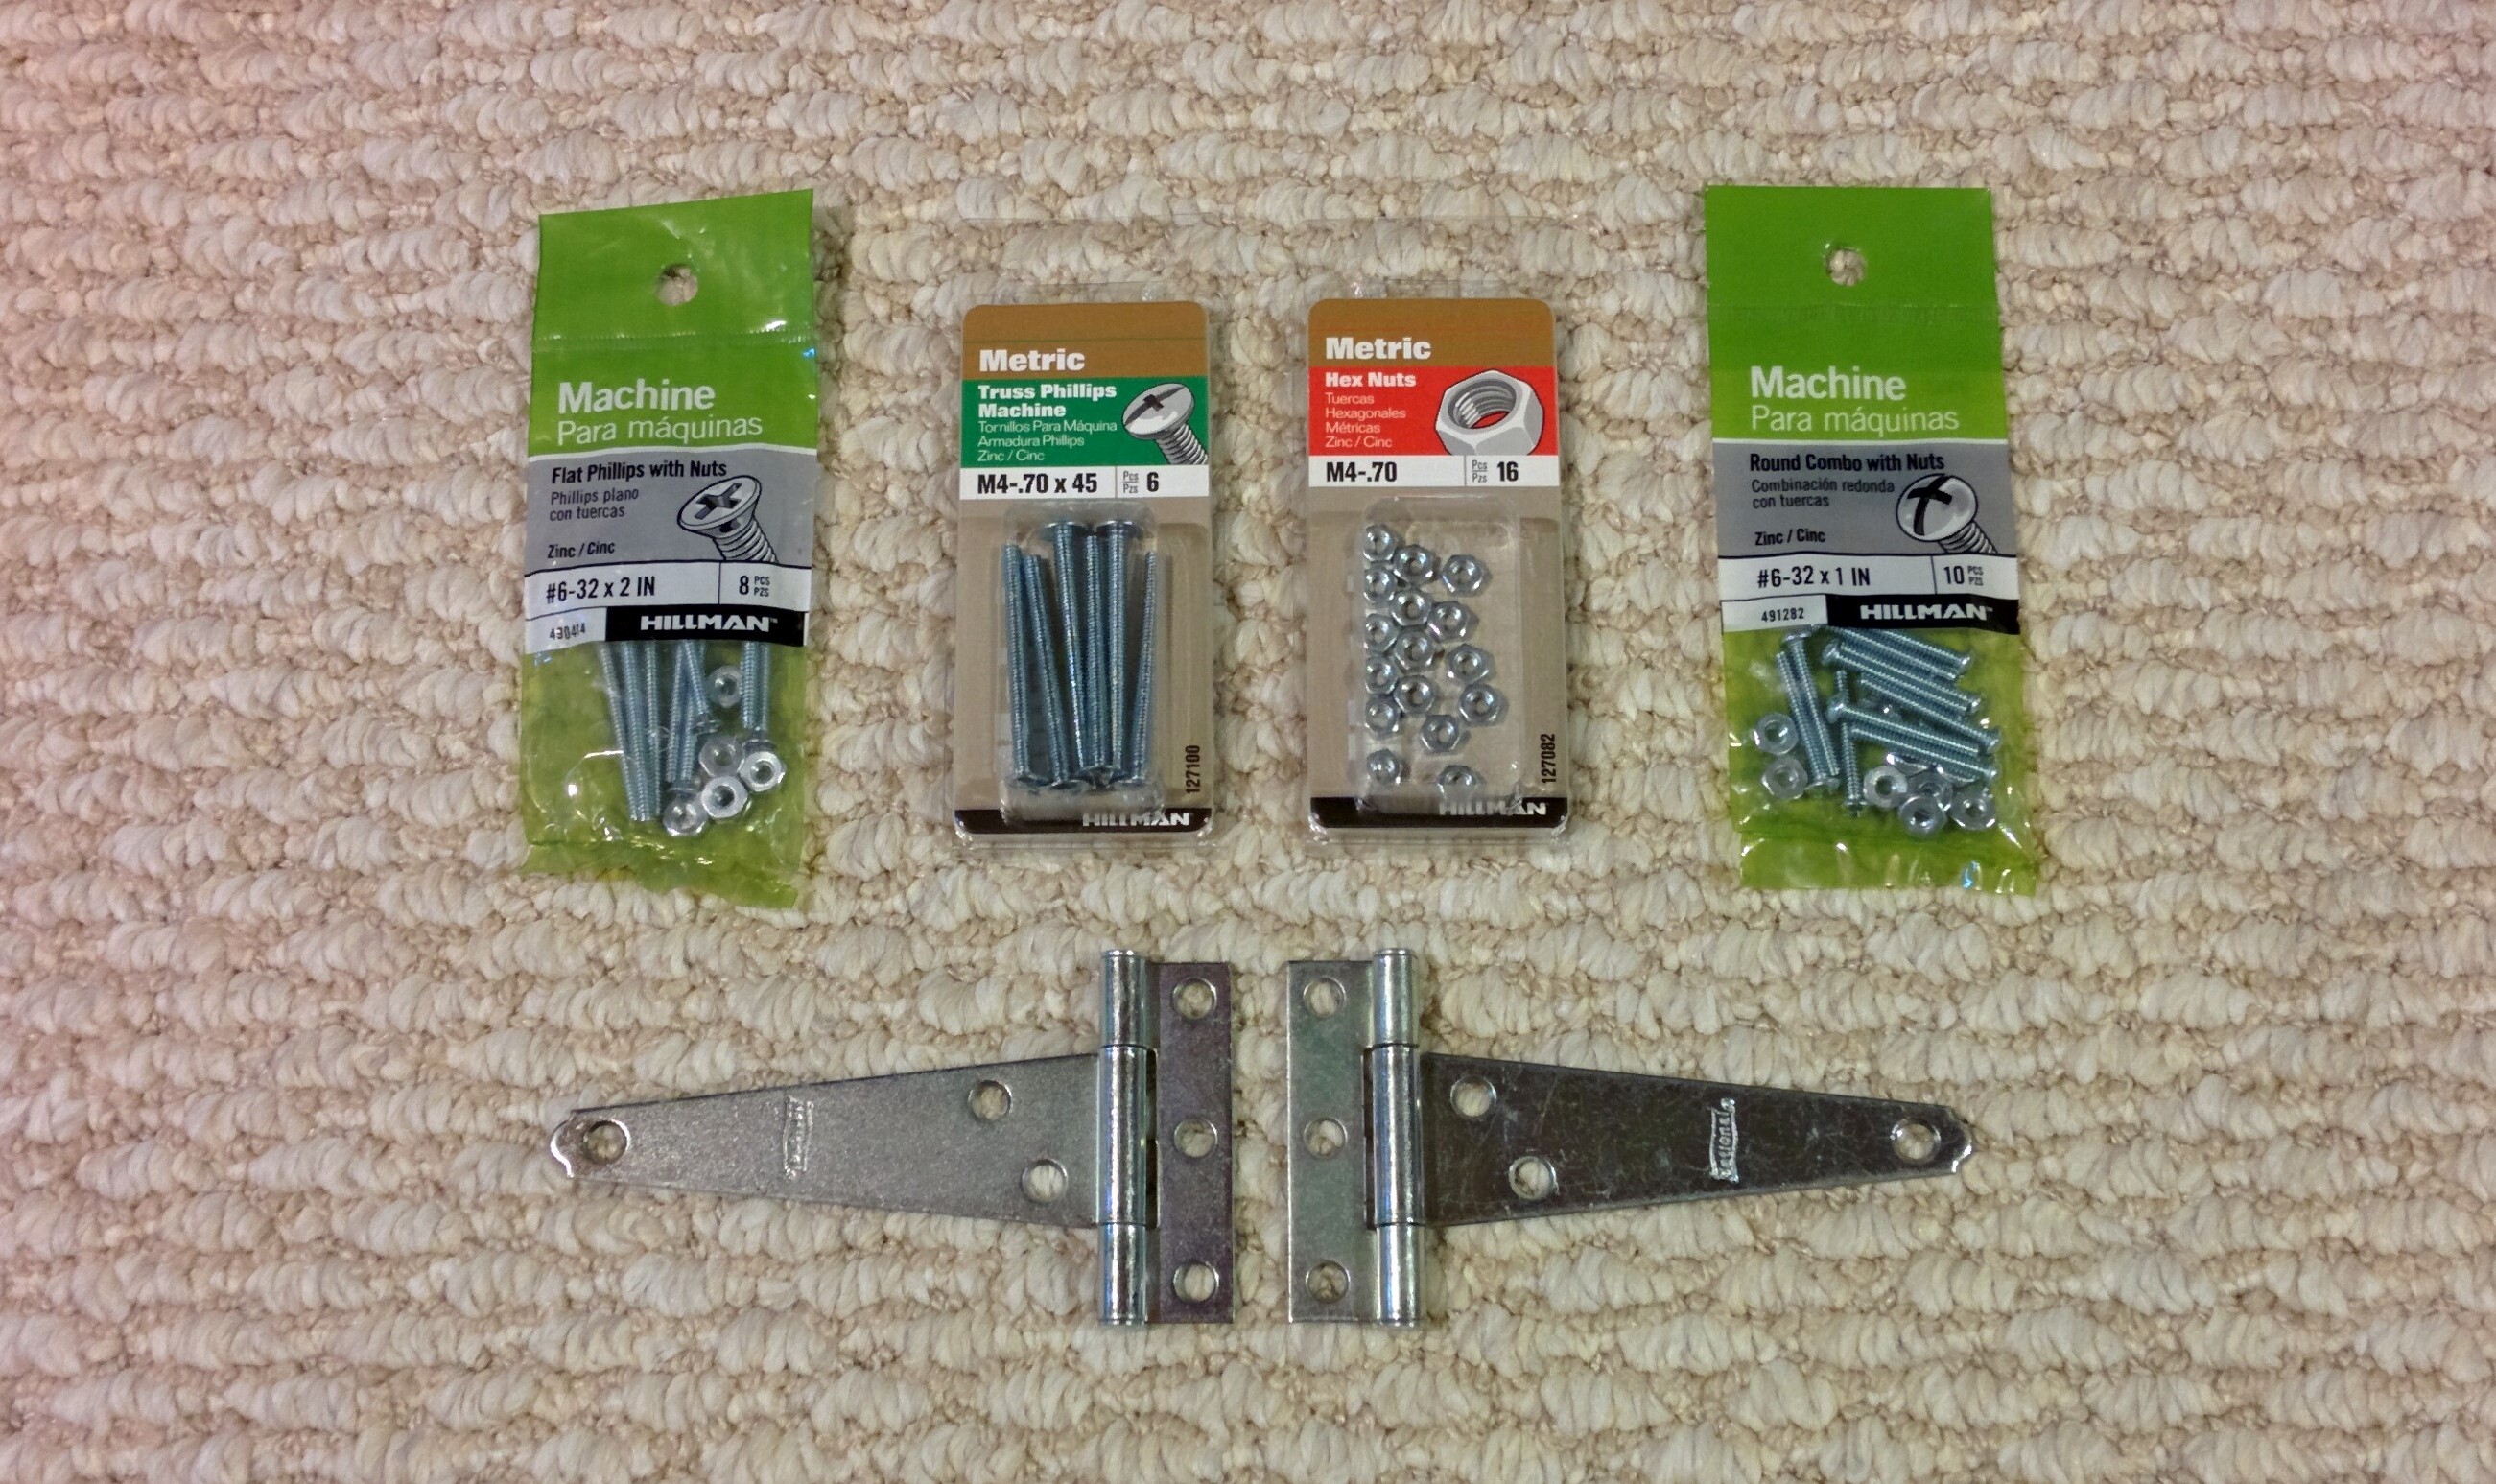
To secure everything together, I wanted to keep to nuts and bolts/machine screws. This would allow me to disassemble components as needed without fear of damaging the frame or stripping screw holes like wood screws would (i.e. when changing artwork). The #6 and M4 size machine screws were chosen because they both work well with holes drilled by a 5/32" drill bit . #6 means a thread diameter of 9/64", while M4 means a thread diameter of 4mm or 0.15748", just barely enough to fit inside a 5/32" diameter hole. The 1/16" bit was just for drilling pilot holes, and any similar, low-diameter drill bit should work just as well for that purpose.
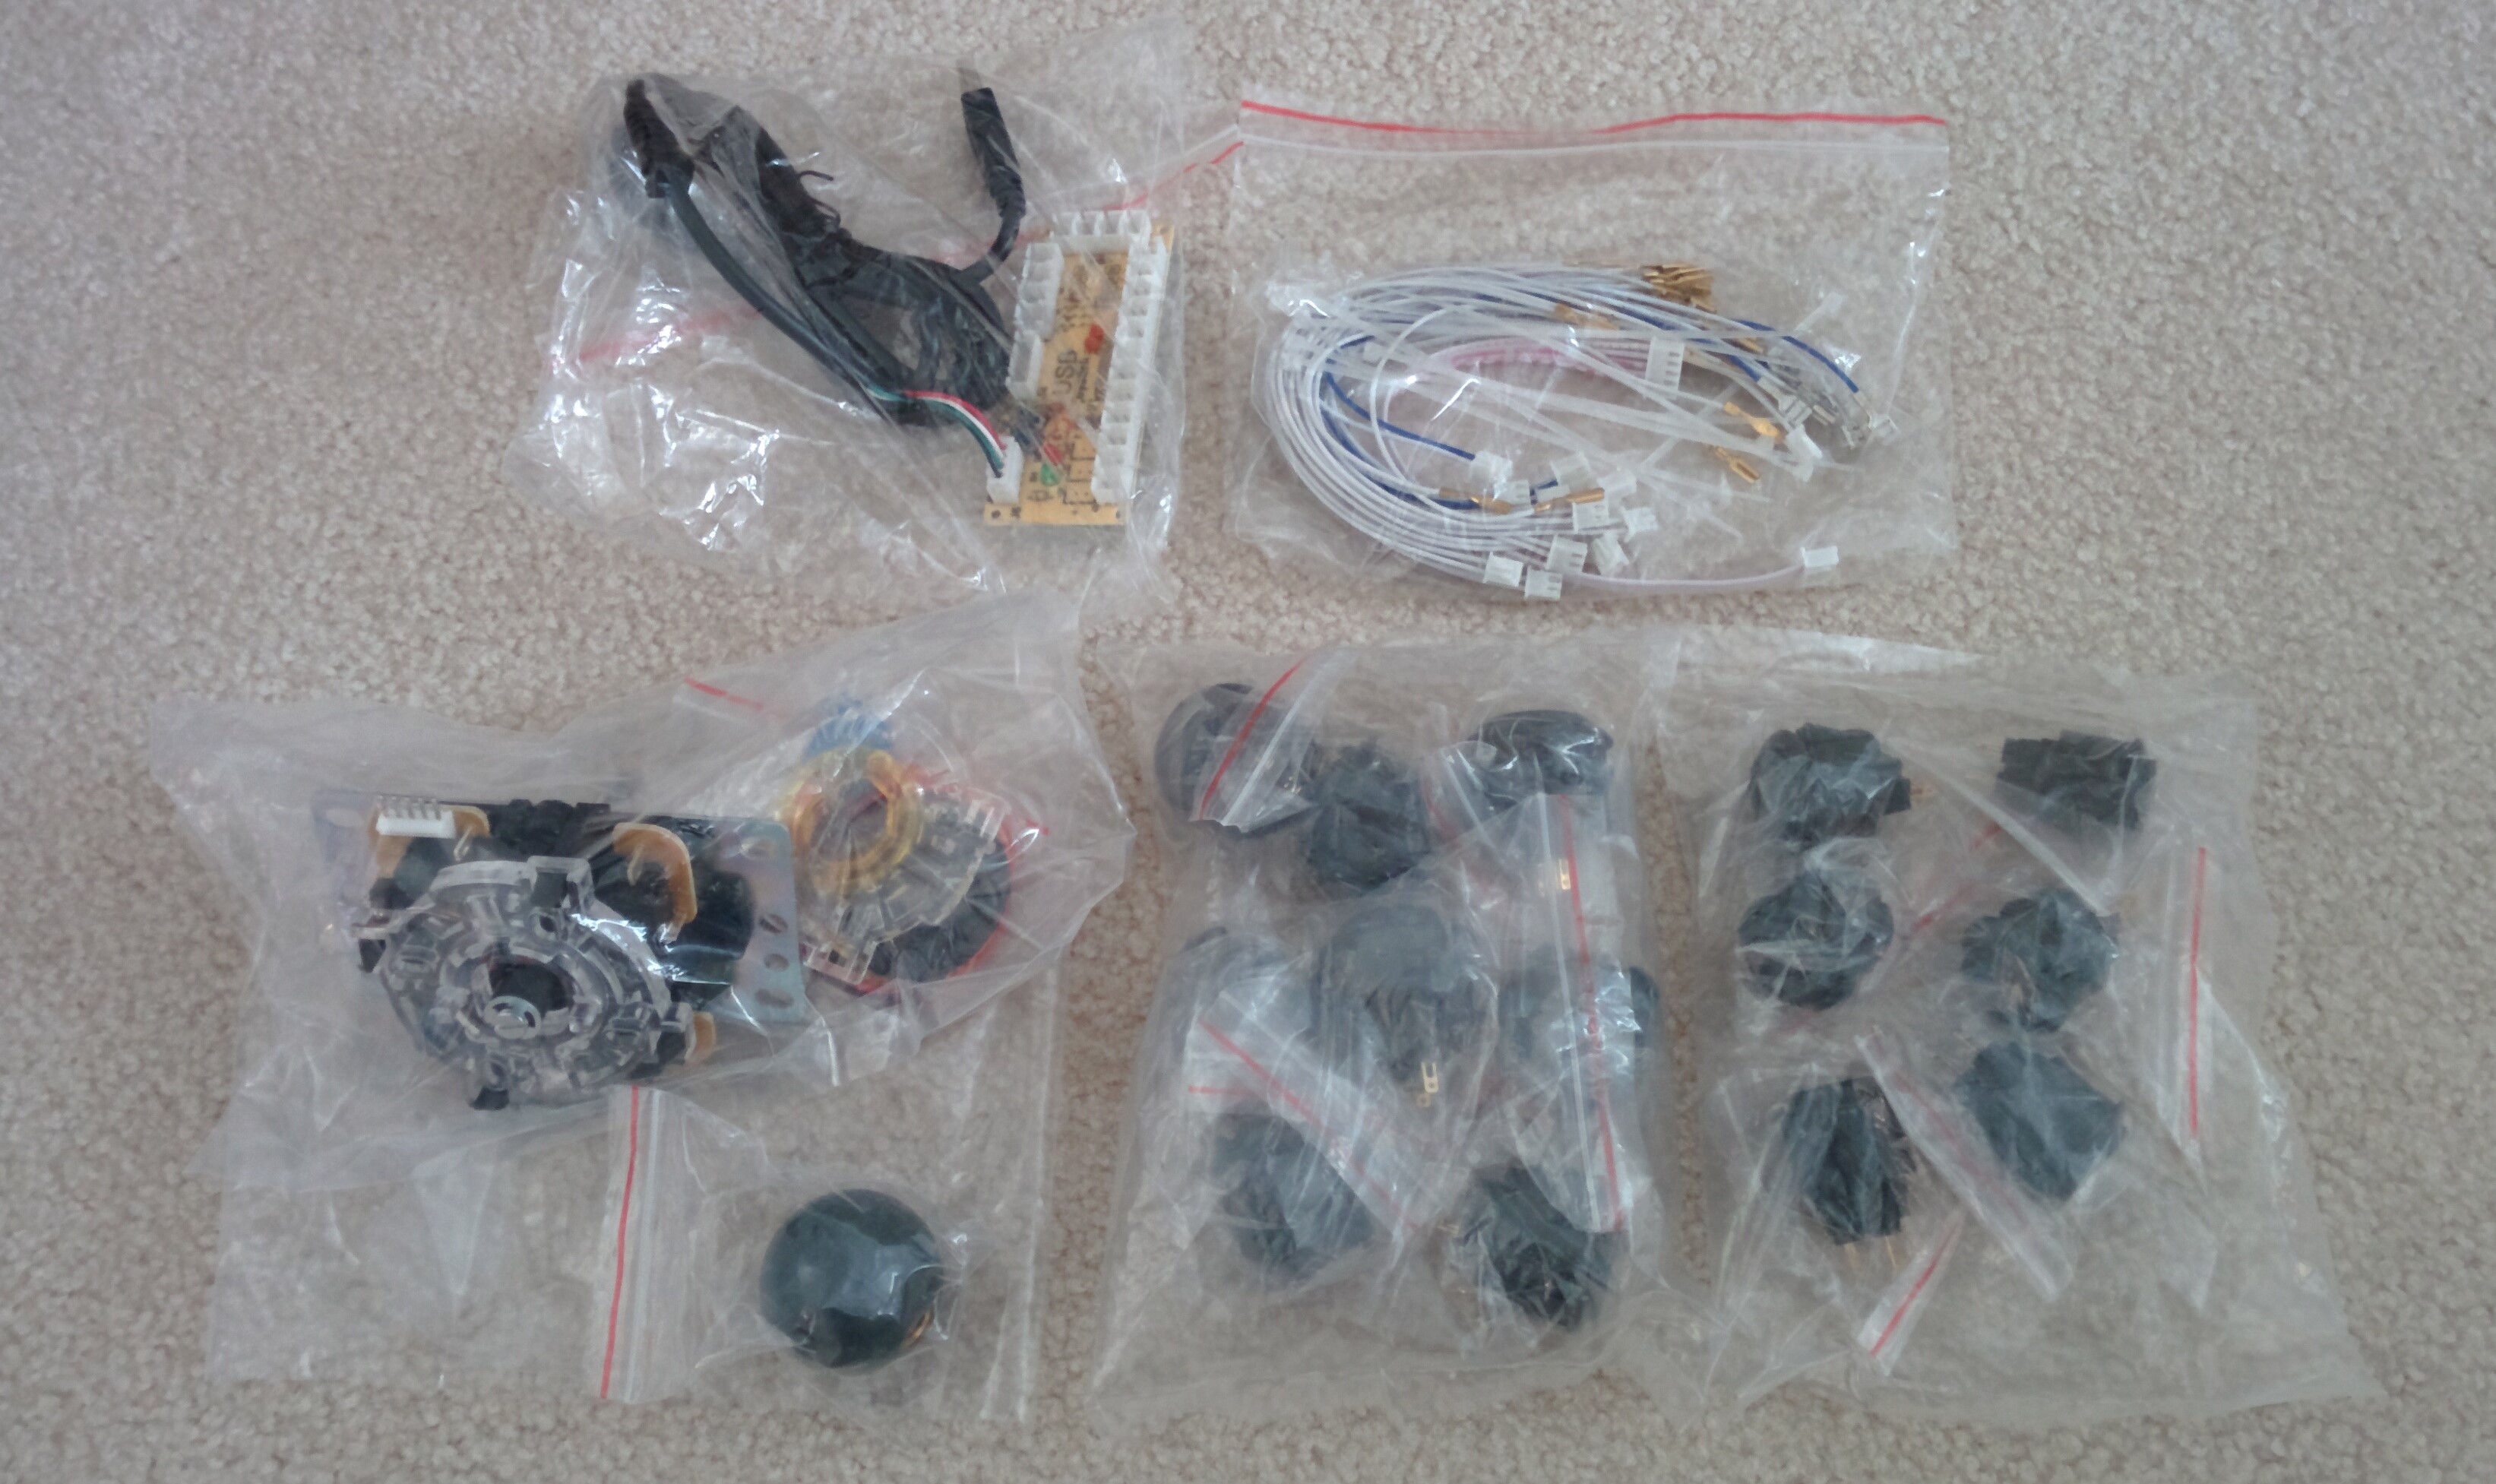
The #1 machine screws and nuts were just spares I dug out of my father's toolbox. I was thinking of ways to mount the controller PCB to the frame, and was initially prepared to just screw it to a block of wood and fix that to the inside of the box. Luckily, the mounting holes for the PCB are #2 or 3/32" in diameter which is just enough to fit the #1 (5/64" diameter) spares I had. I used a 3/32" drill bit for those holes.
For the plunge router, a 1/4" straight bit is pretty standard fare, and would also make holes large enough for me to thread my paracord through. I also used a 1/4" roundover bit to smooth over some of the edges for comfort. Additionally there were a few instances where I wanted to drill holes to make room for machine screw nuts. I measured their maximum diameter and picked out a 3/8" straight router bit for that purpose.
↿ Back to top ↾Wood Cutting & Routing
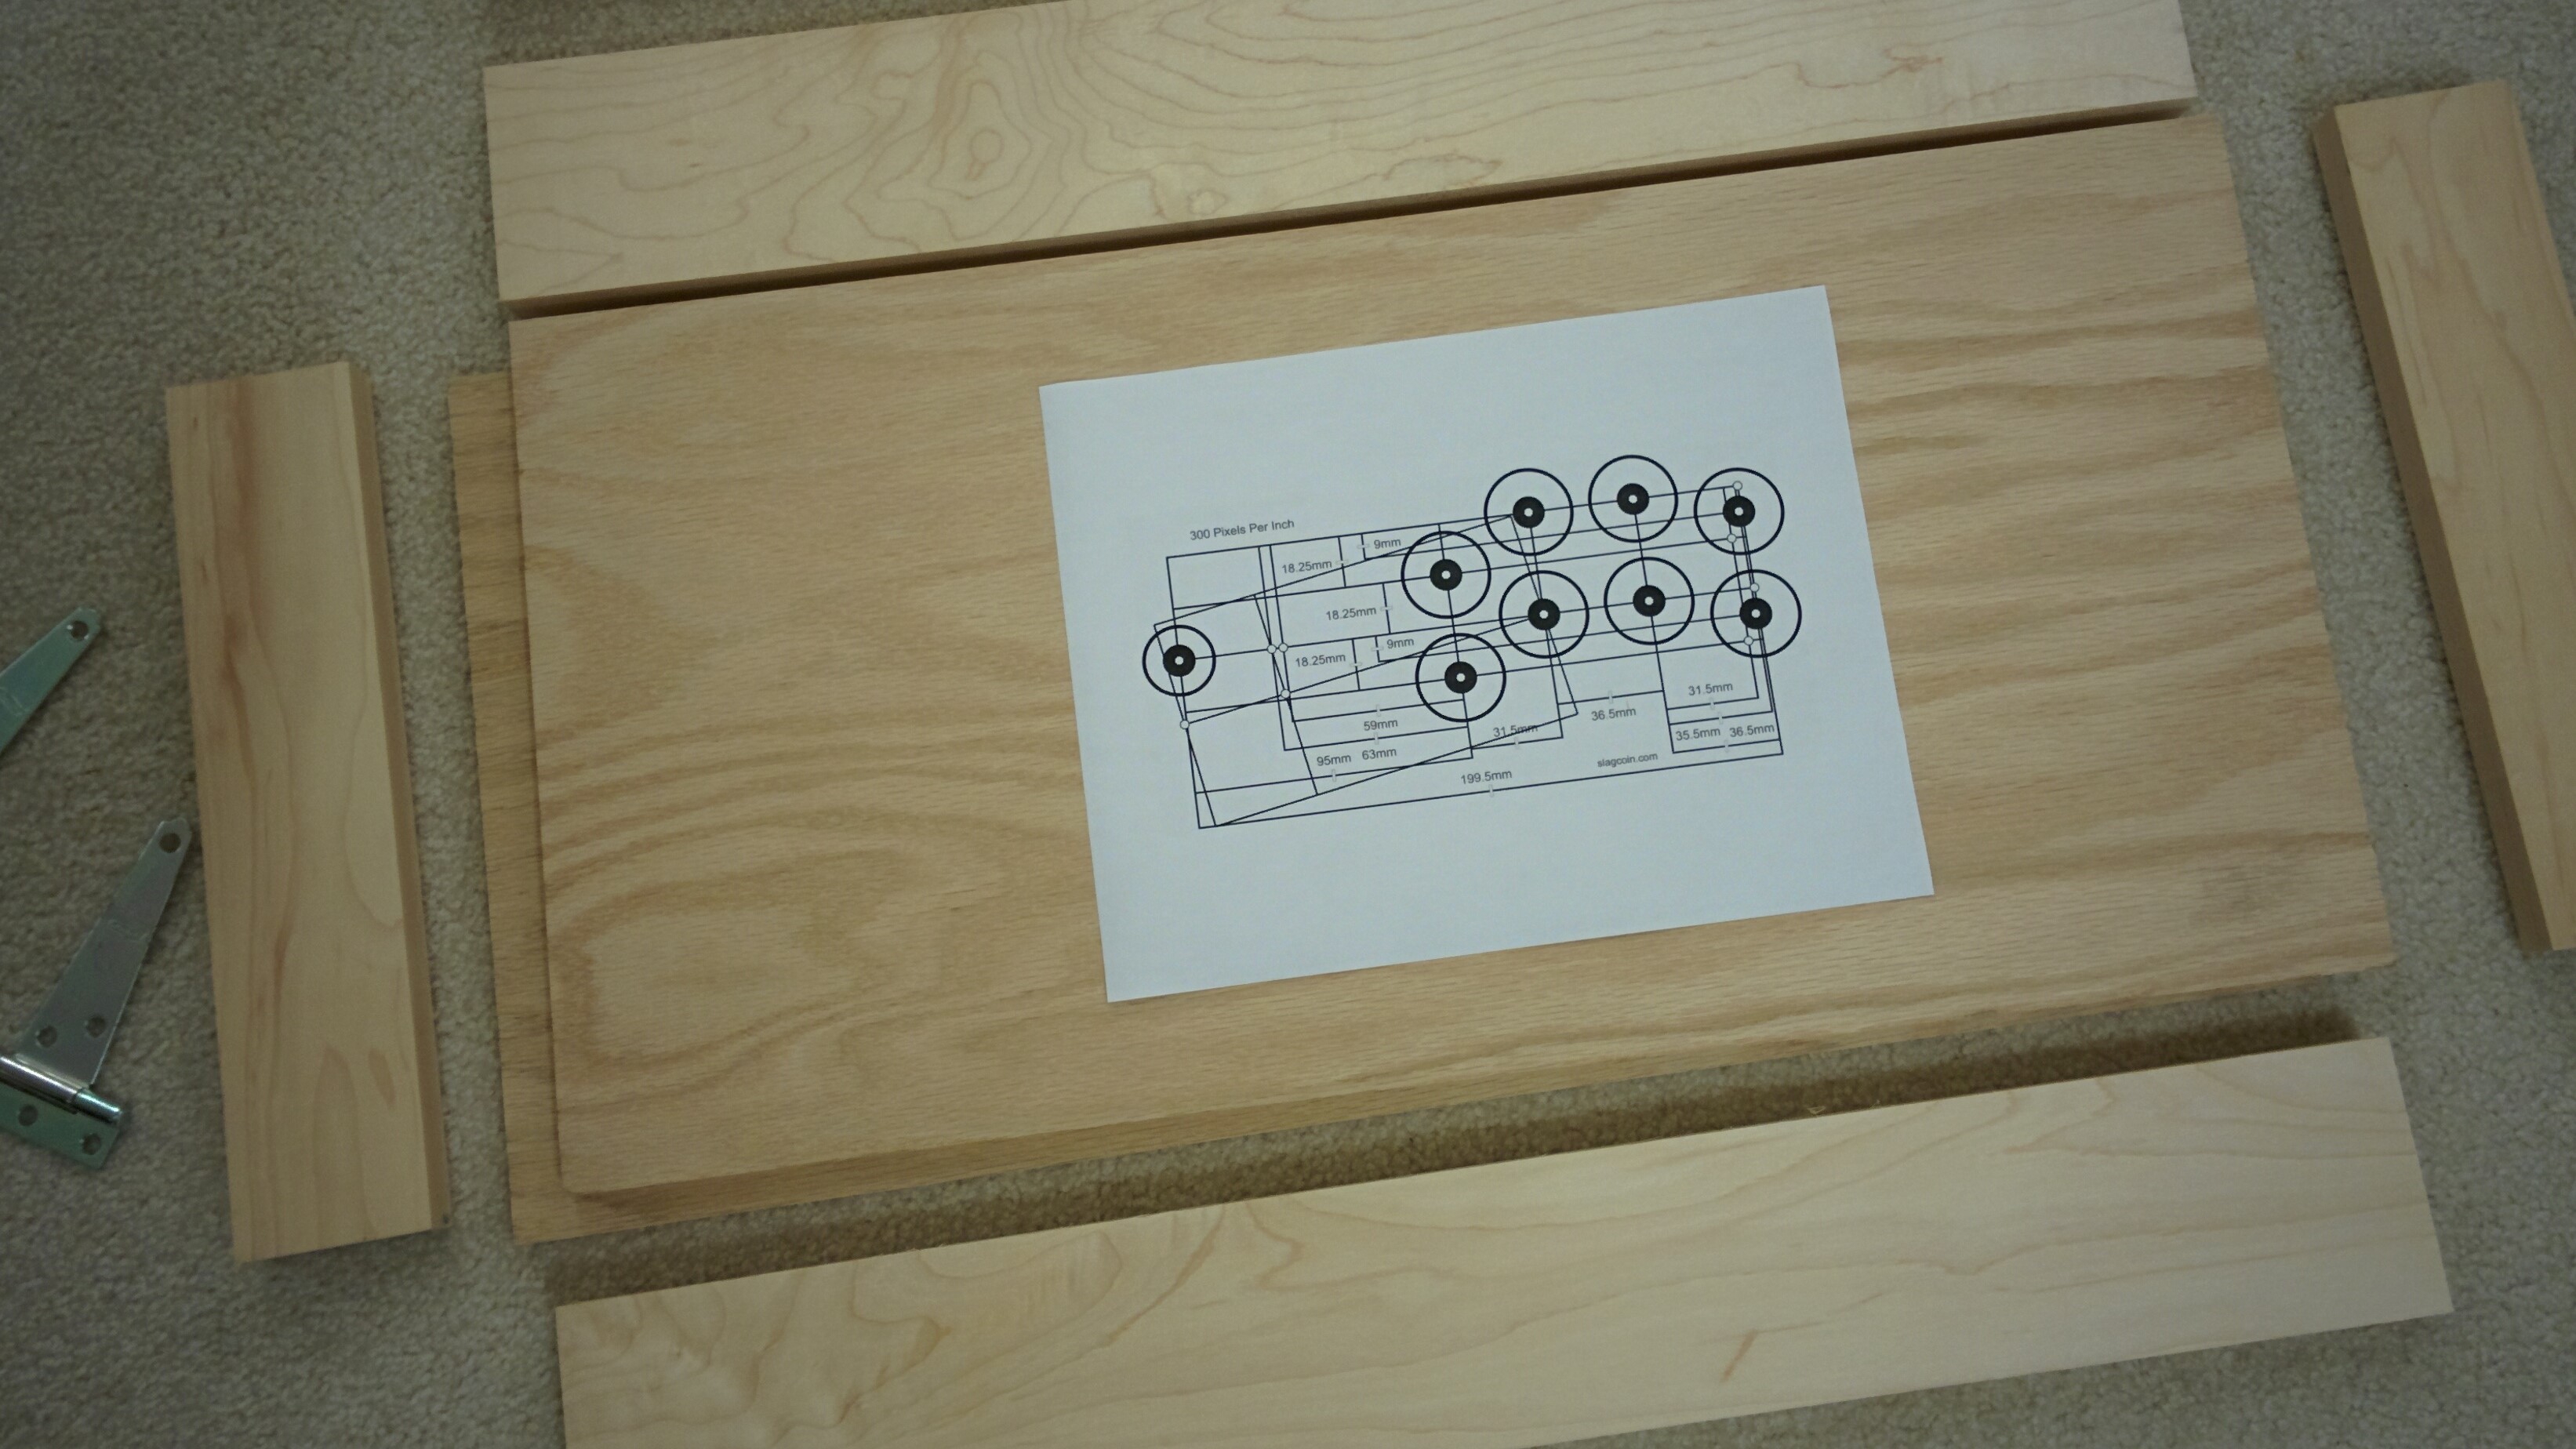
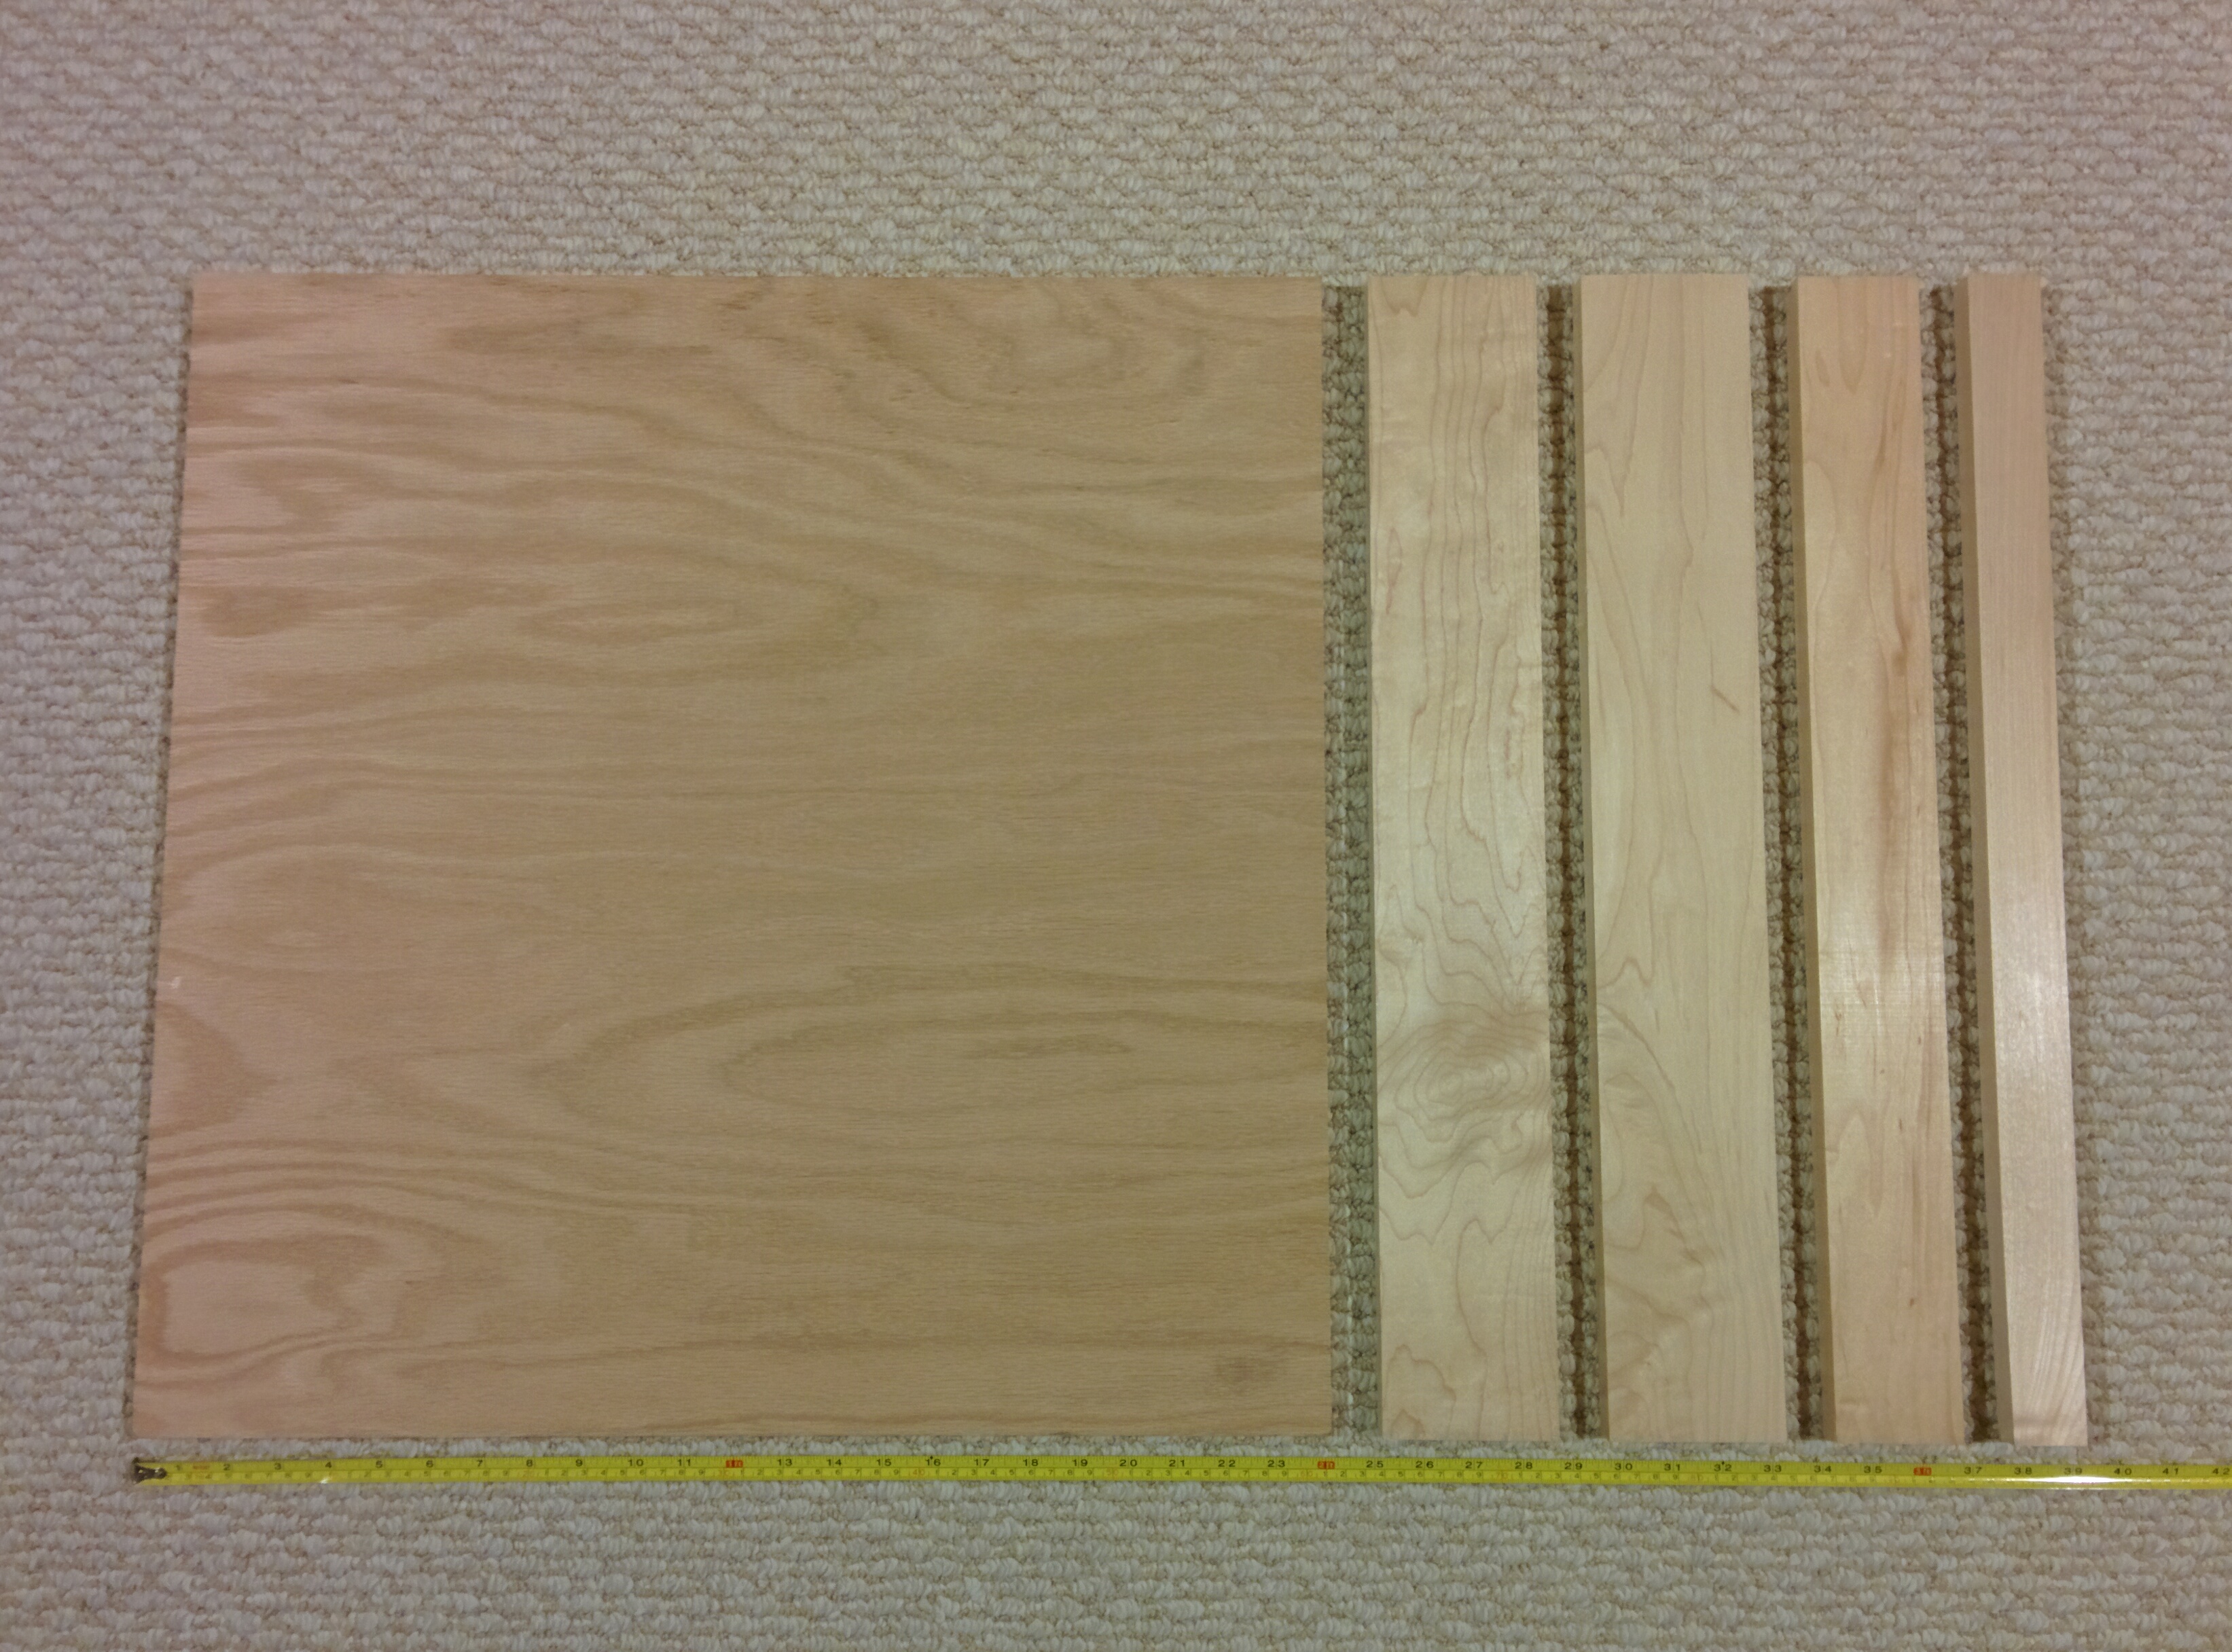
First thing to do was saw the oak plywood panel and 2.5" maple board in half. This would give me two 0.5" x 12" x 24" panels and two 0.75" x 2.5" x 12" boards to be used for the top bottom and left right walls respectively. Since hand saws eliminate some material and I had to straighten the cuts with my router and some sanding after each cut, both pieces were actually missing around 1/16", which was acceptable for my purposes since they were all missing material lengthwise and wouldn't affect gluing.
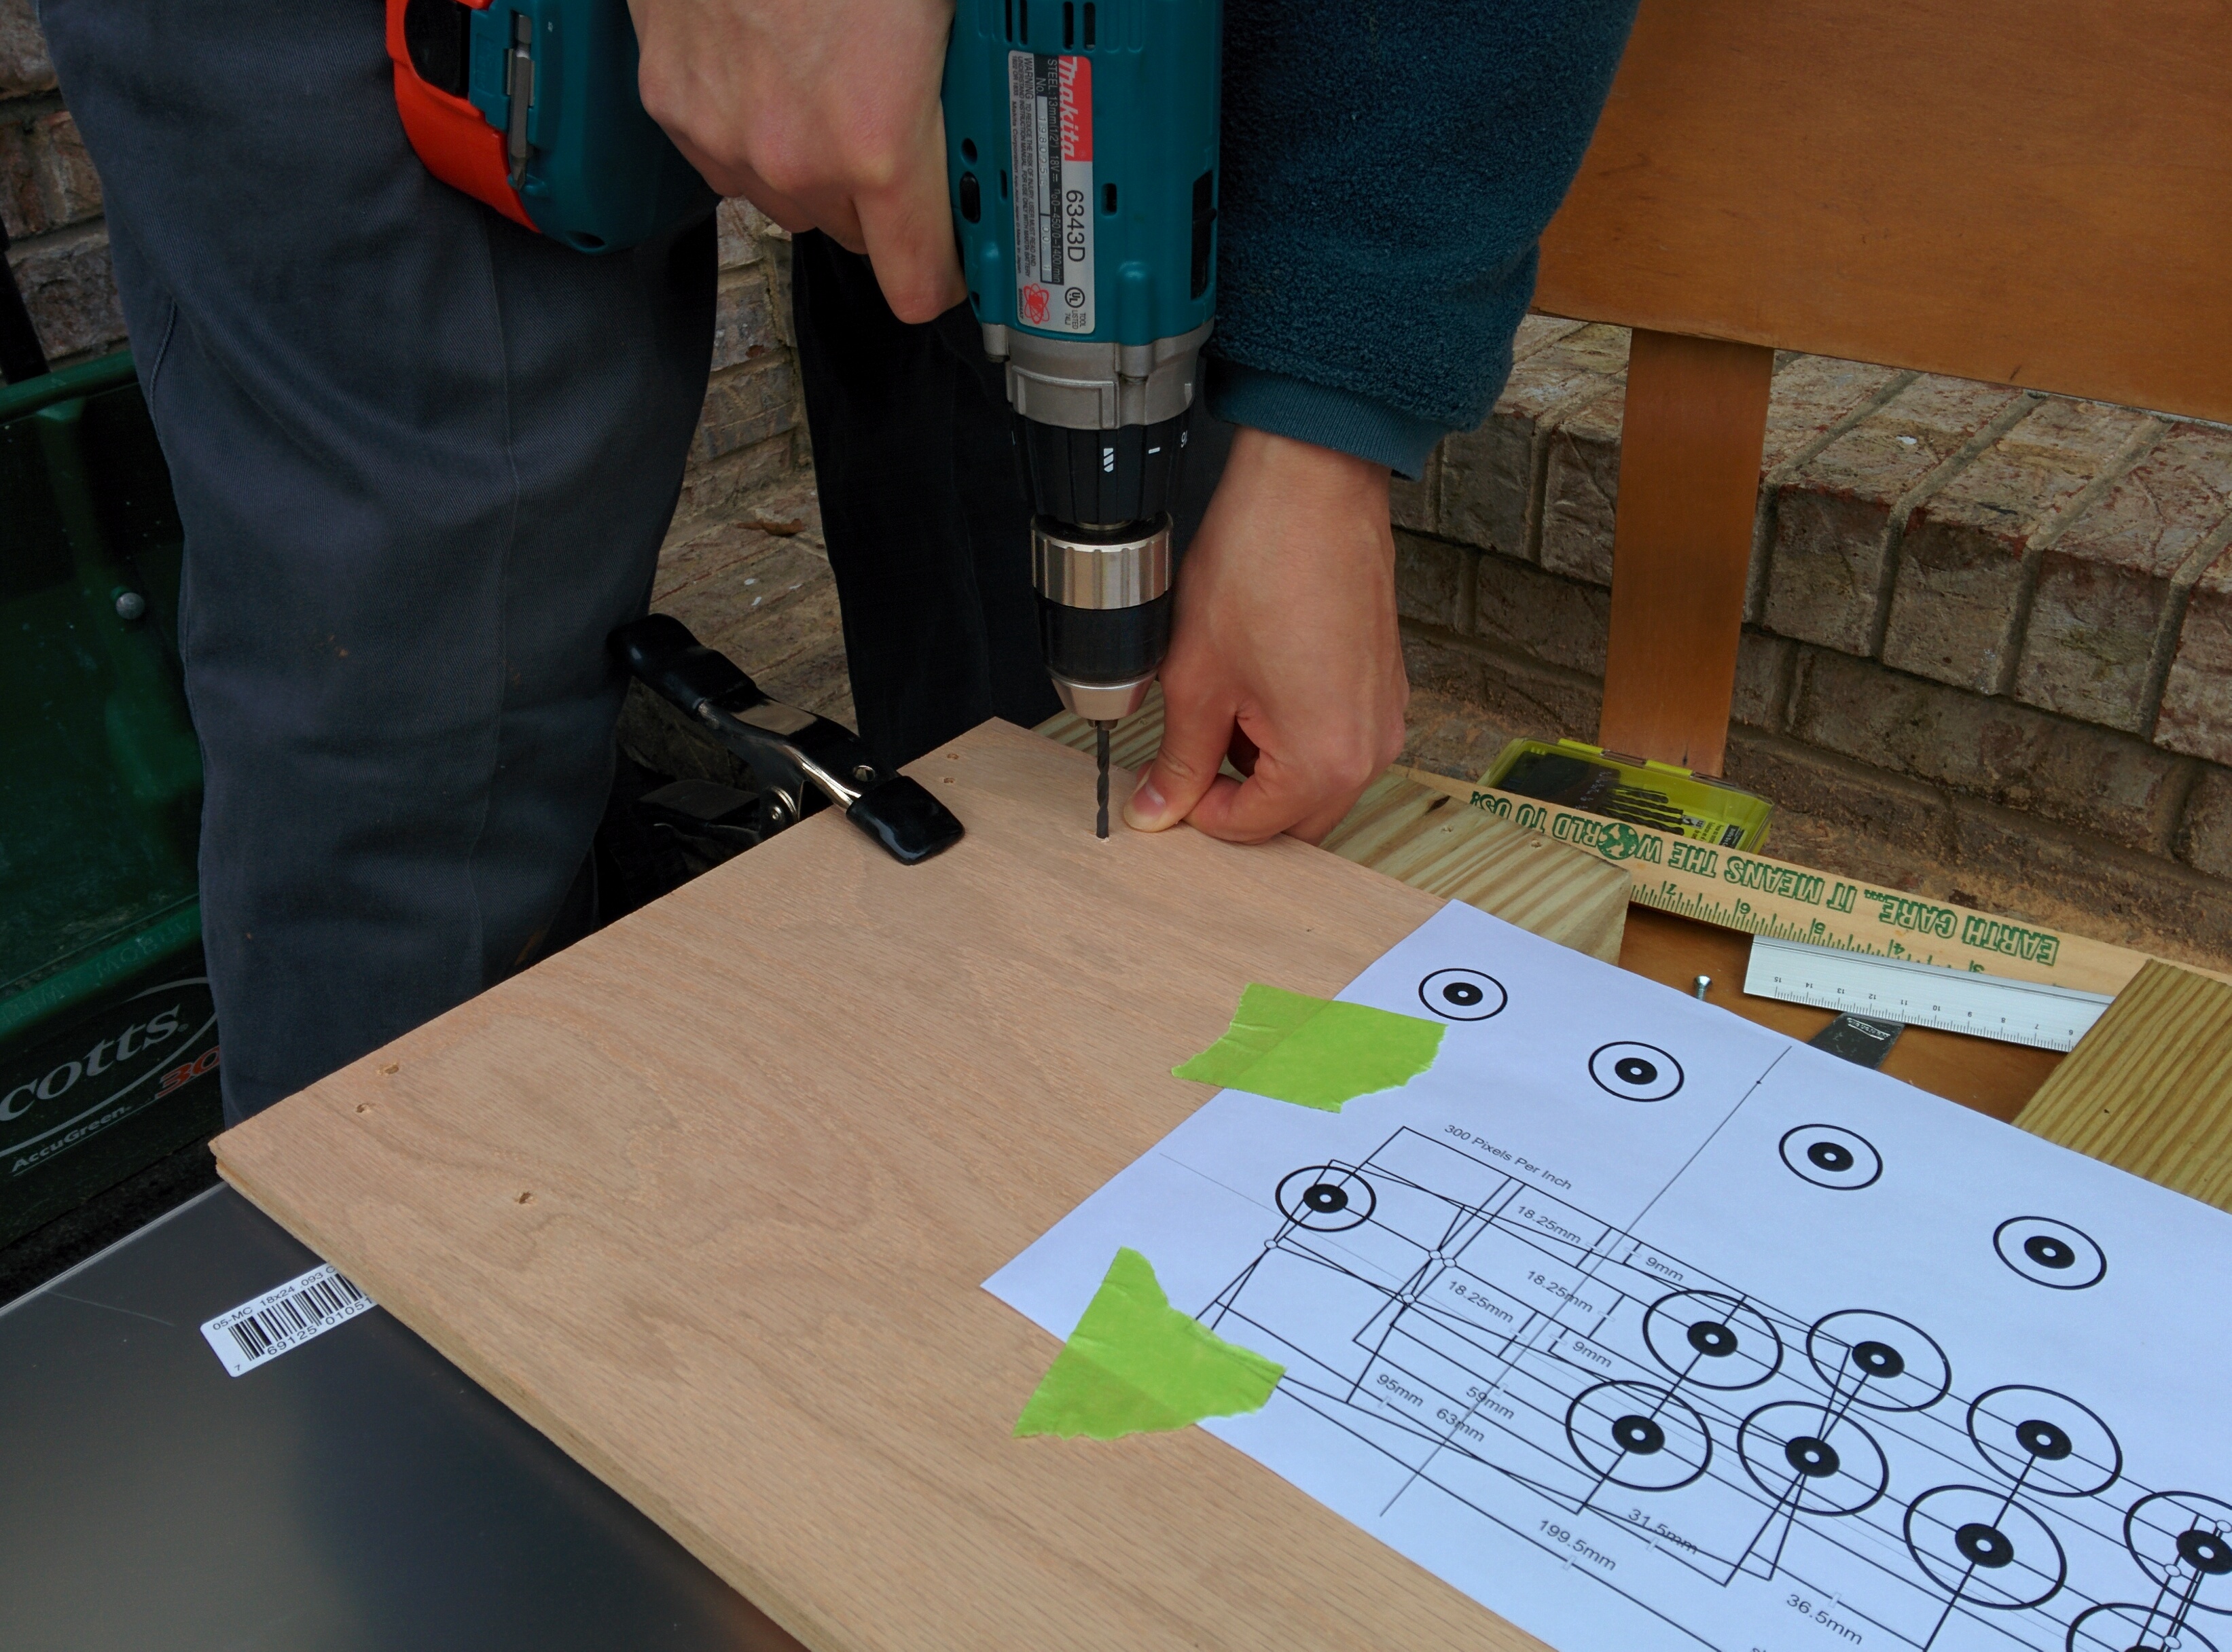
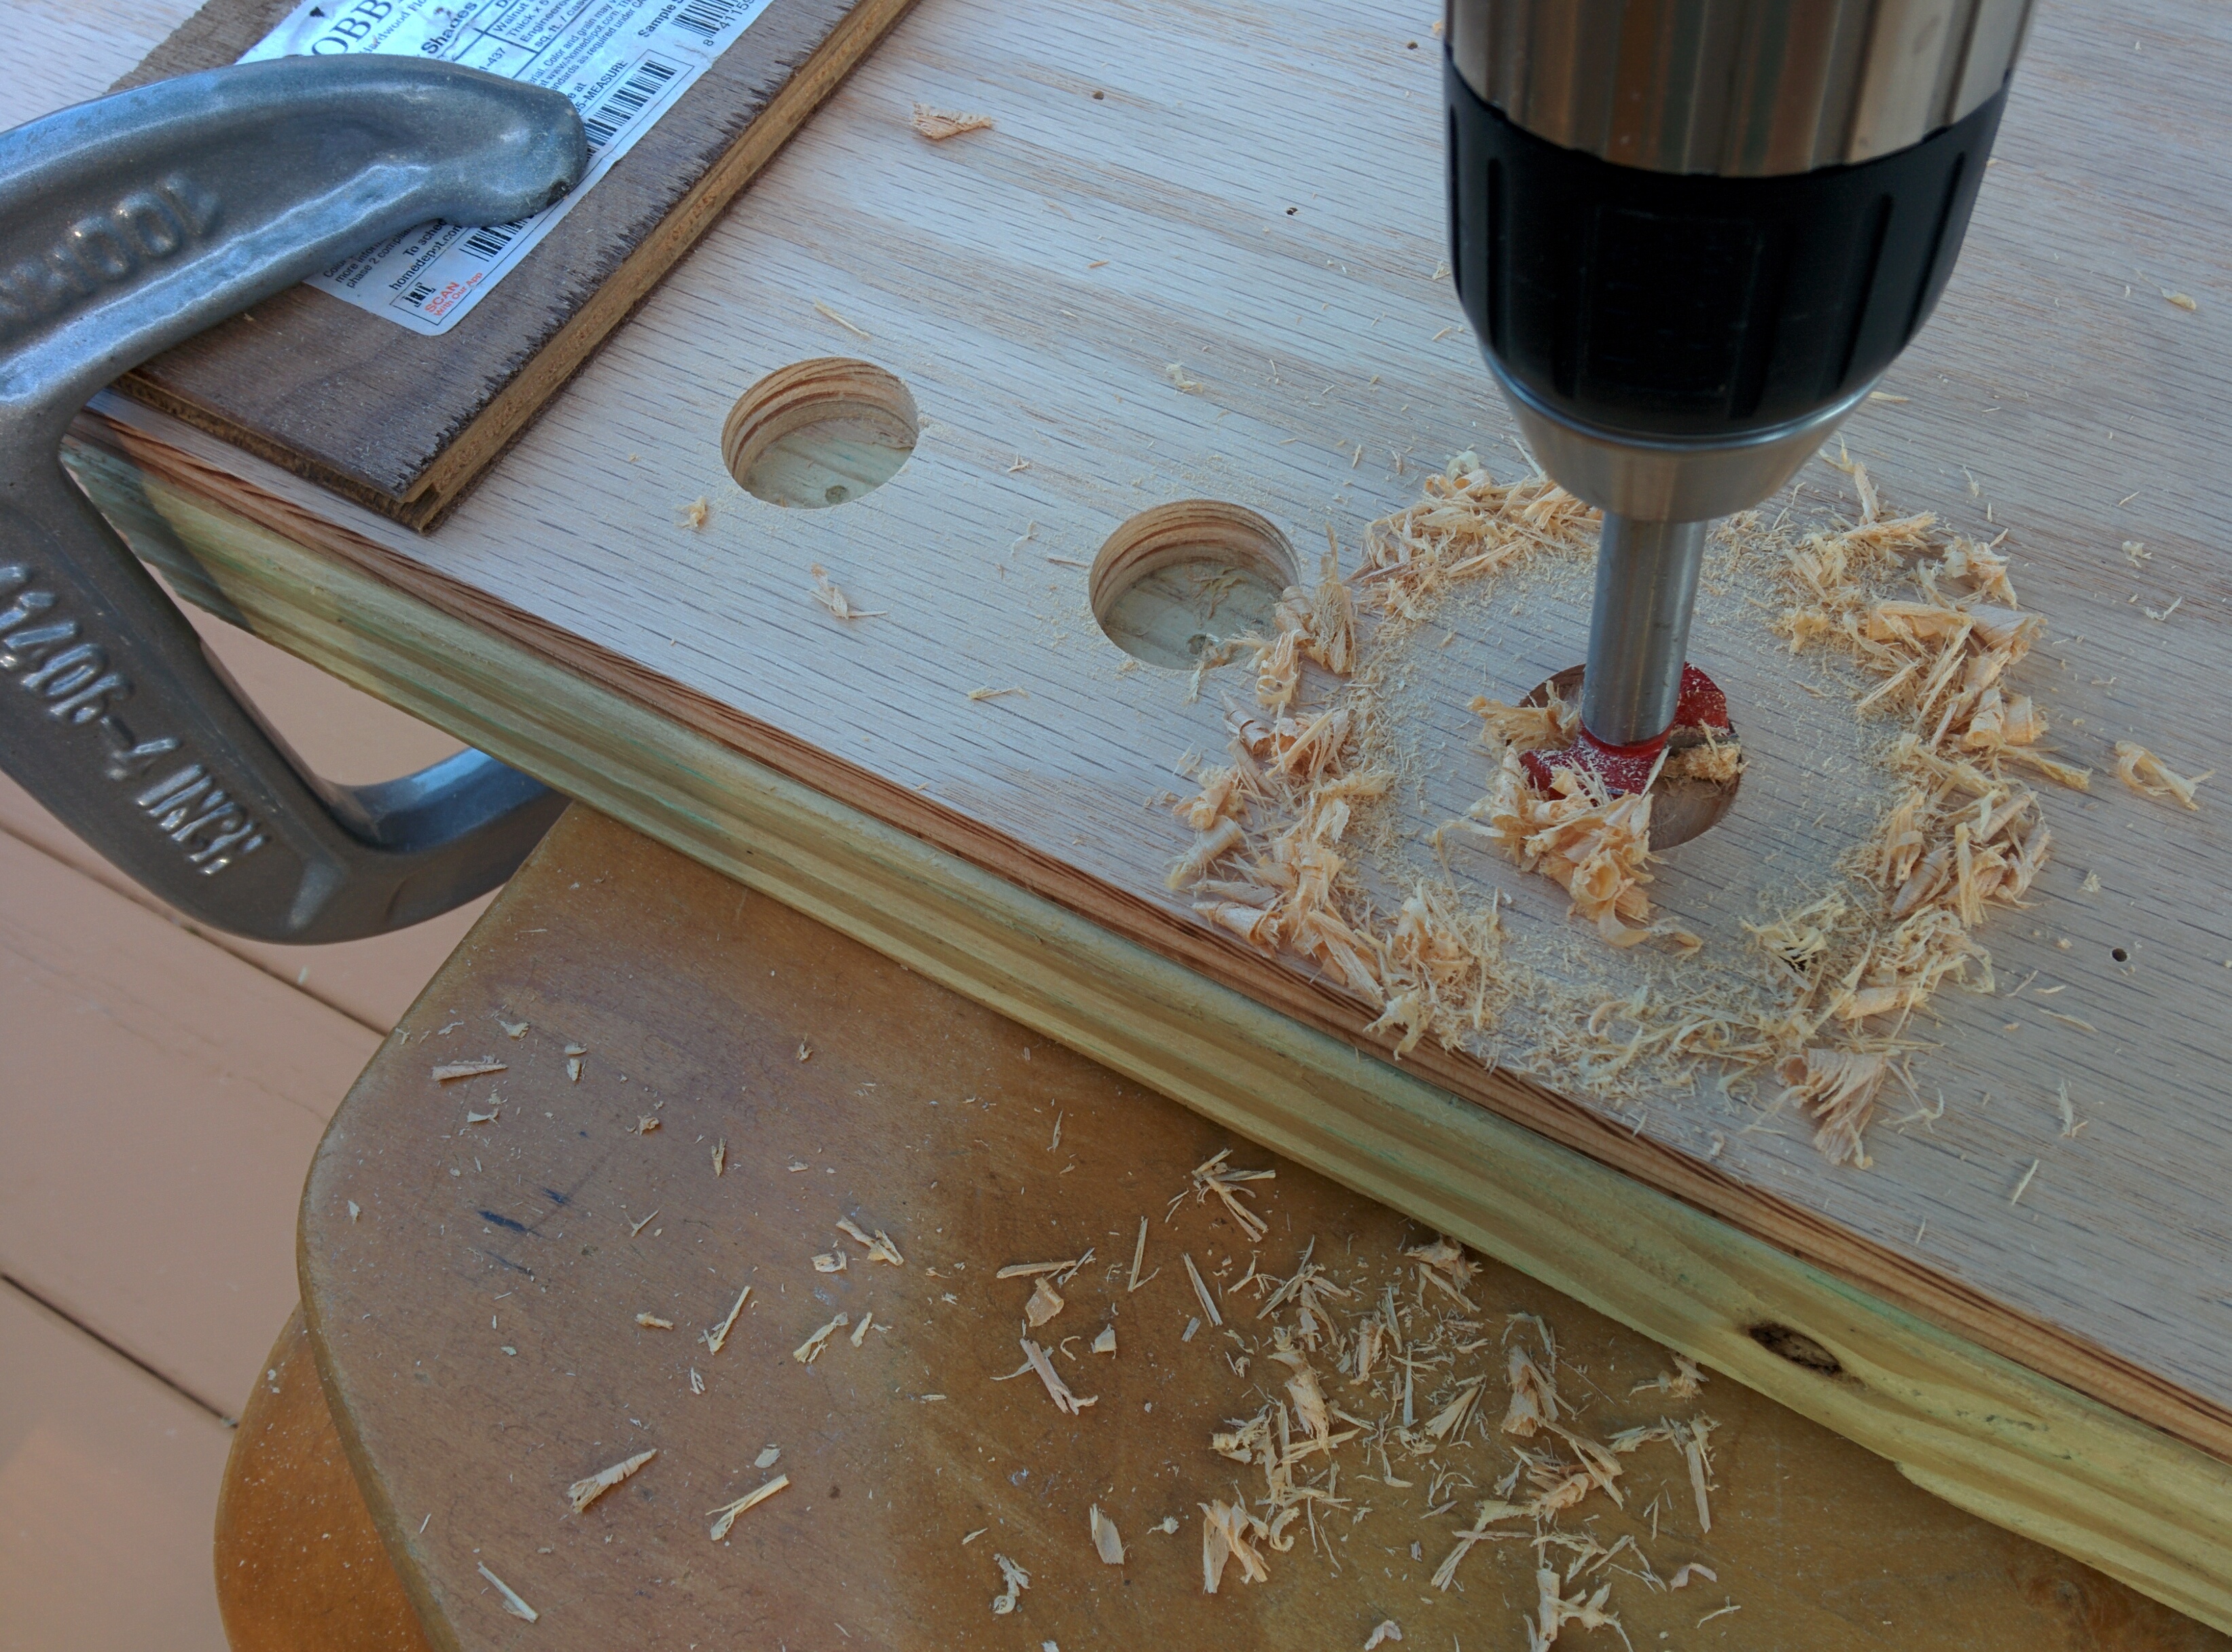
Using painter's tape, I fixed a printout of the major portions of my template to the top panel and marked all holes to be drilled with a pencil. I used clamps to temporarily hold the panel and acrylic sheet together while I drilled out the 10 screw holes along the edges. That way I could just use the screws and nuts themselves to hold the two pieces together while drilling out pilot holes for the joystick and buttons.
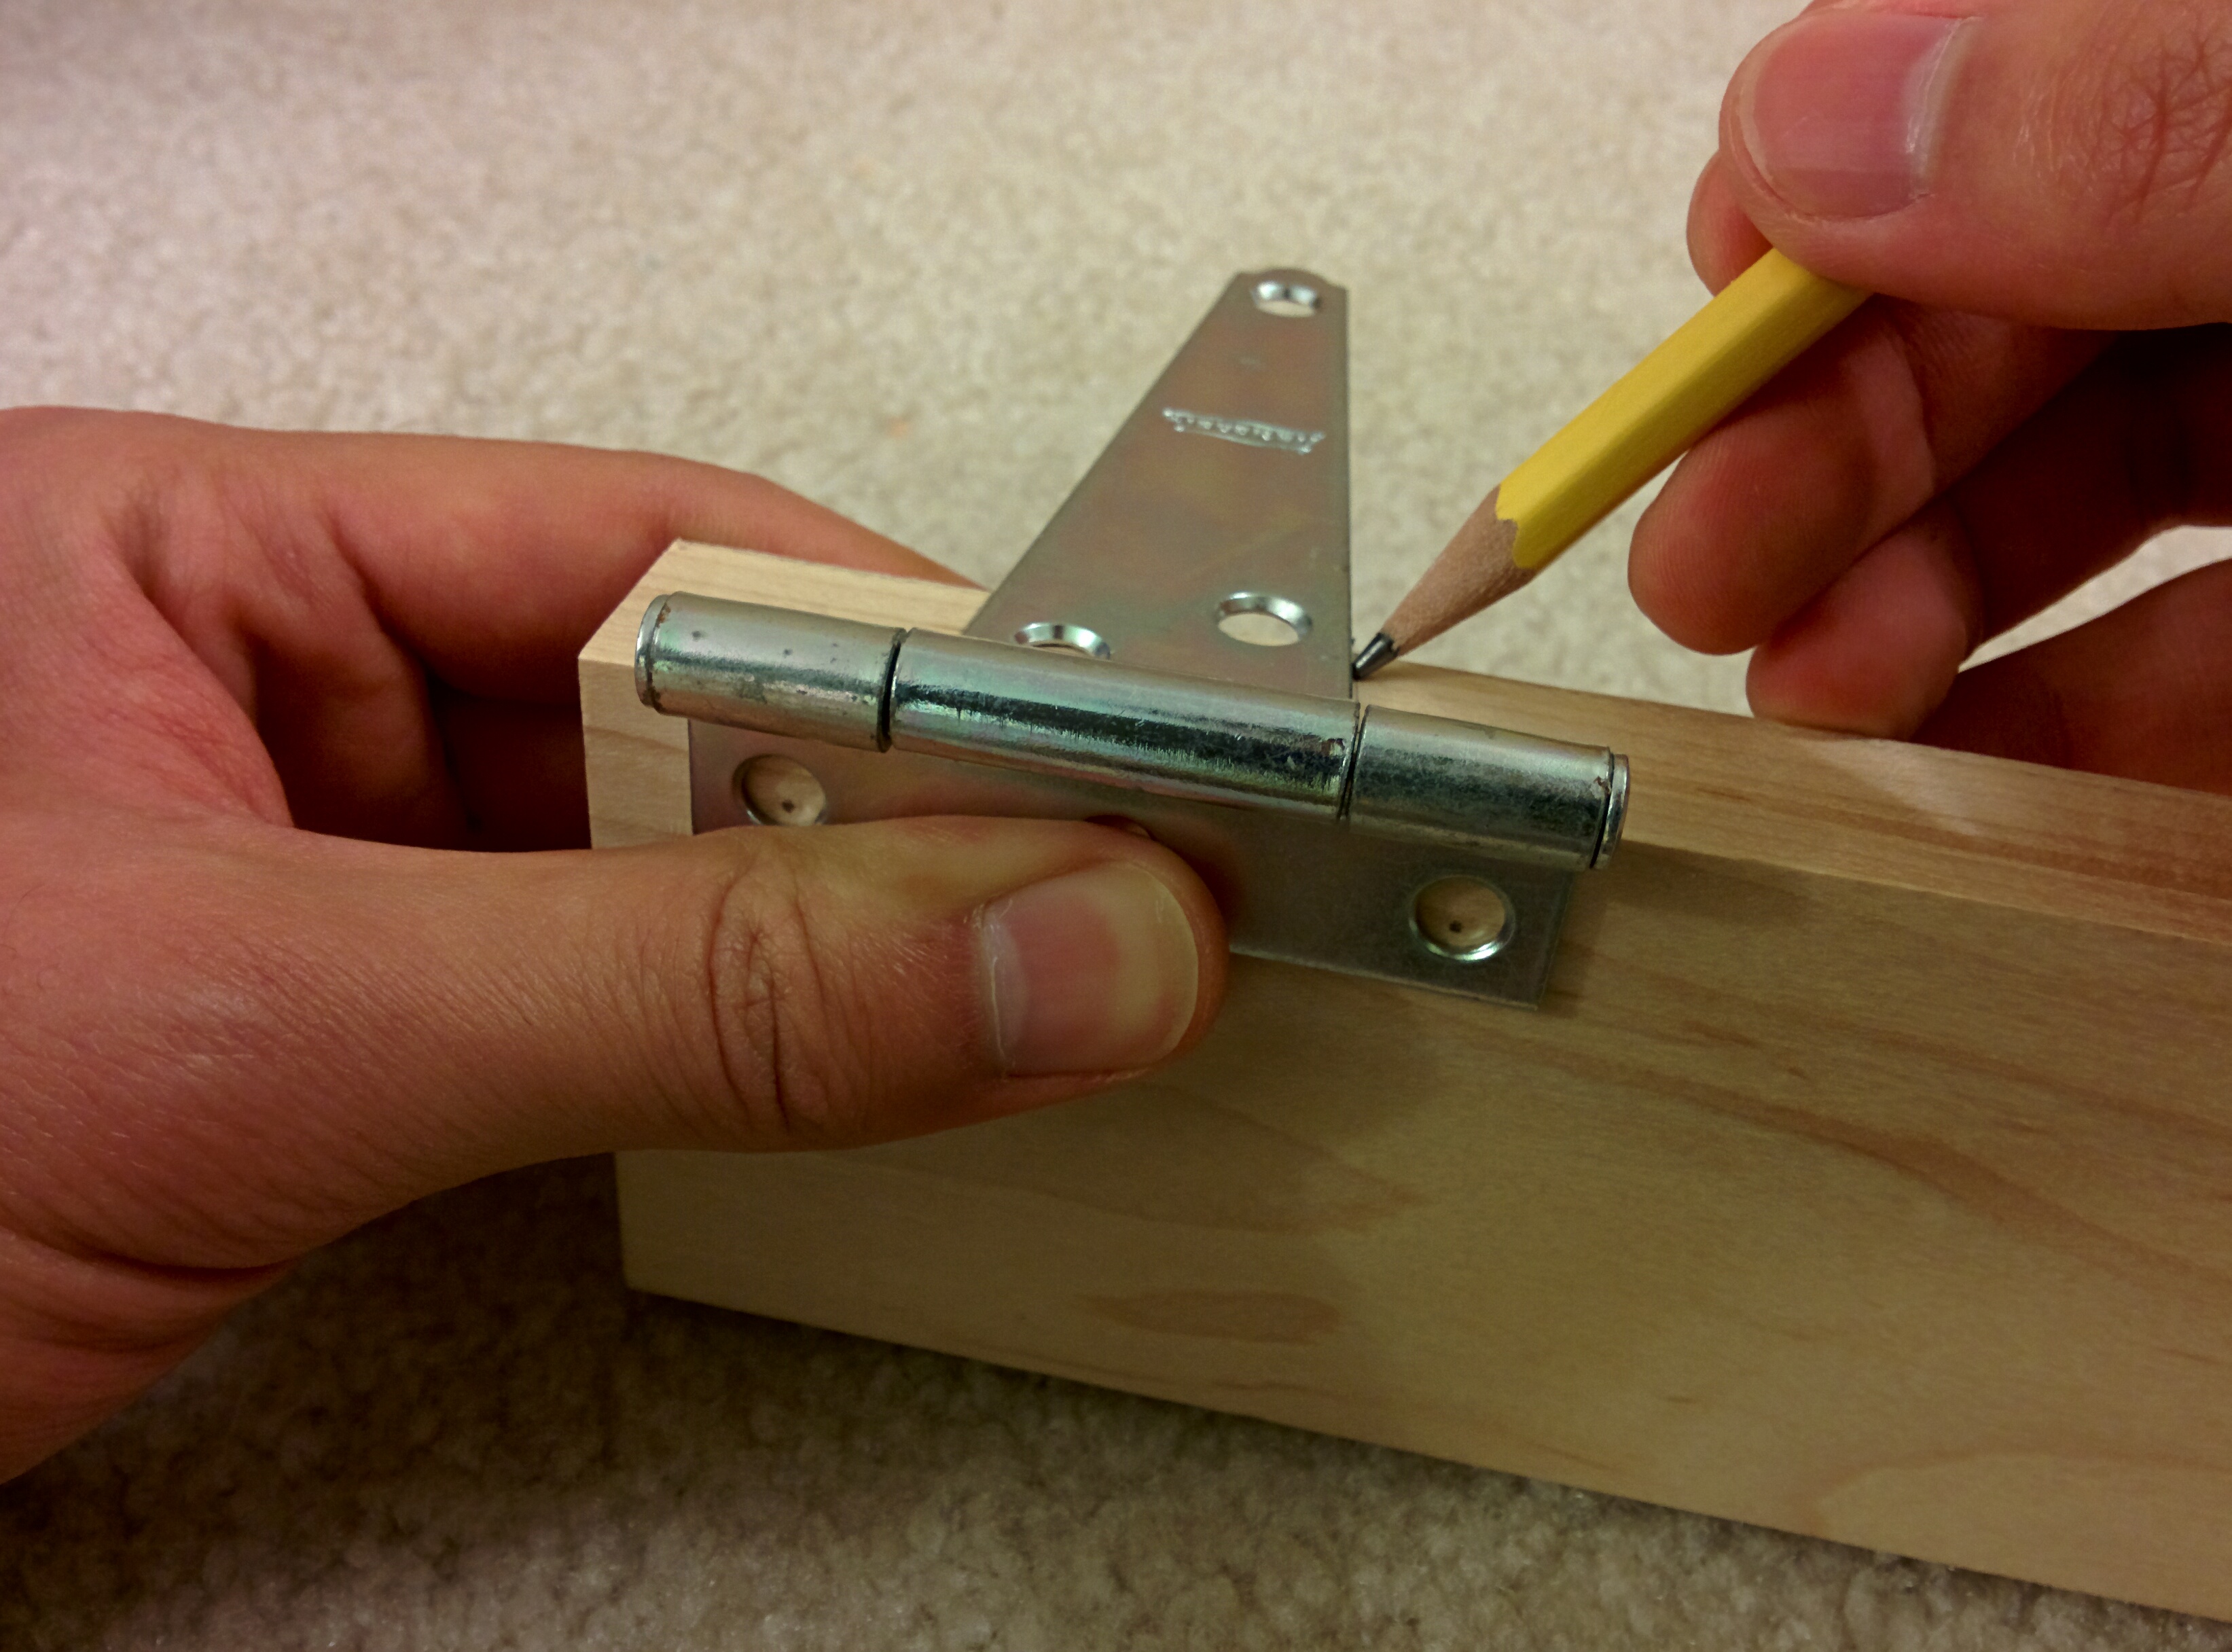
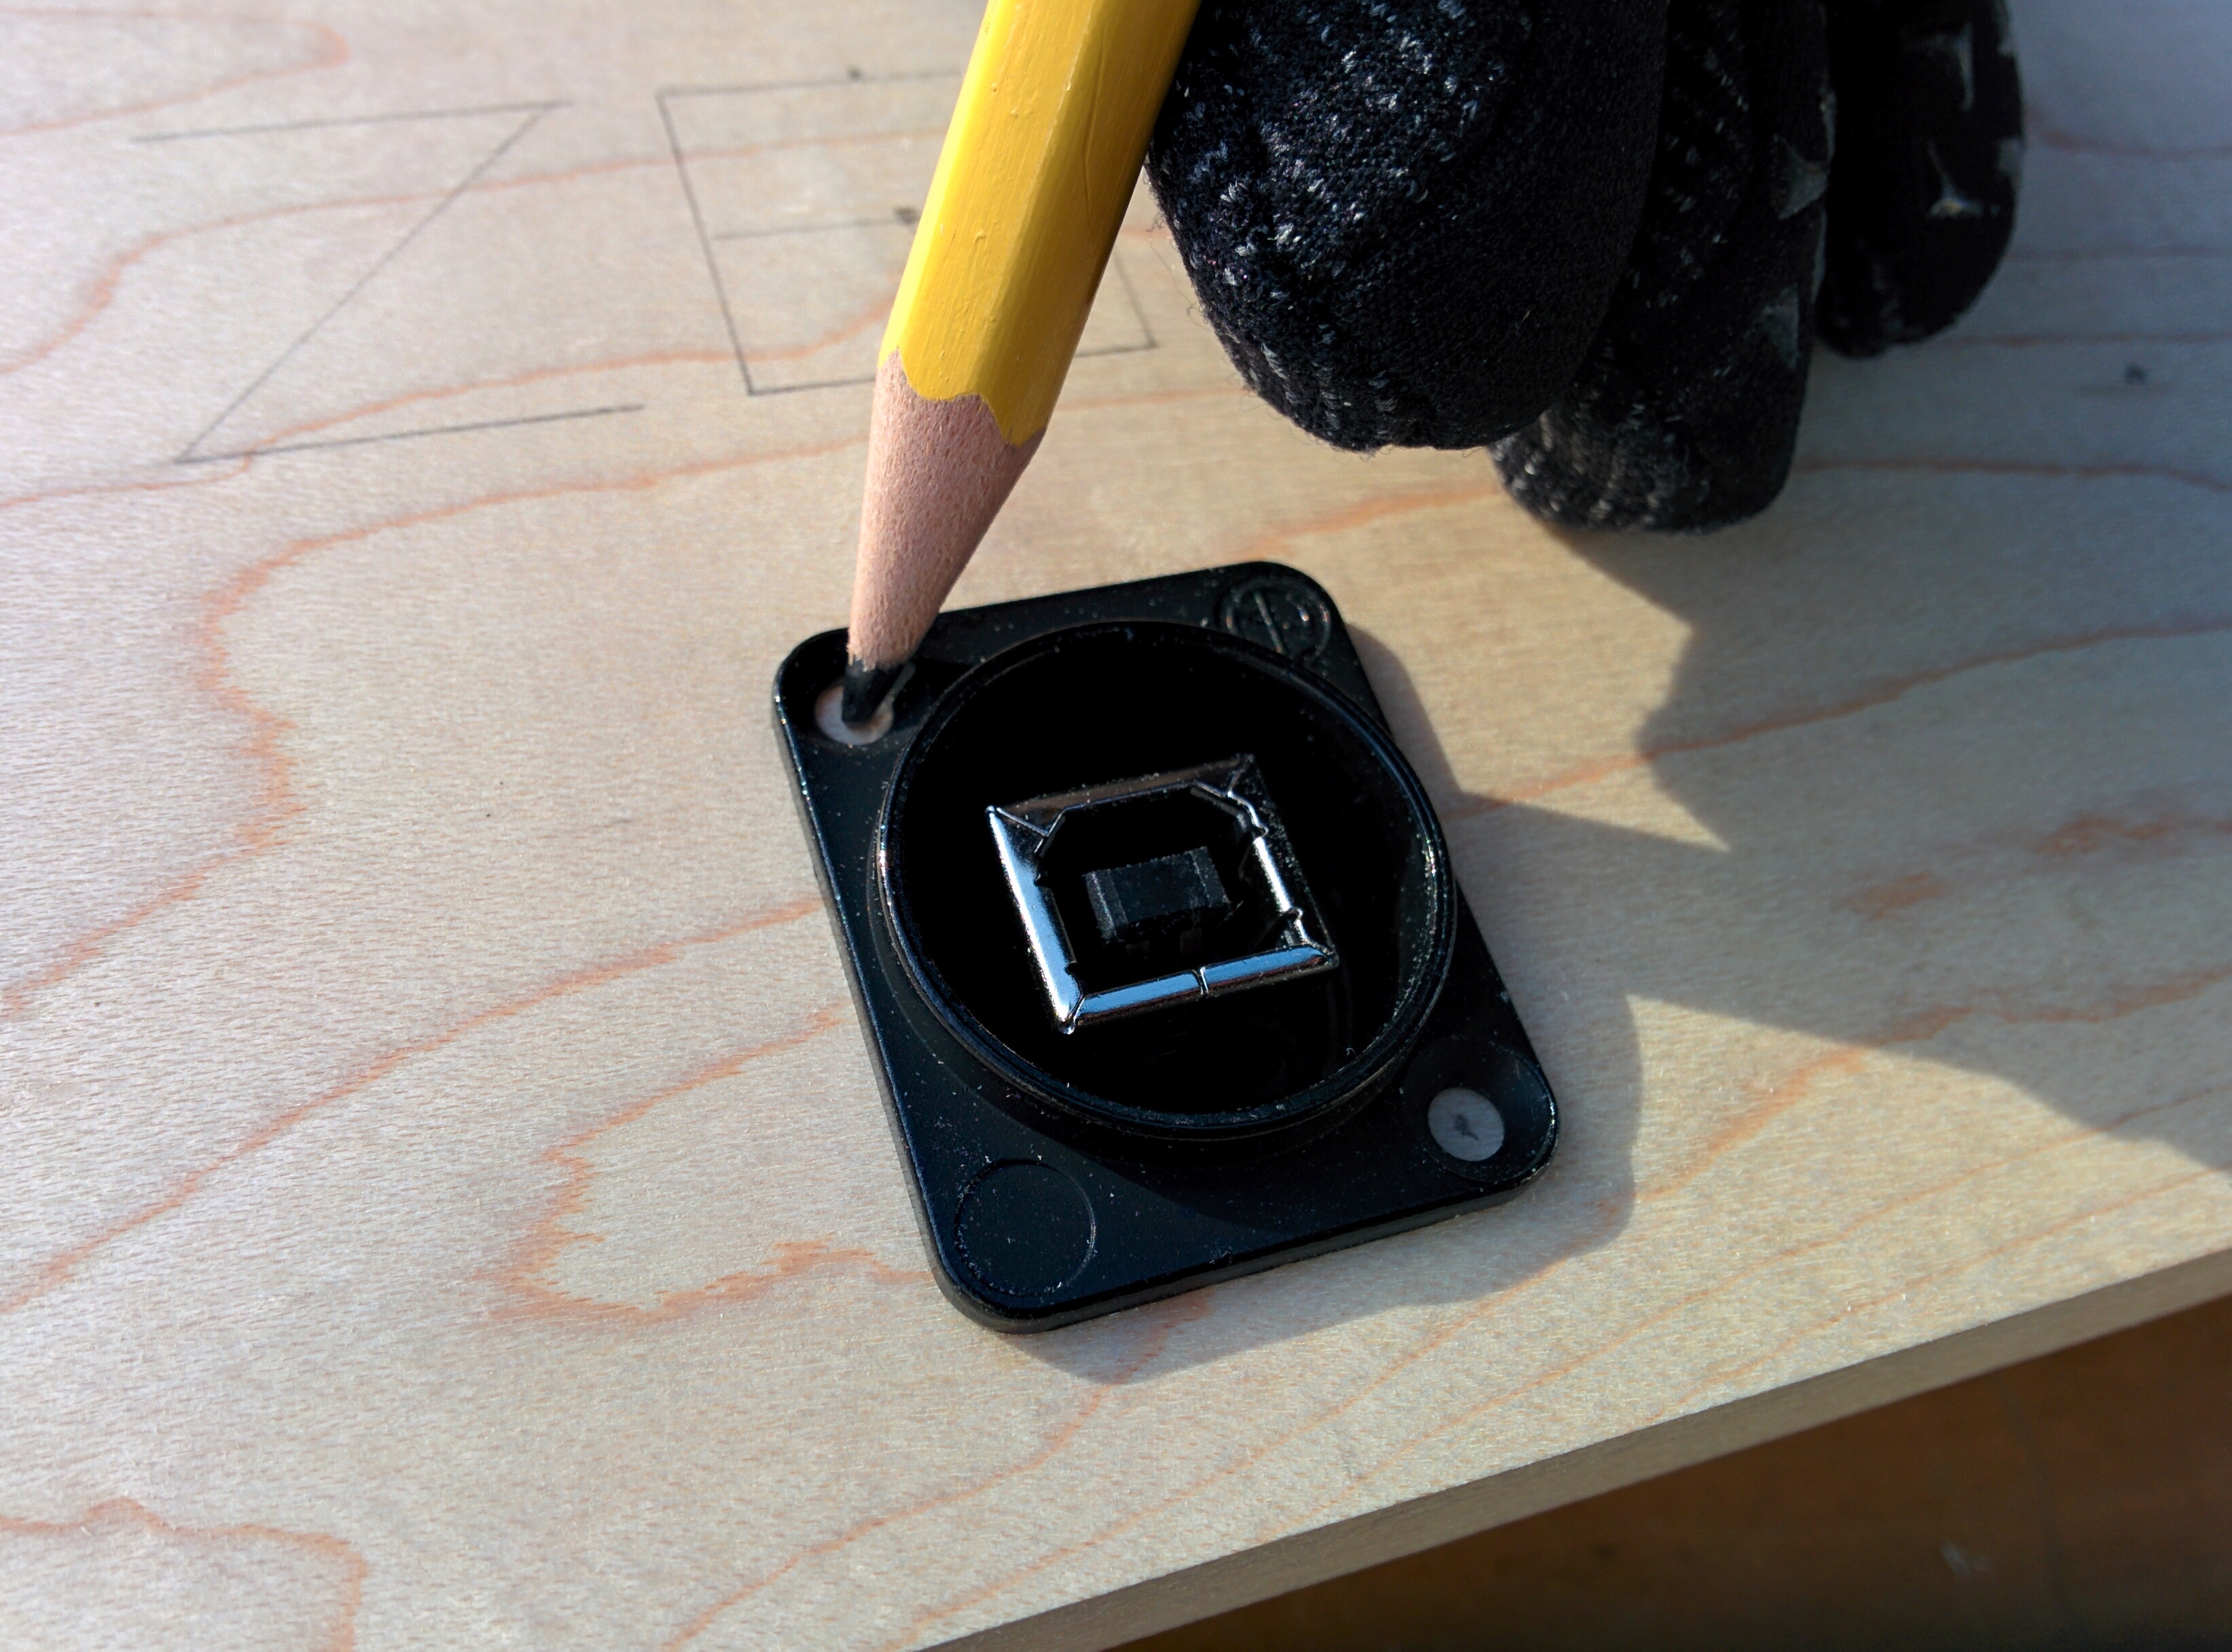
On the front wall, I marked two holes for threading paracord and a 24mm hole for the USB Feedthrough, leaving some room above for me to burn my name in with a soldering iron. On the right wall I also marked two paracord holes, and on the left wall I marked four screw holes for hinge screws. On the top face of the left wall I also marked out where I would have to route away a bit of material so the hinges could sit flush with the underside of the top panel.
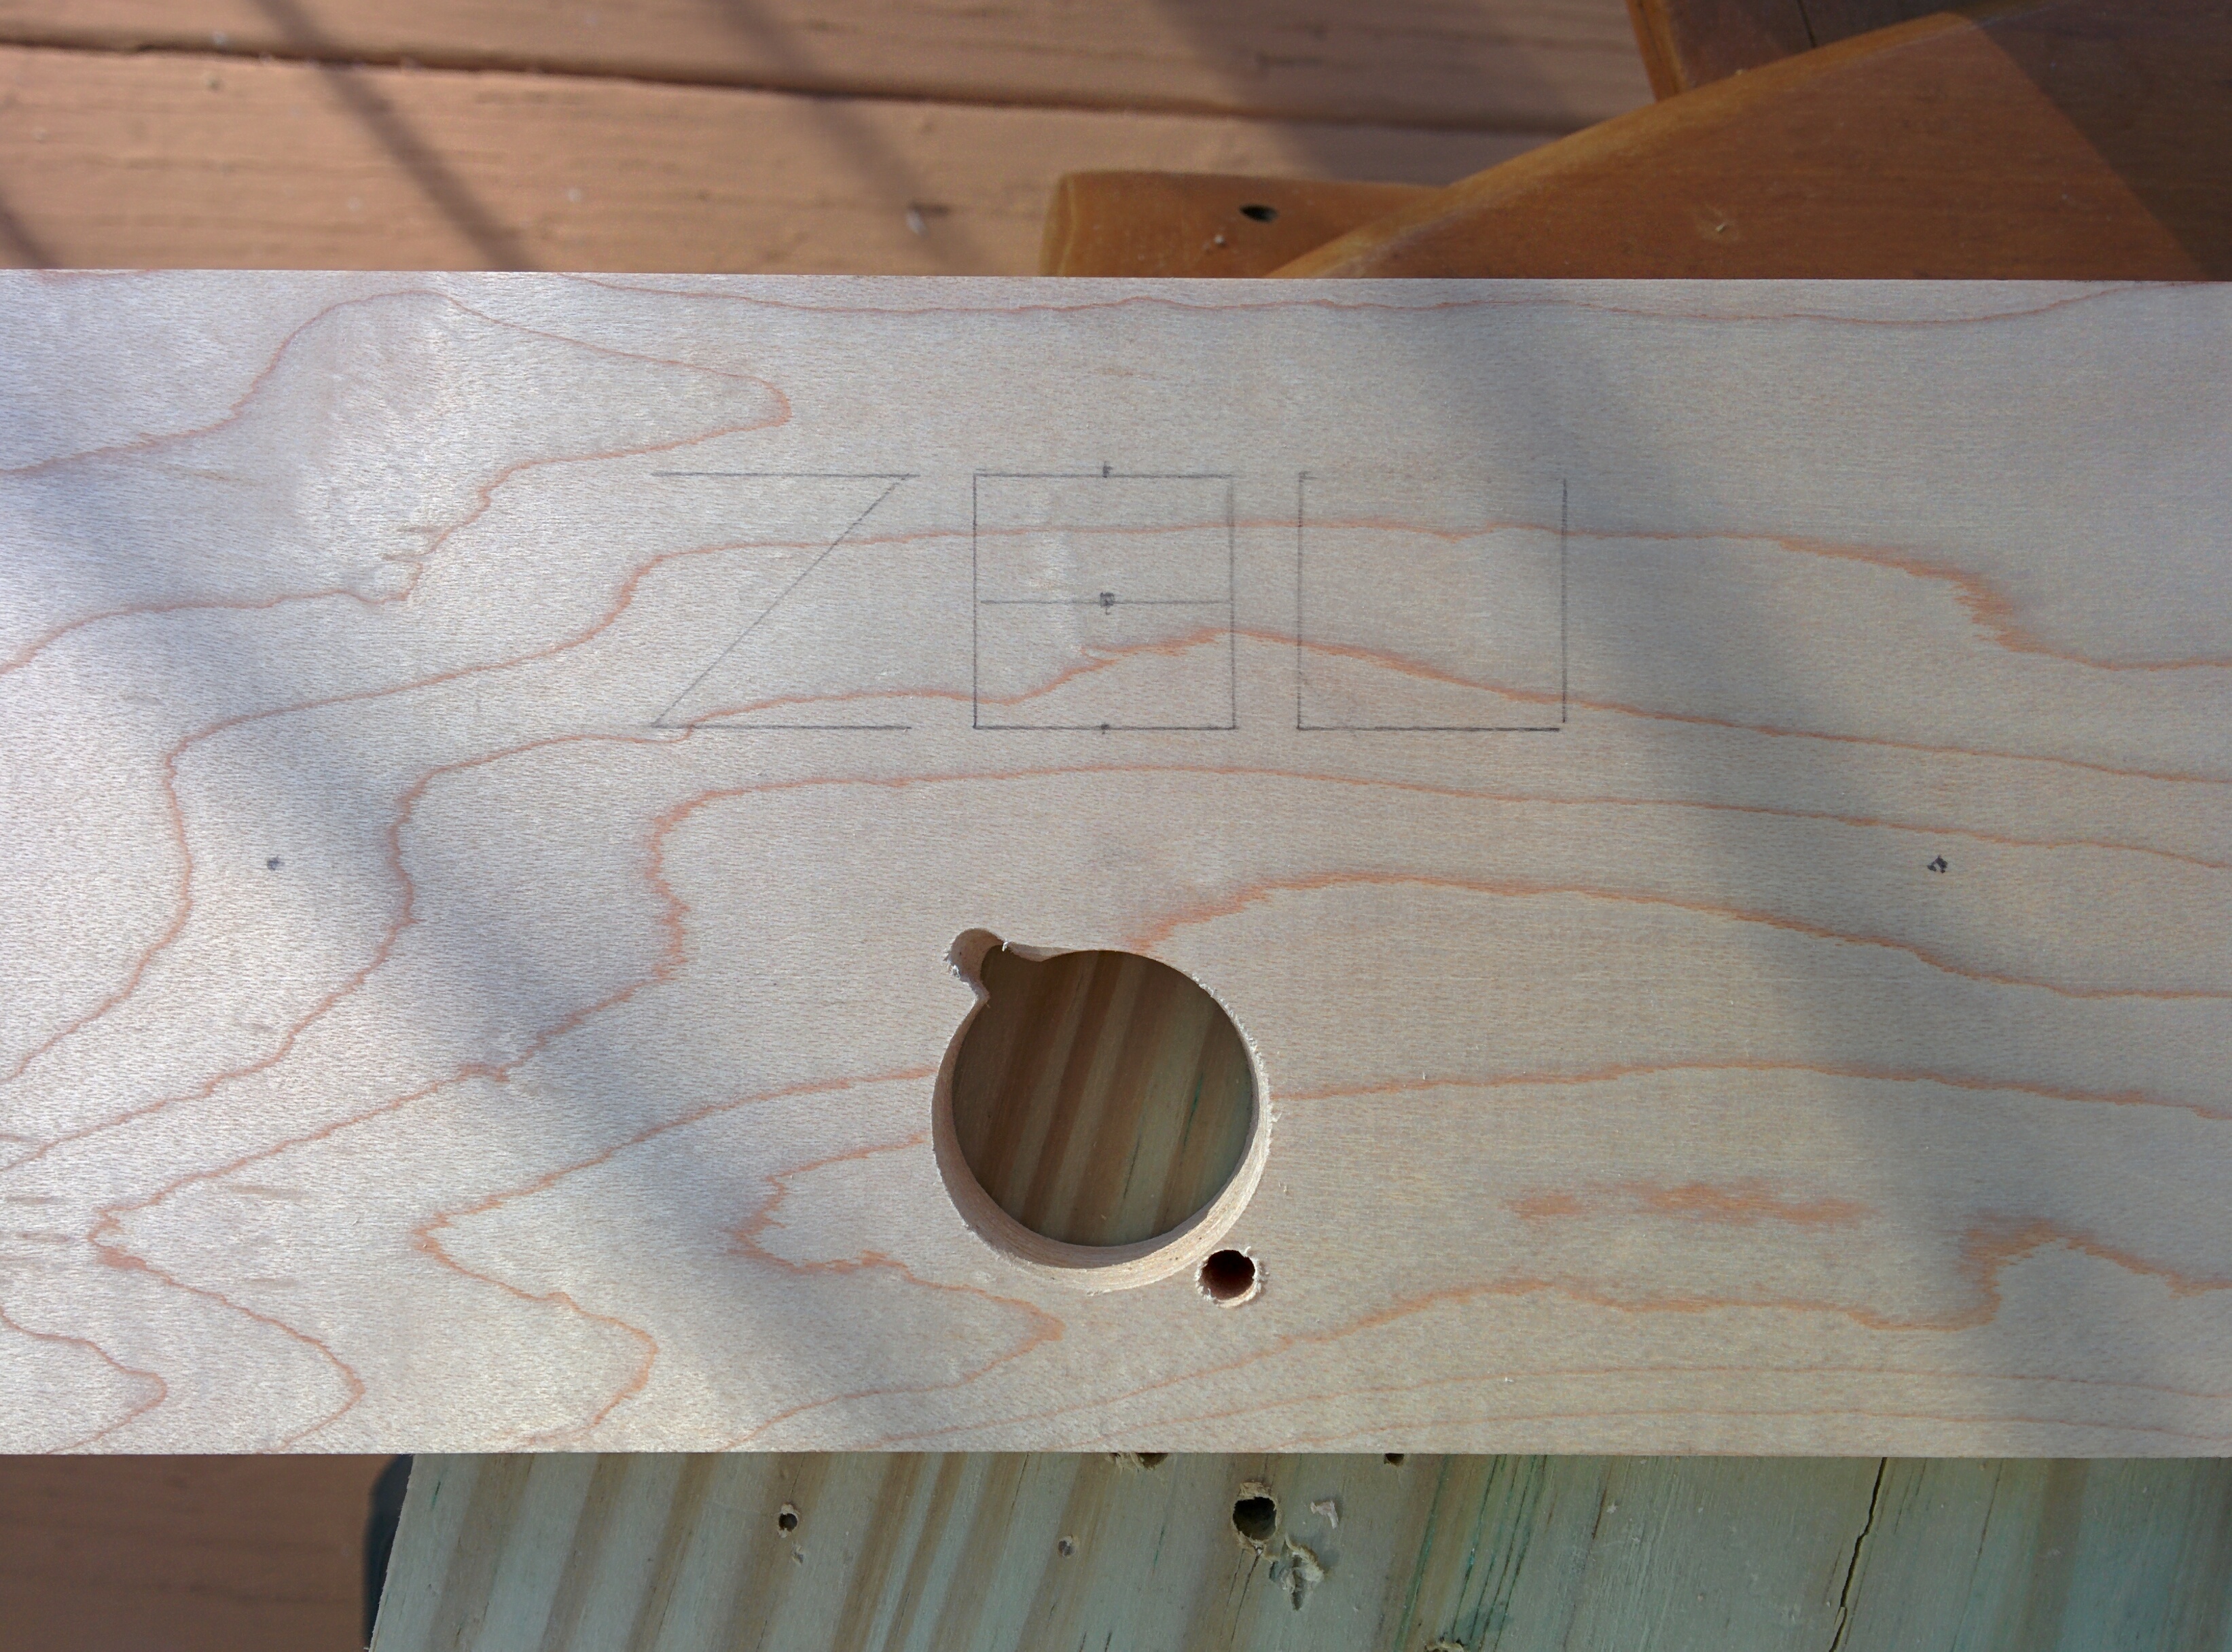
After drilling pilot holes for the Feedthrough, I recommend marking the two screw holes for it and drilling those out first before you drill the larger one with the Forstner bit. This avoids the problem I encountered where one of my screw holes spilled into the larged hole due to their proximity. I ended up having to sand out the rest of it.
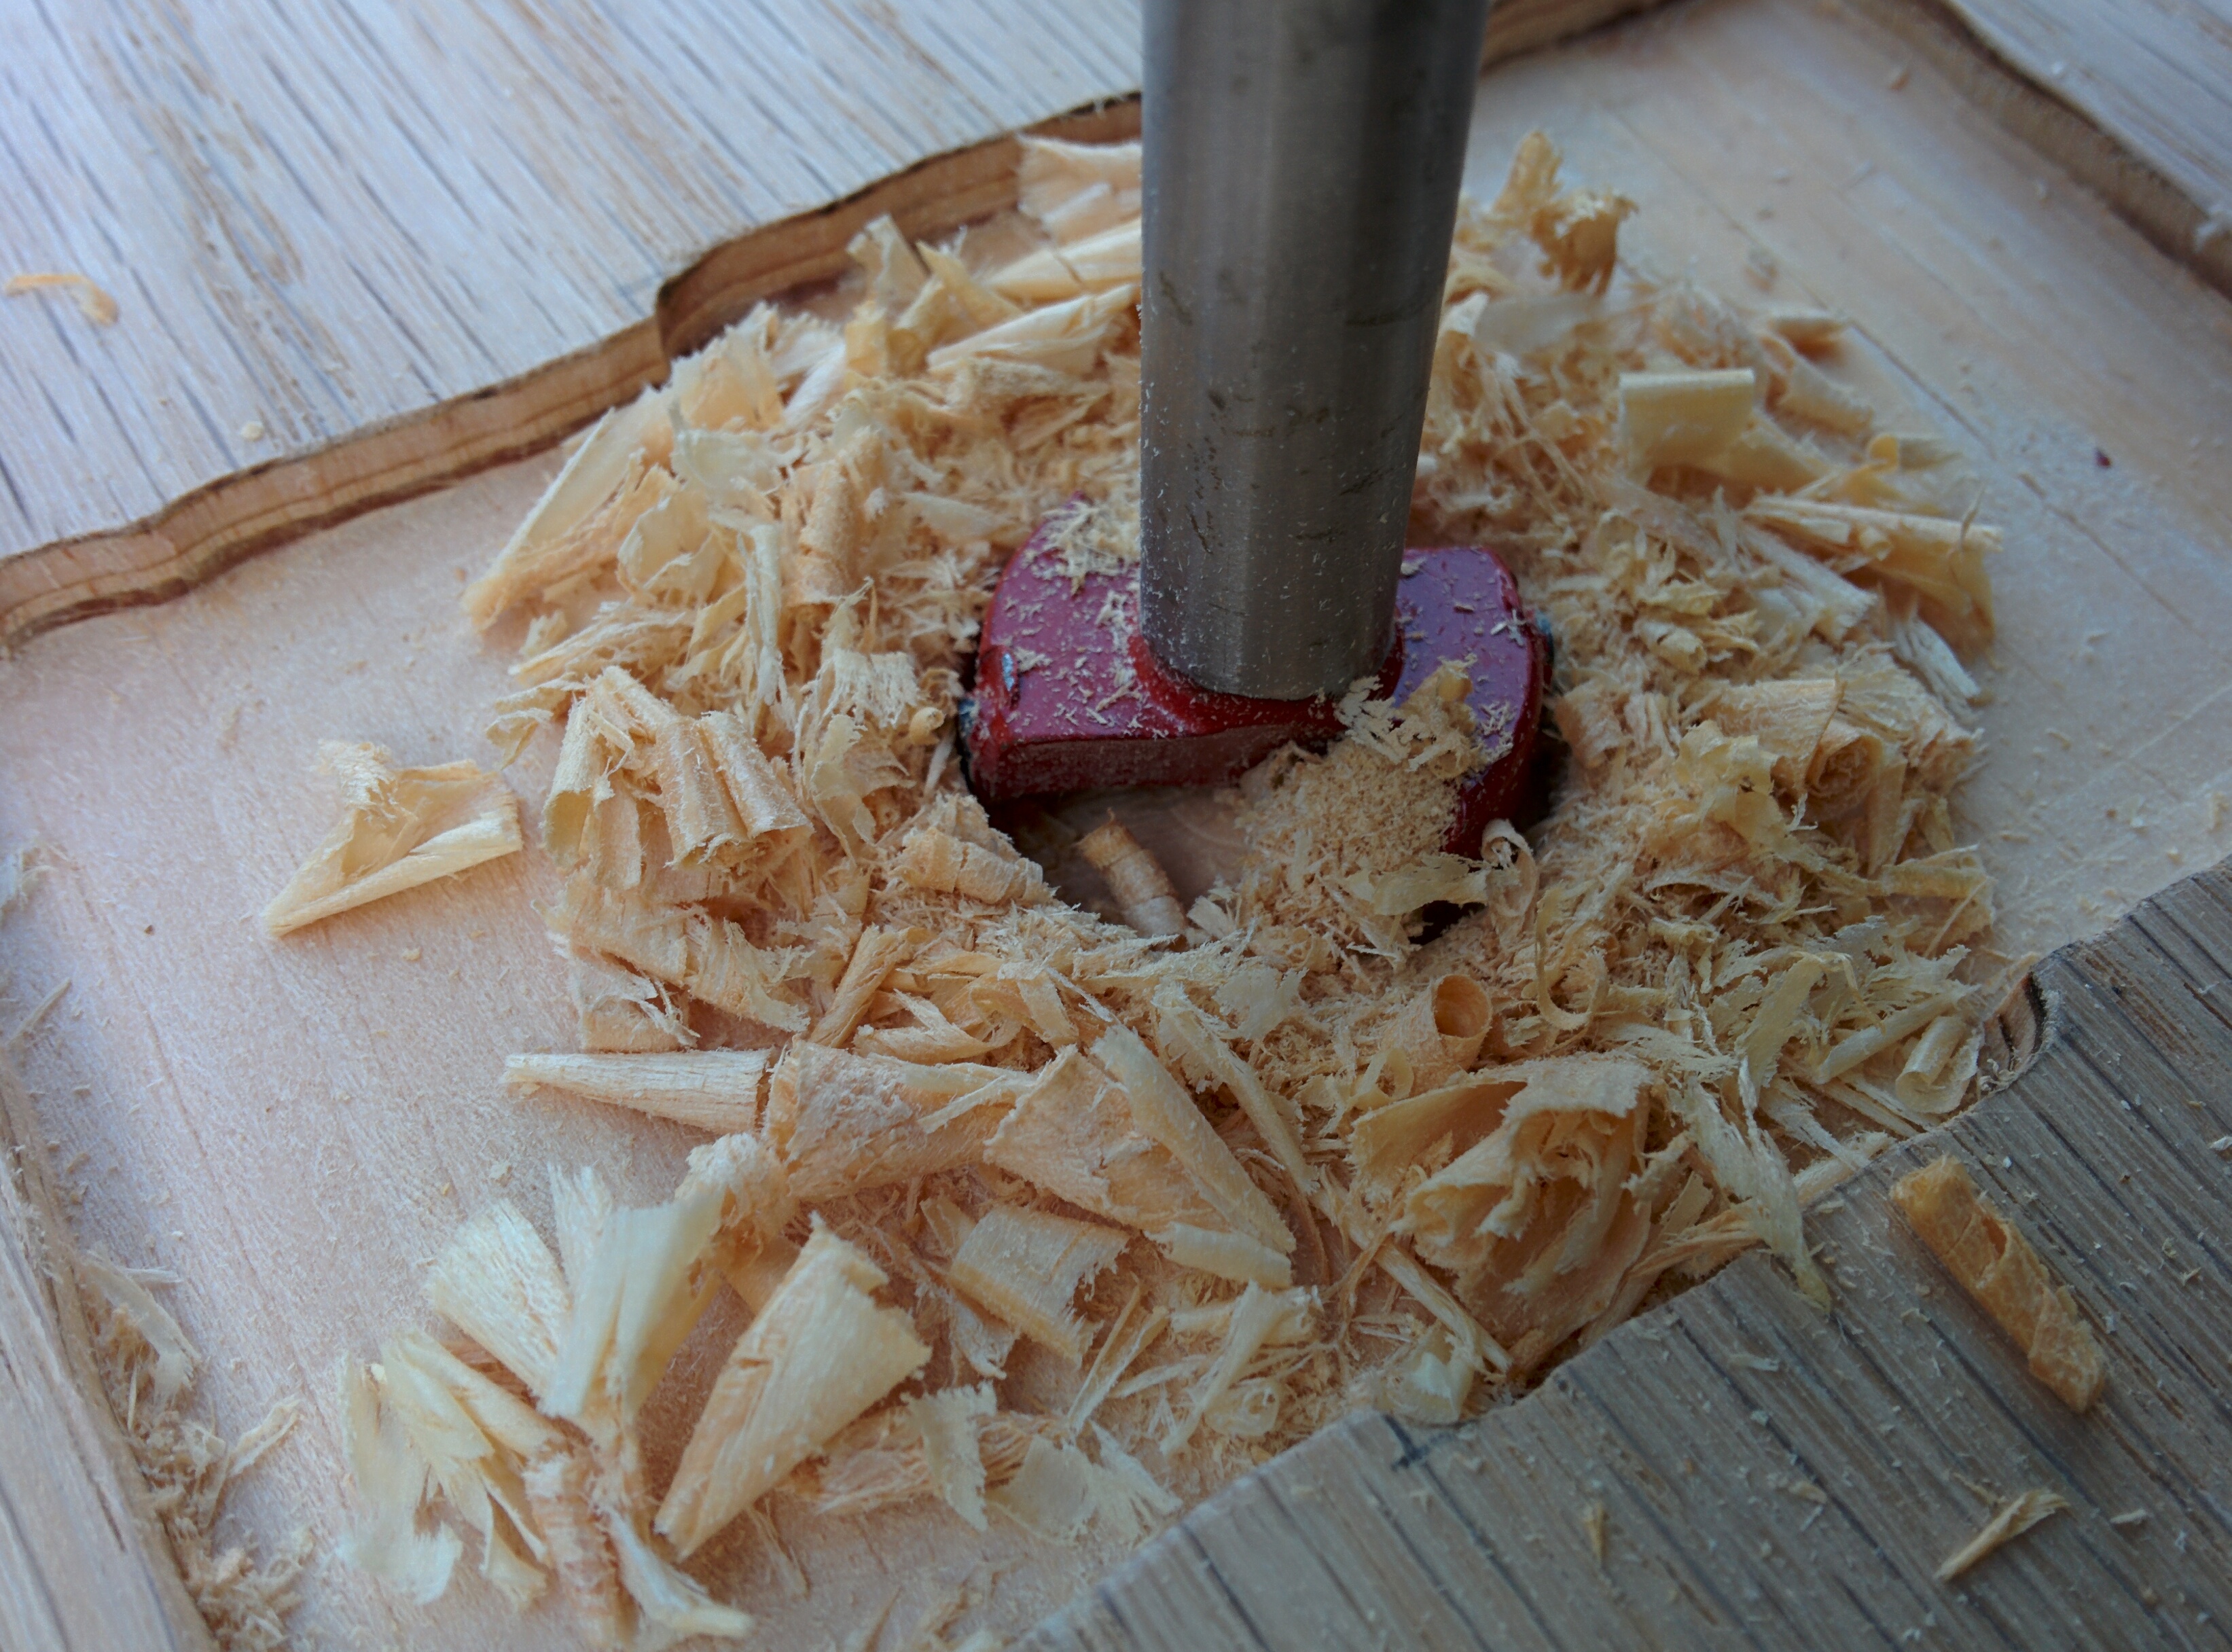
As for the actual Forstner hole, hardwoods will take some time, so definitely take it slow and clear out debris frequently to keep the process smooth. I don't own a drill press, so when using the Forstner bit with my cordless drill I needed some way to keep it going straight through the hole, as Forstner bits remove a lot of material slowly and can get off-center fairly easily. If the material isn't too tough, like wood, a pilot hole is usually sufficient.
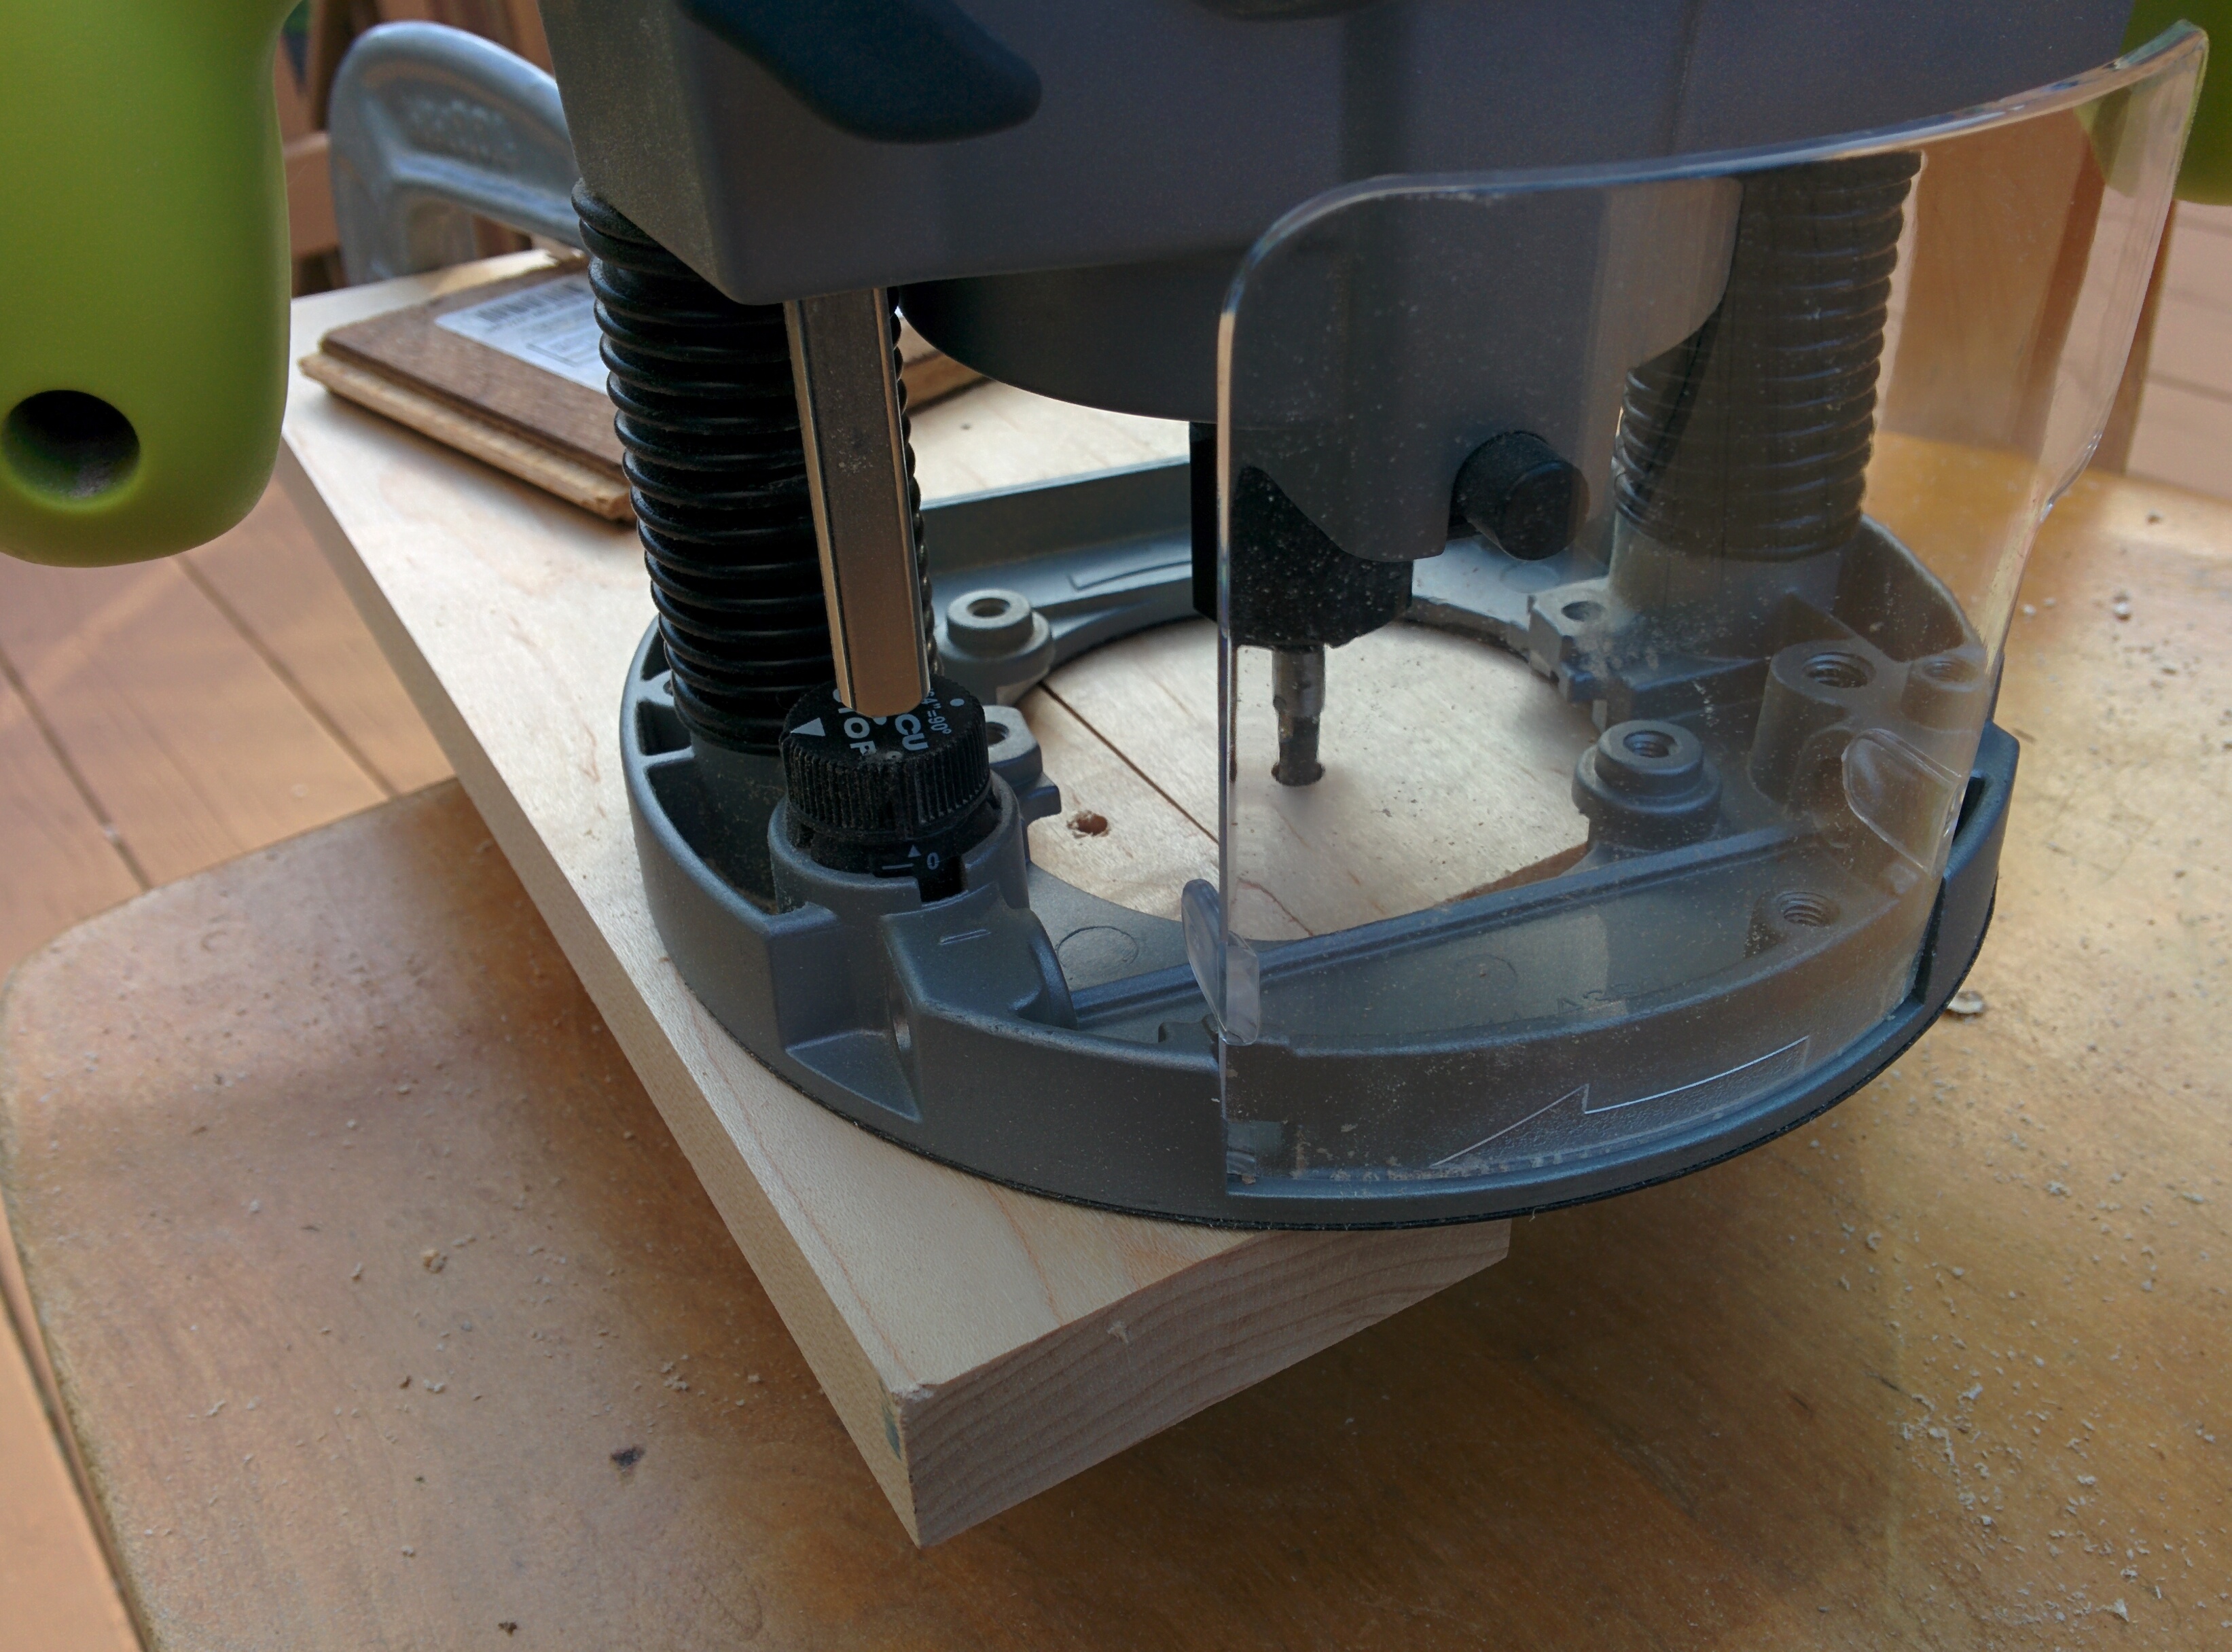
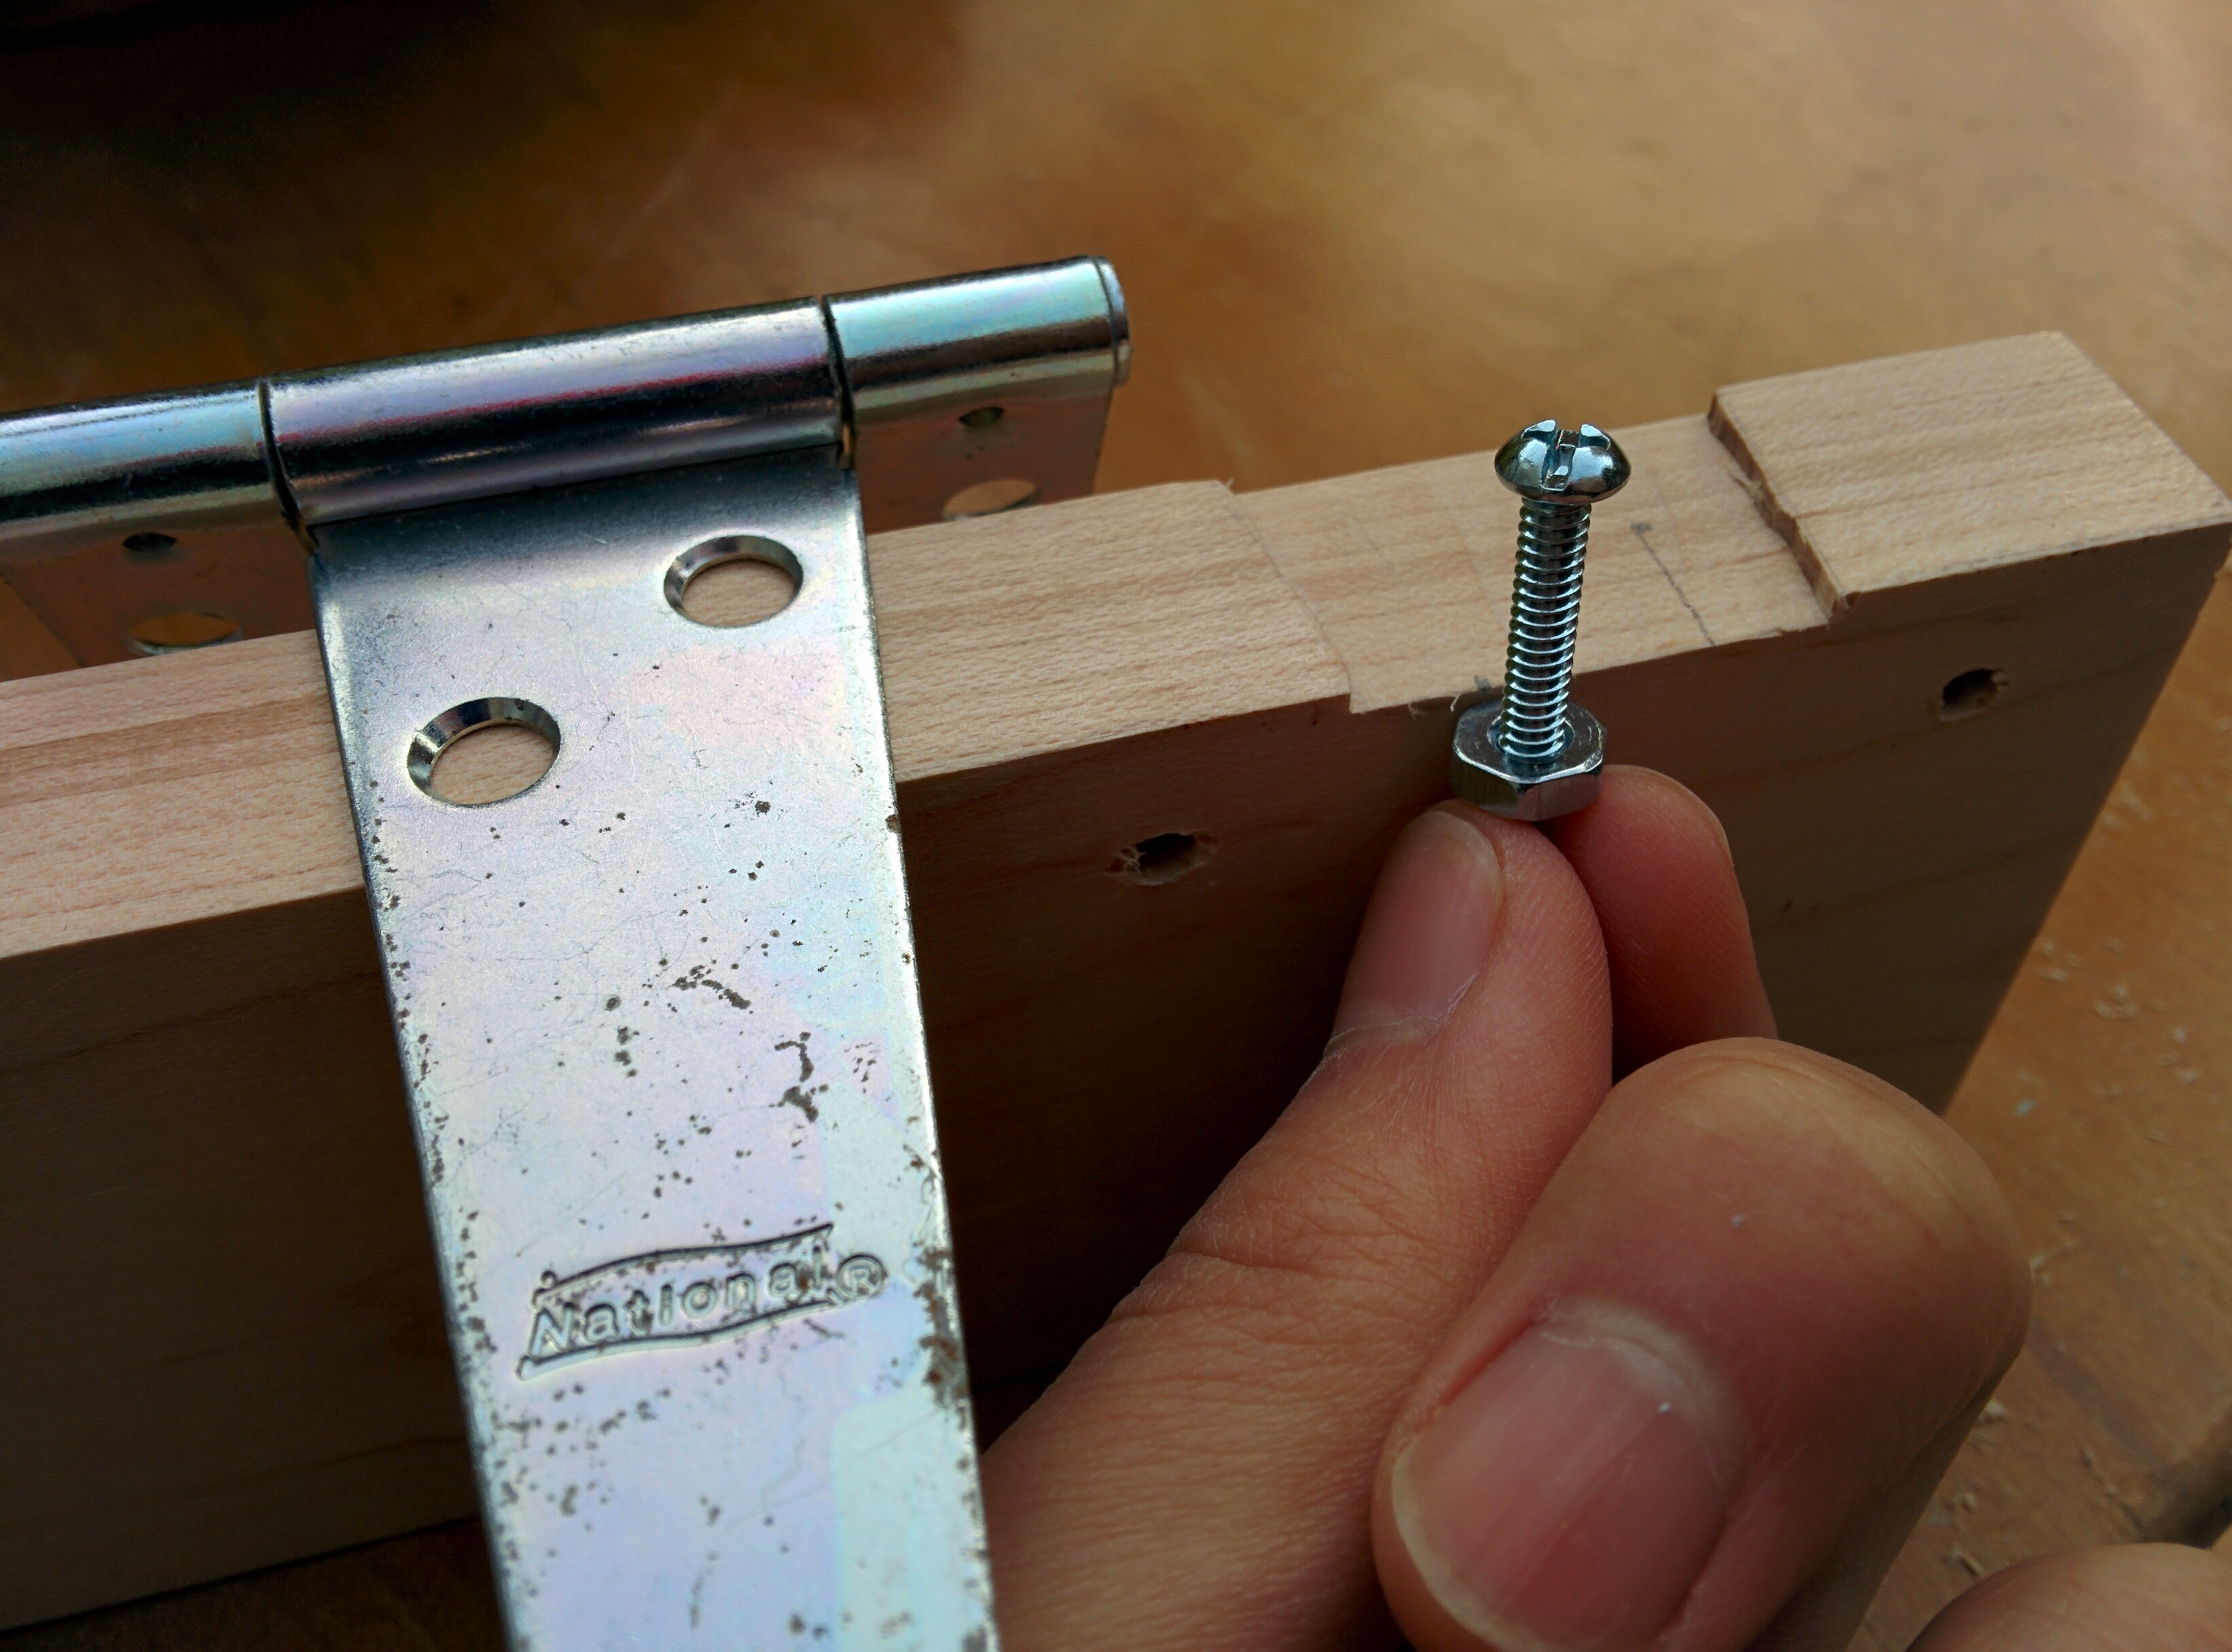
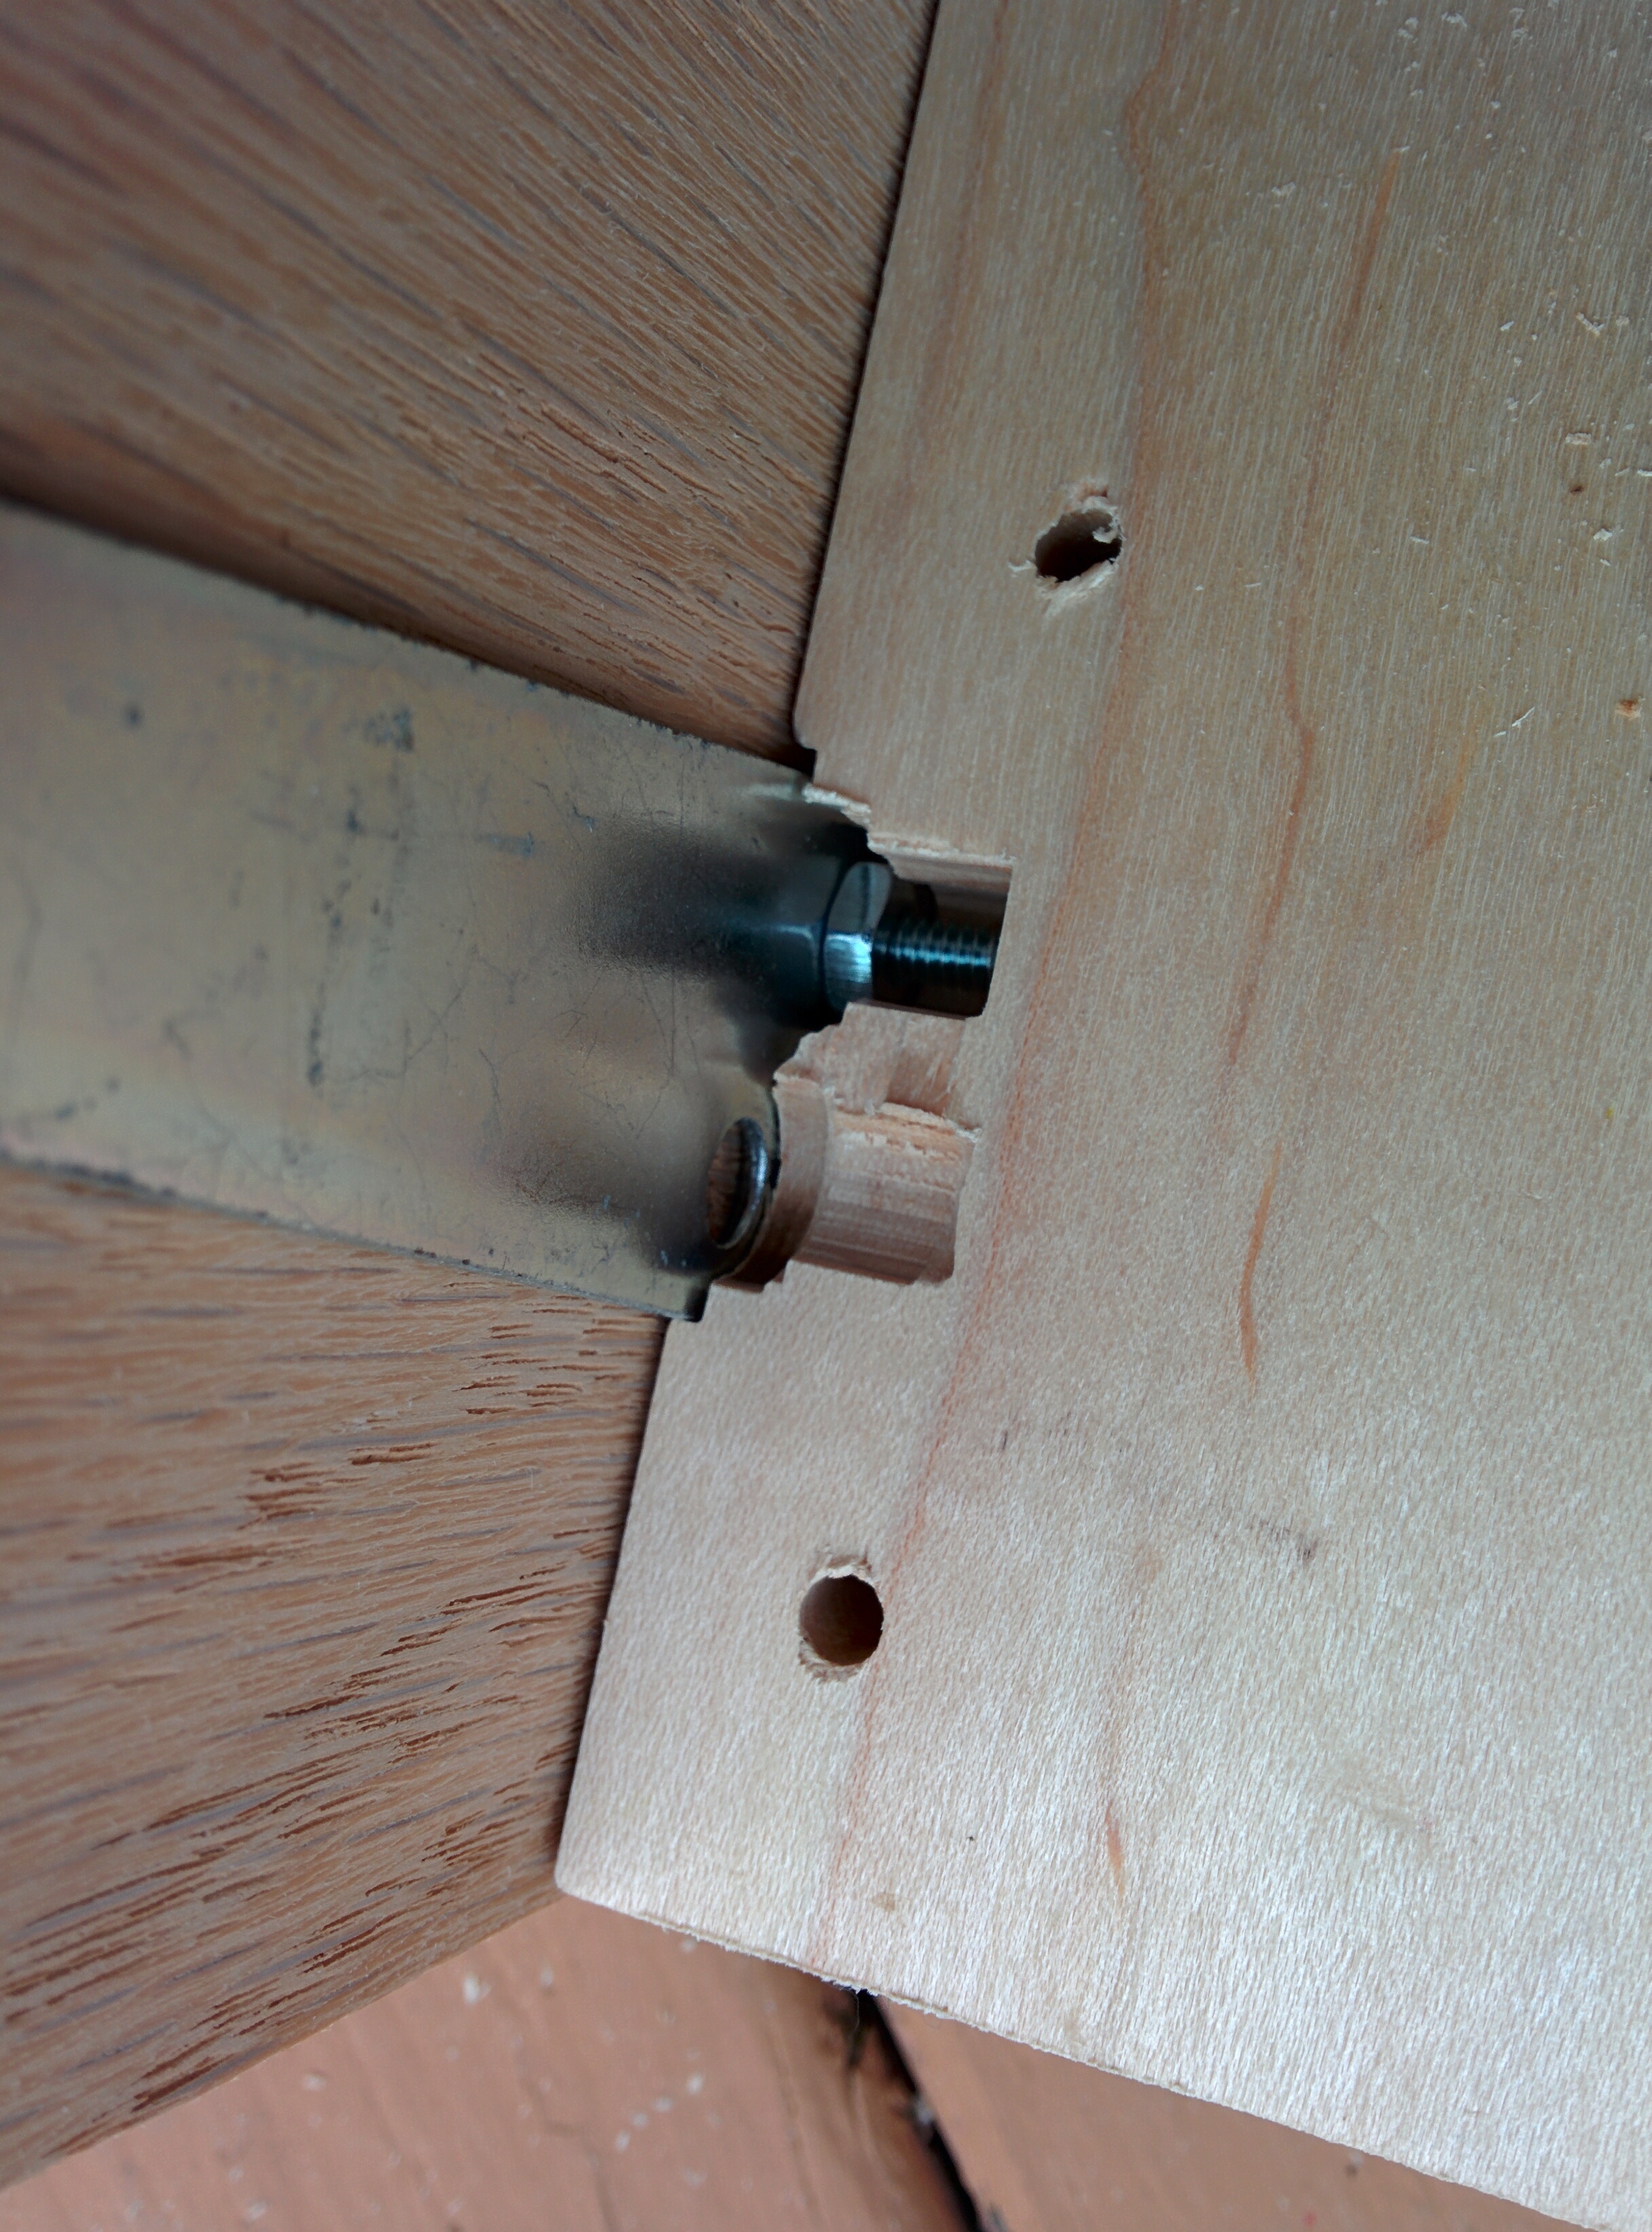
I held my plunge router at an angle and clamped down the left wall so I could carve away slots for the nuts and bolts to go when opening and closing the top panel. The depressions themselves were very messy and there was a decent bit of splintering, but as this would only be seen on the inside of the stick, I did not consider it a huge issue.
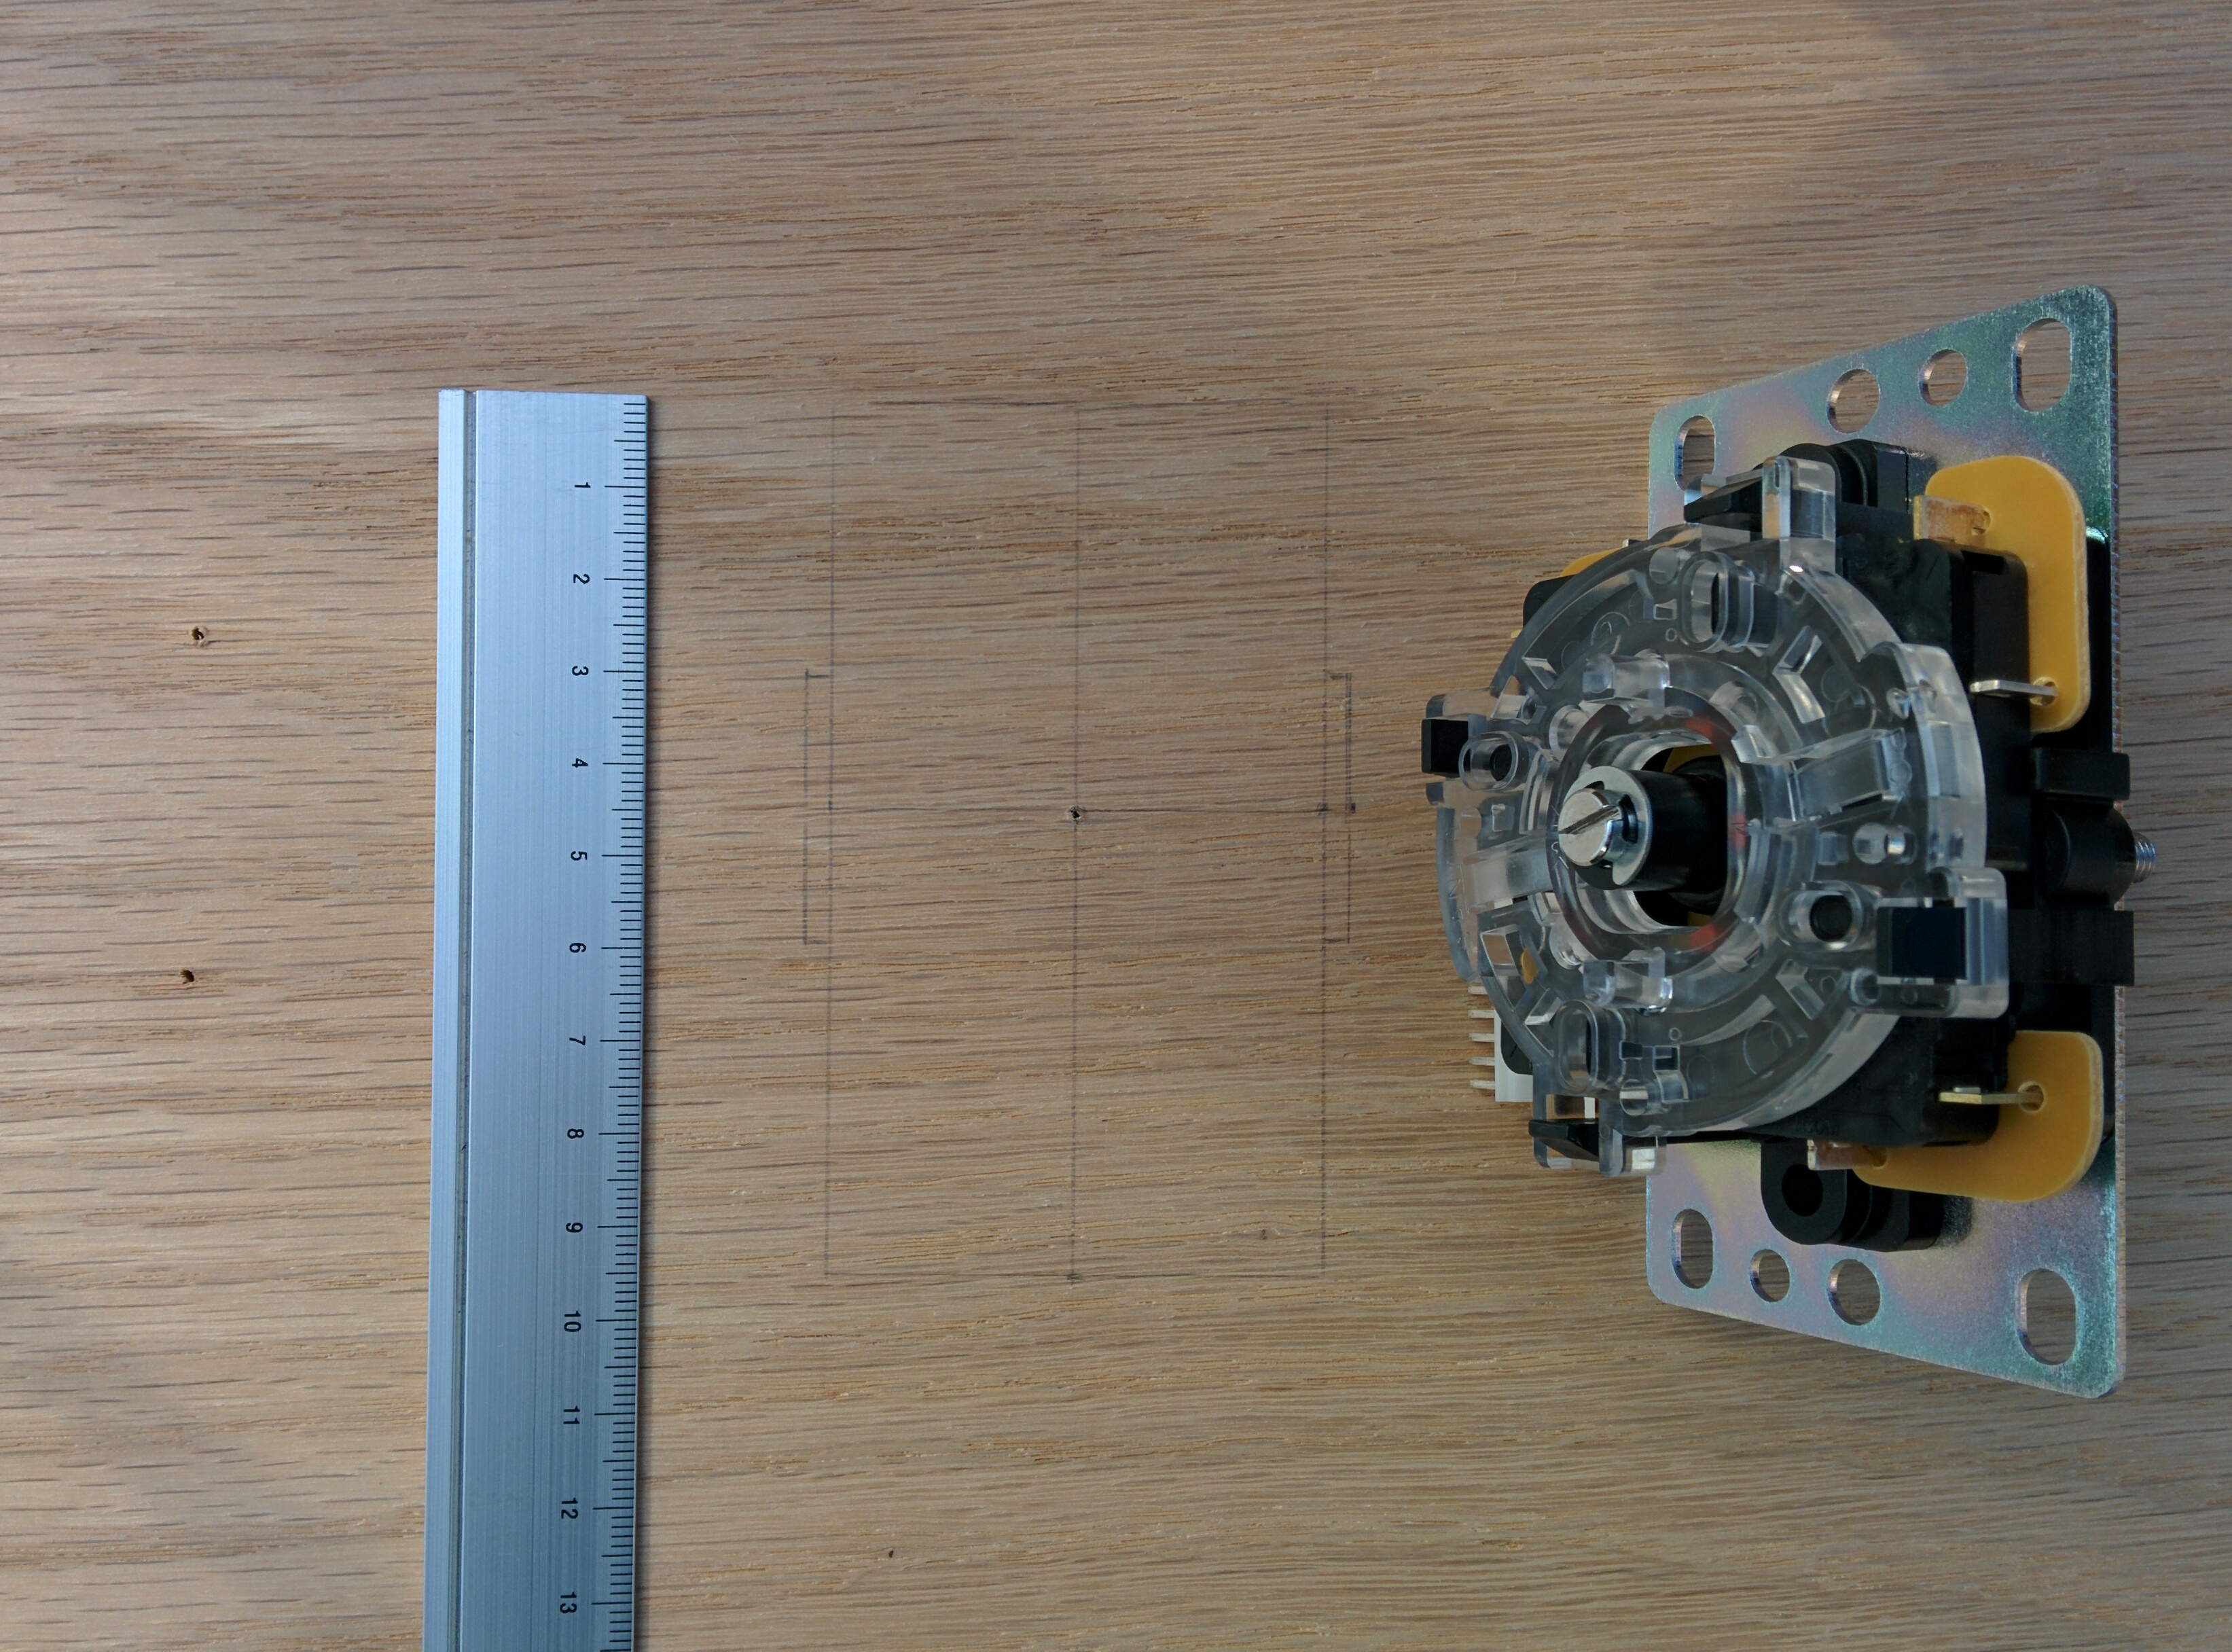
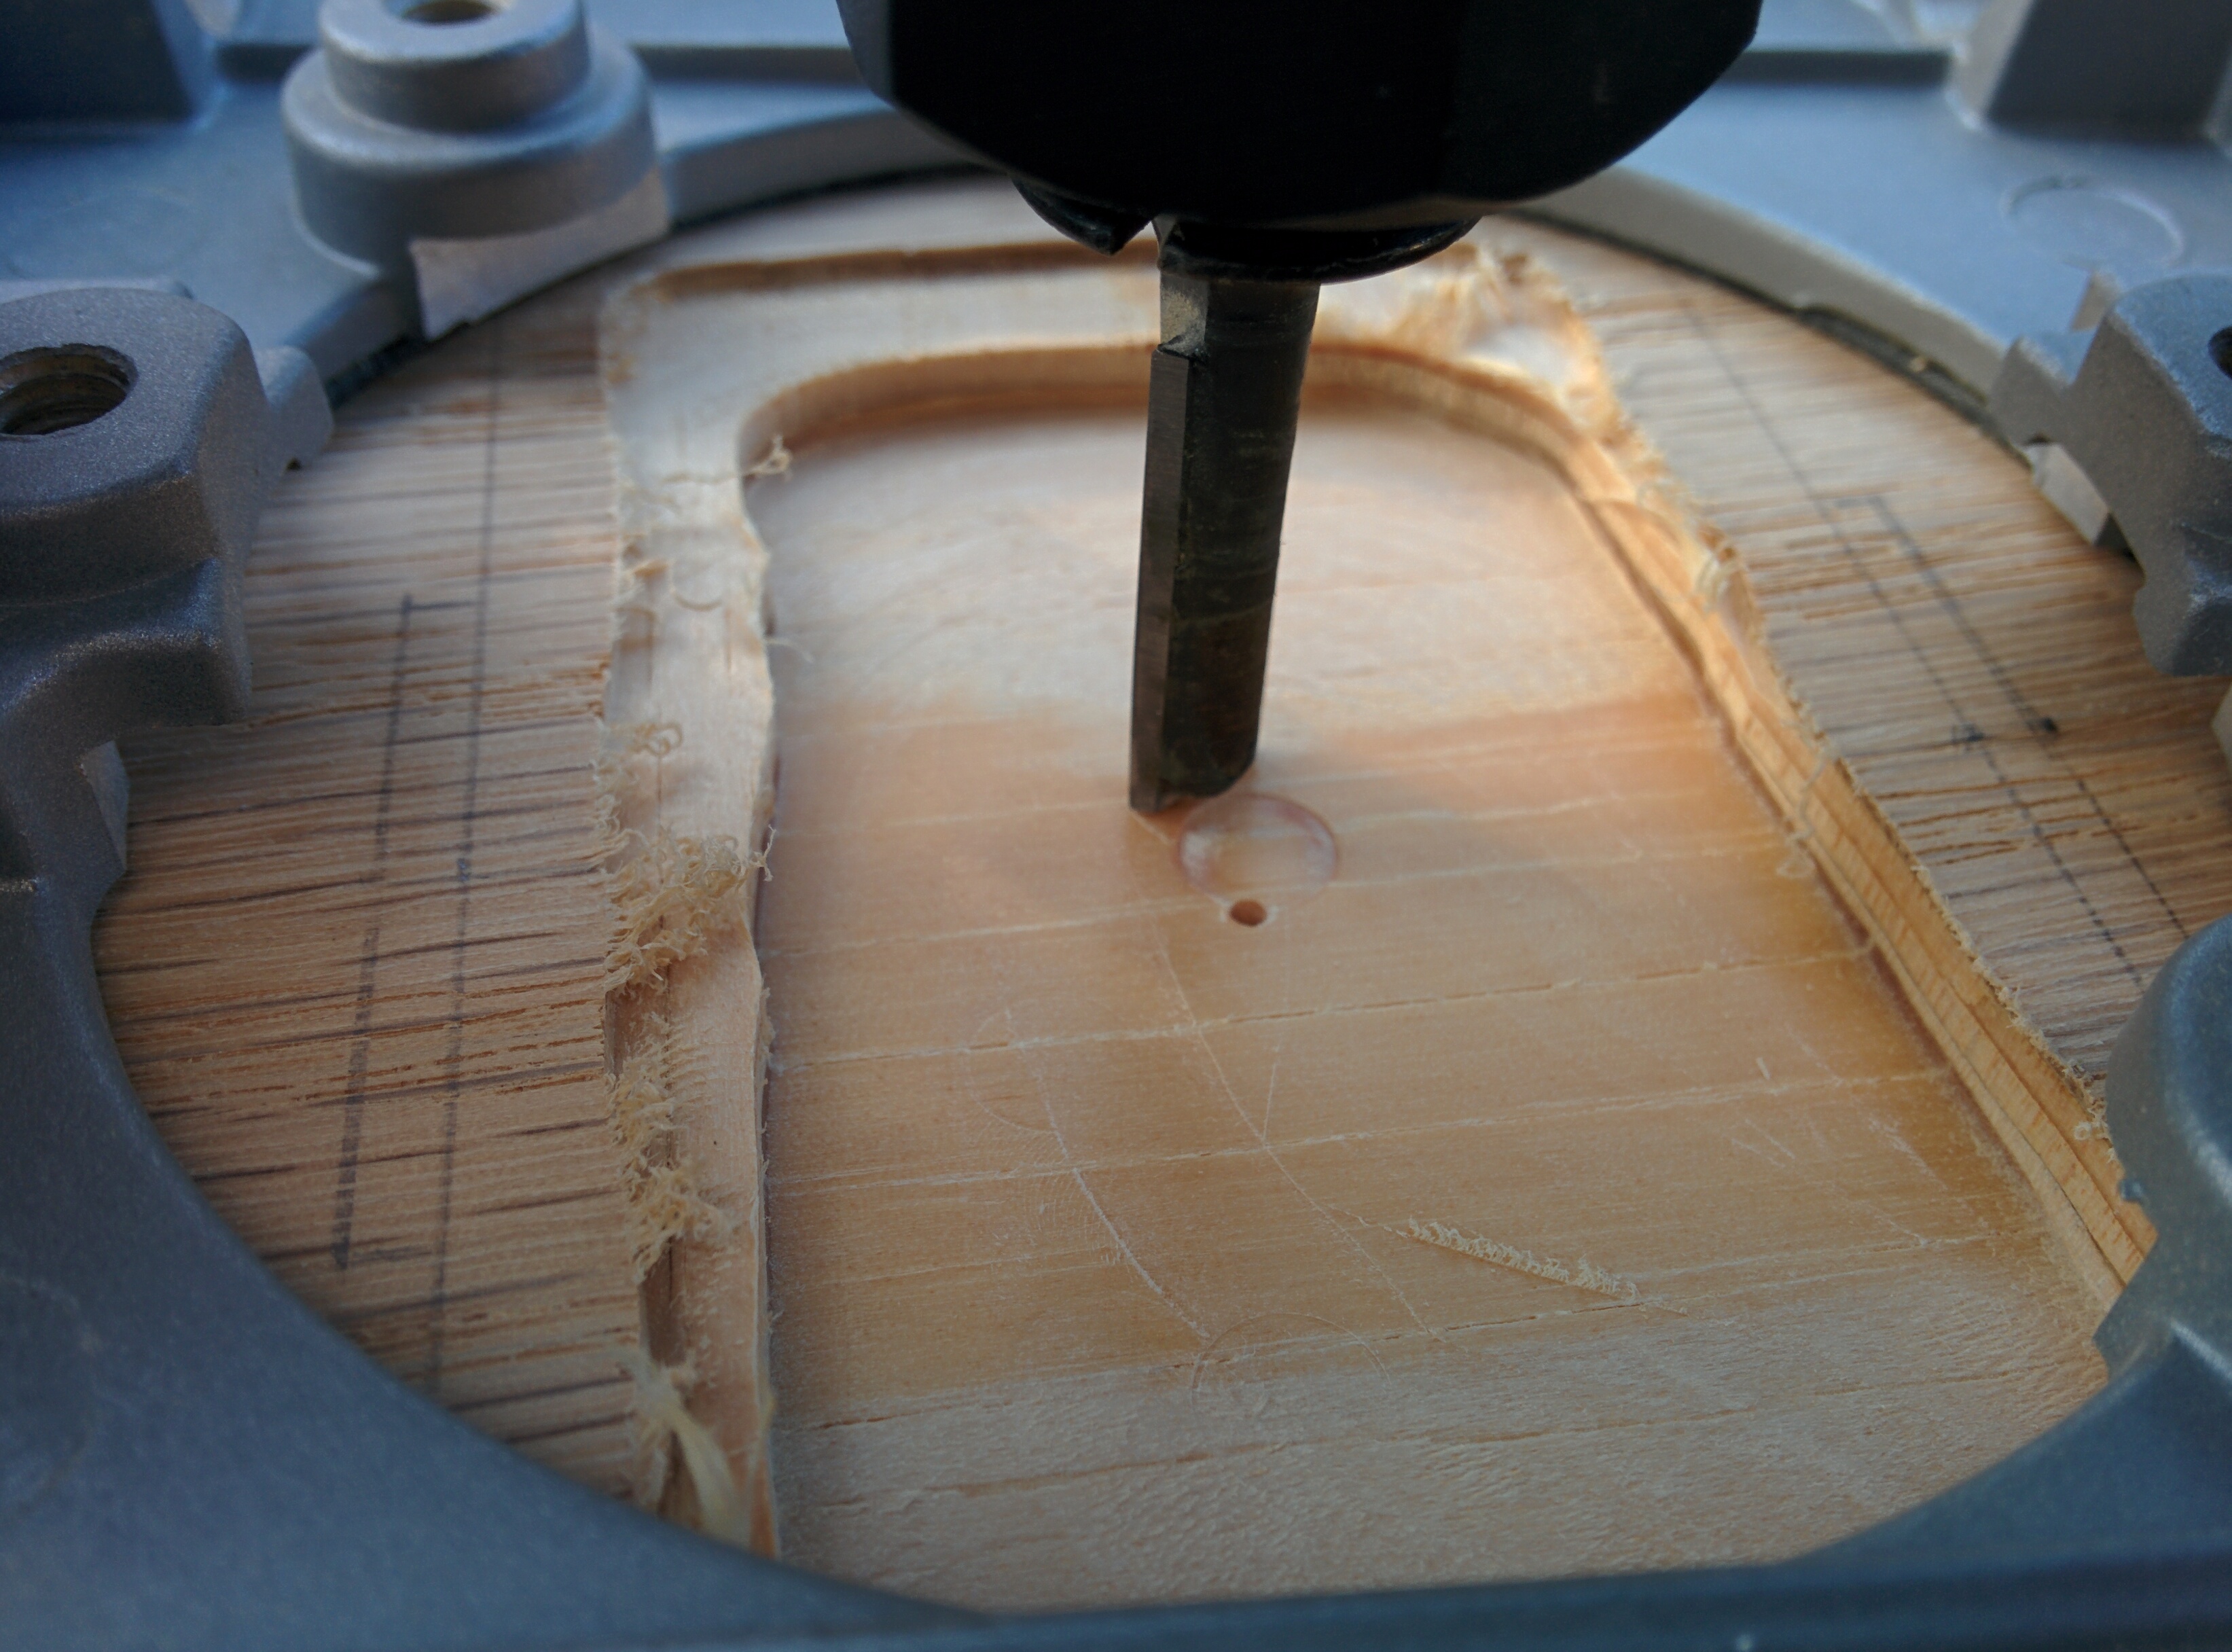
Sanwa joystick shafts are 32.5mm in length, and the joysticks themselves are typically mounted at a height where the bottom of the balltop is 23mm to 24mm above the top panel. The total thickness of my top panel is 0.0593" (0.5" of plywood plus 0.093" of acrylic sheet) or roughly 15.062mm, meaning I would have to drill about 6mm up from the underside in order to mount my joystick. I traced an outline of the area I would need to route out centered on the pilot hole I drew earlier, and proceeded to carve out the region with my plunge router.
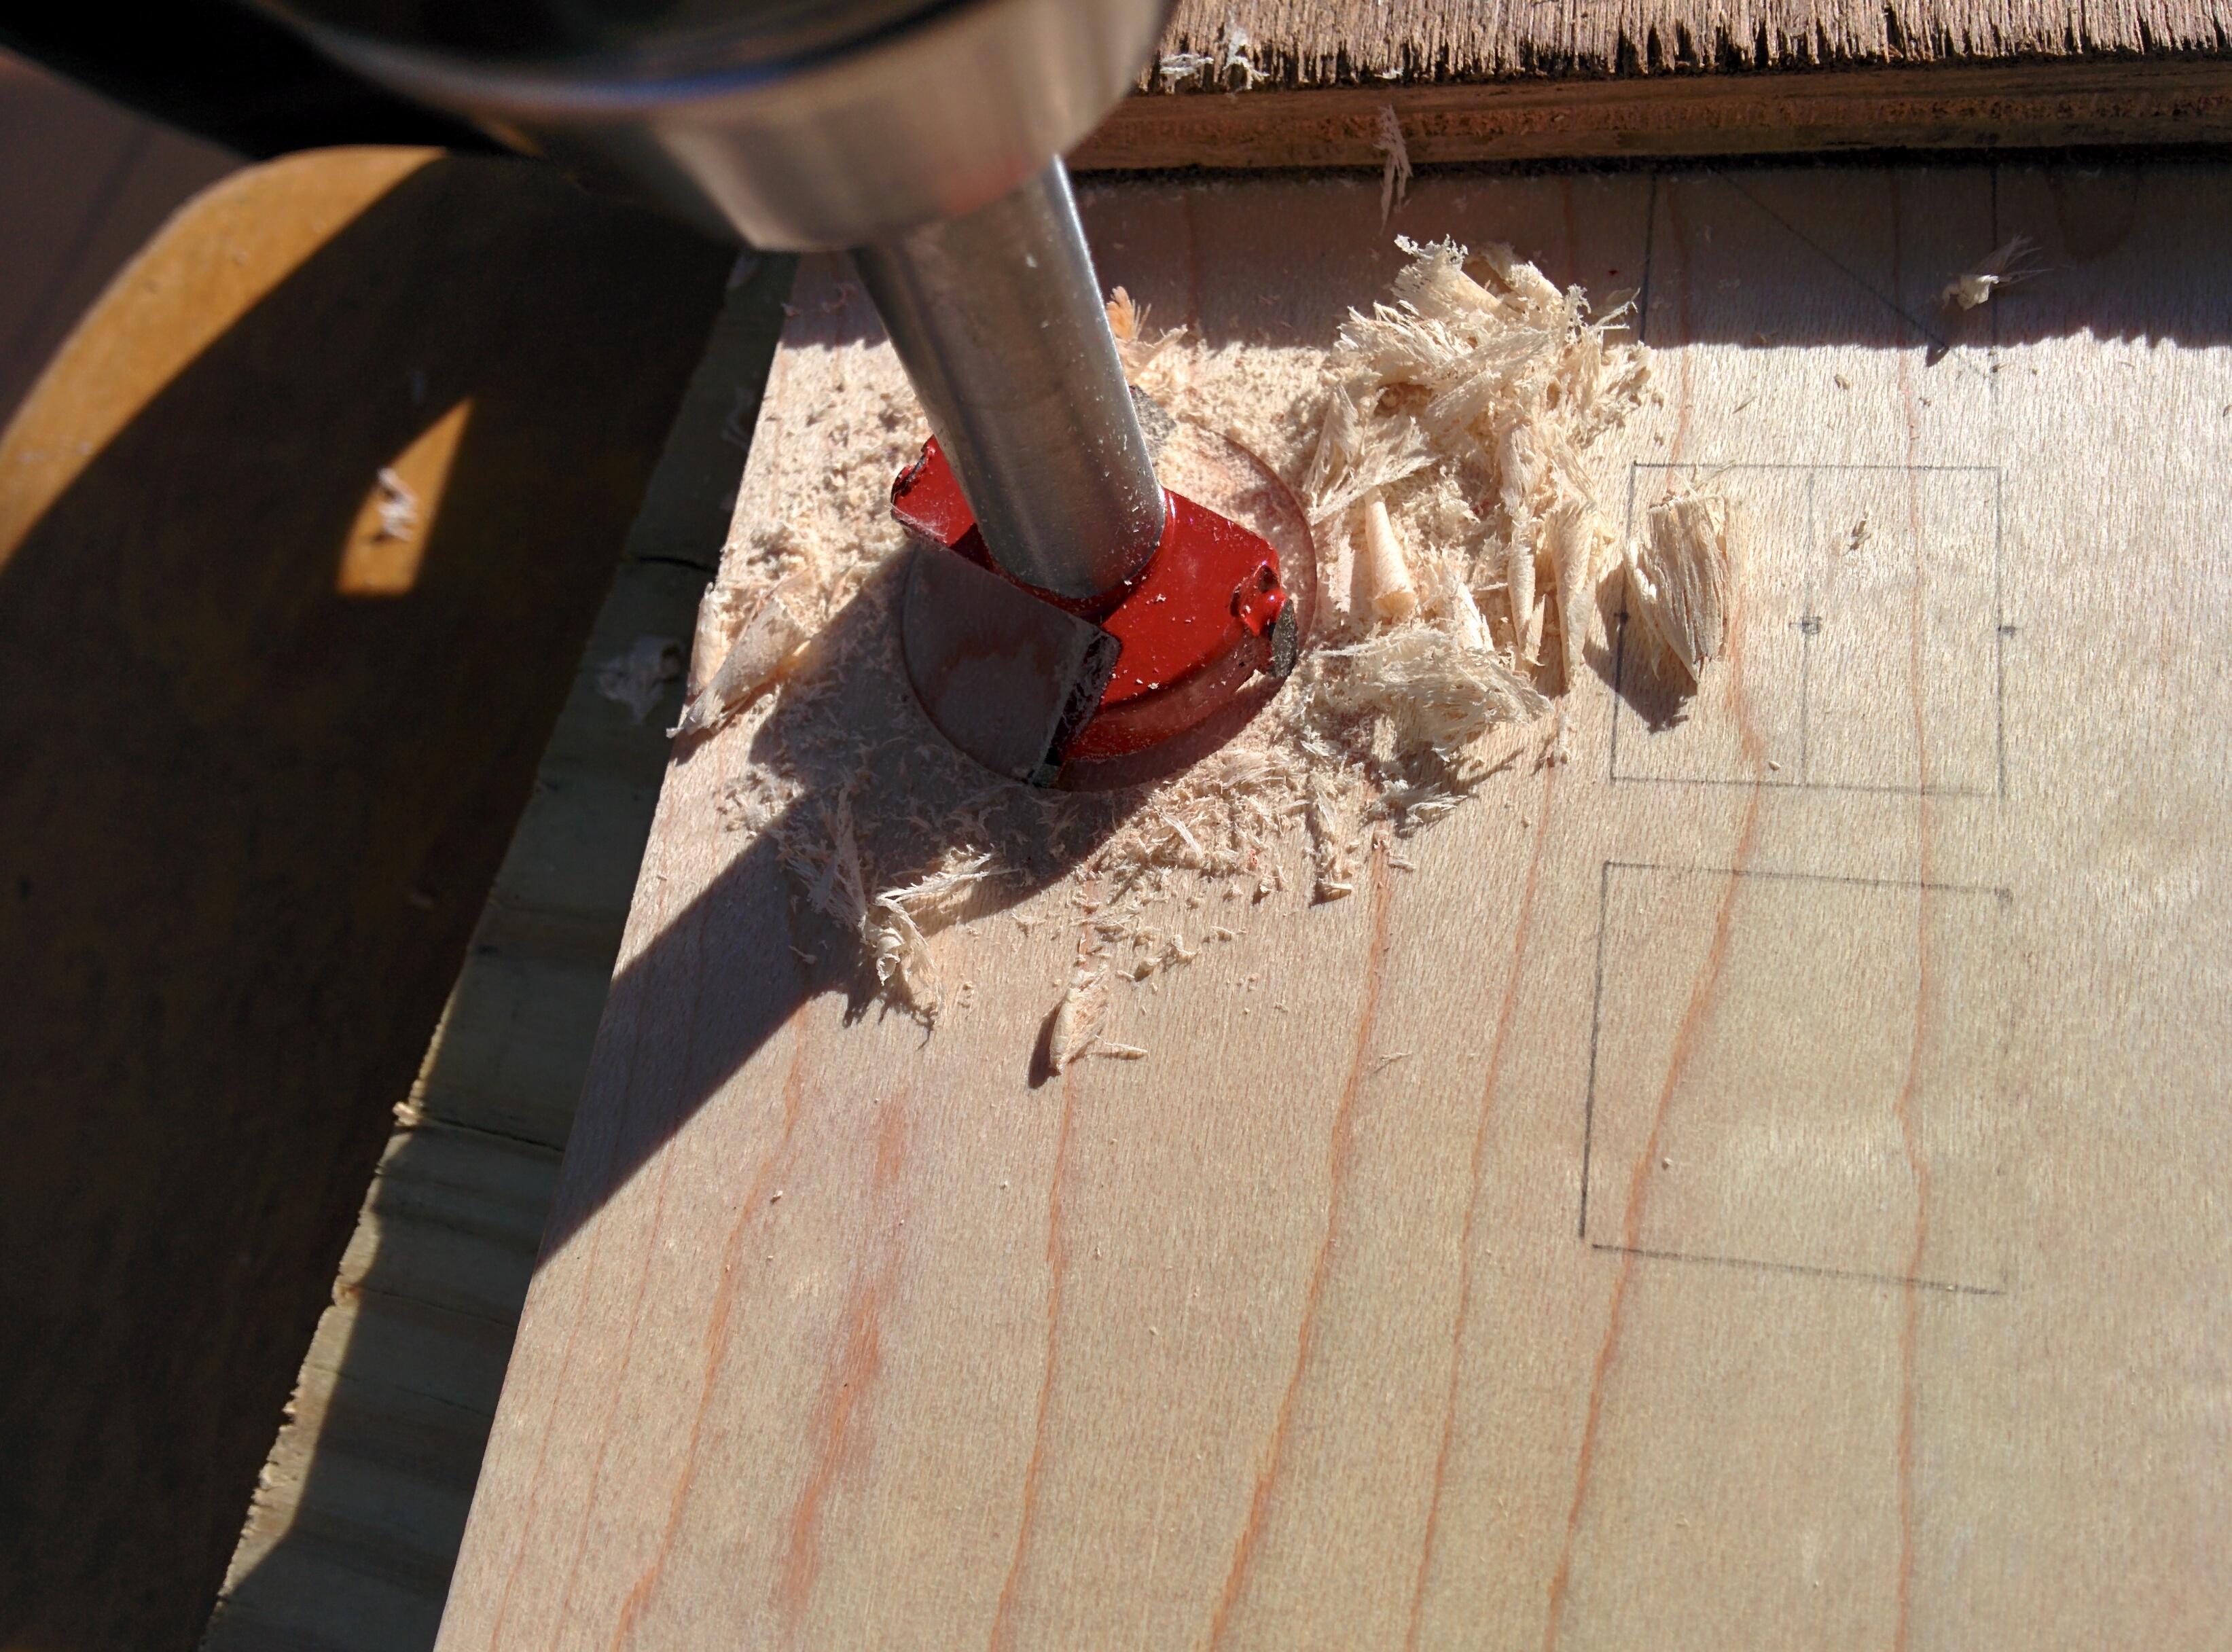
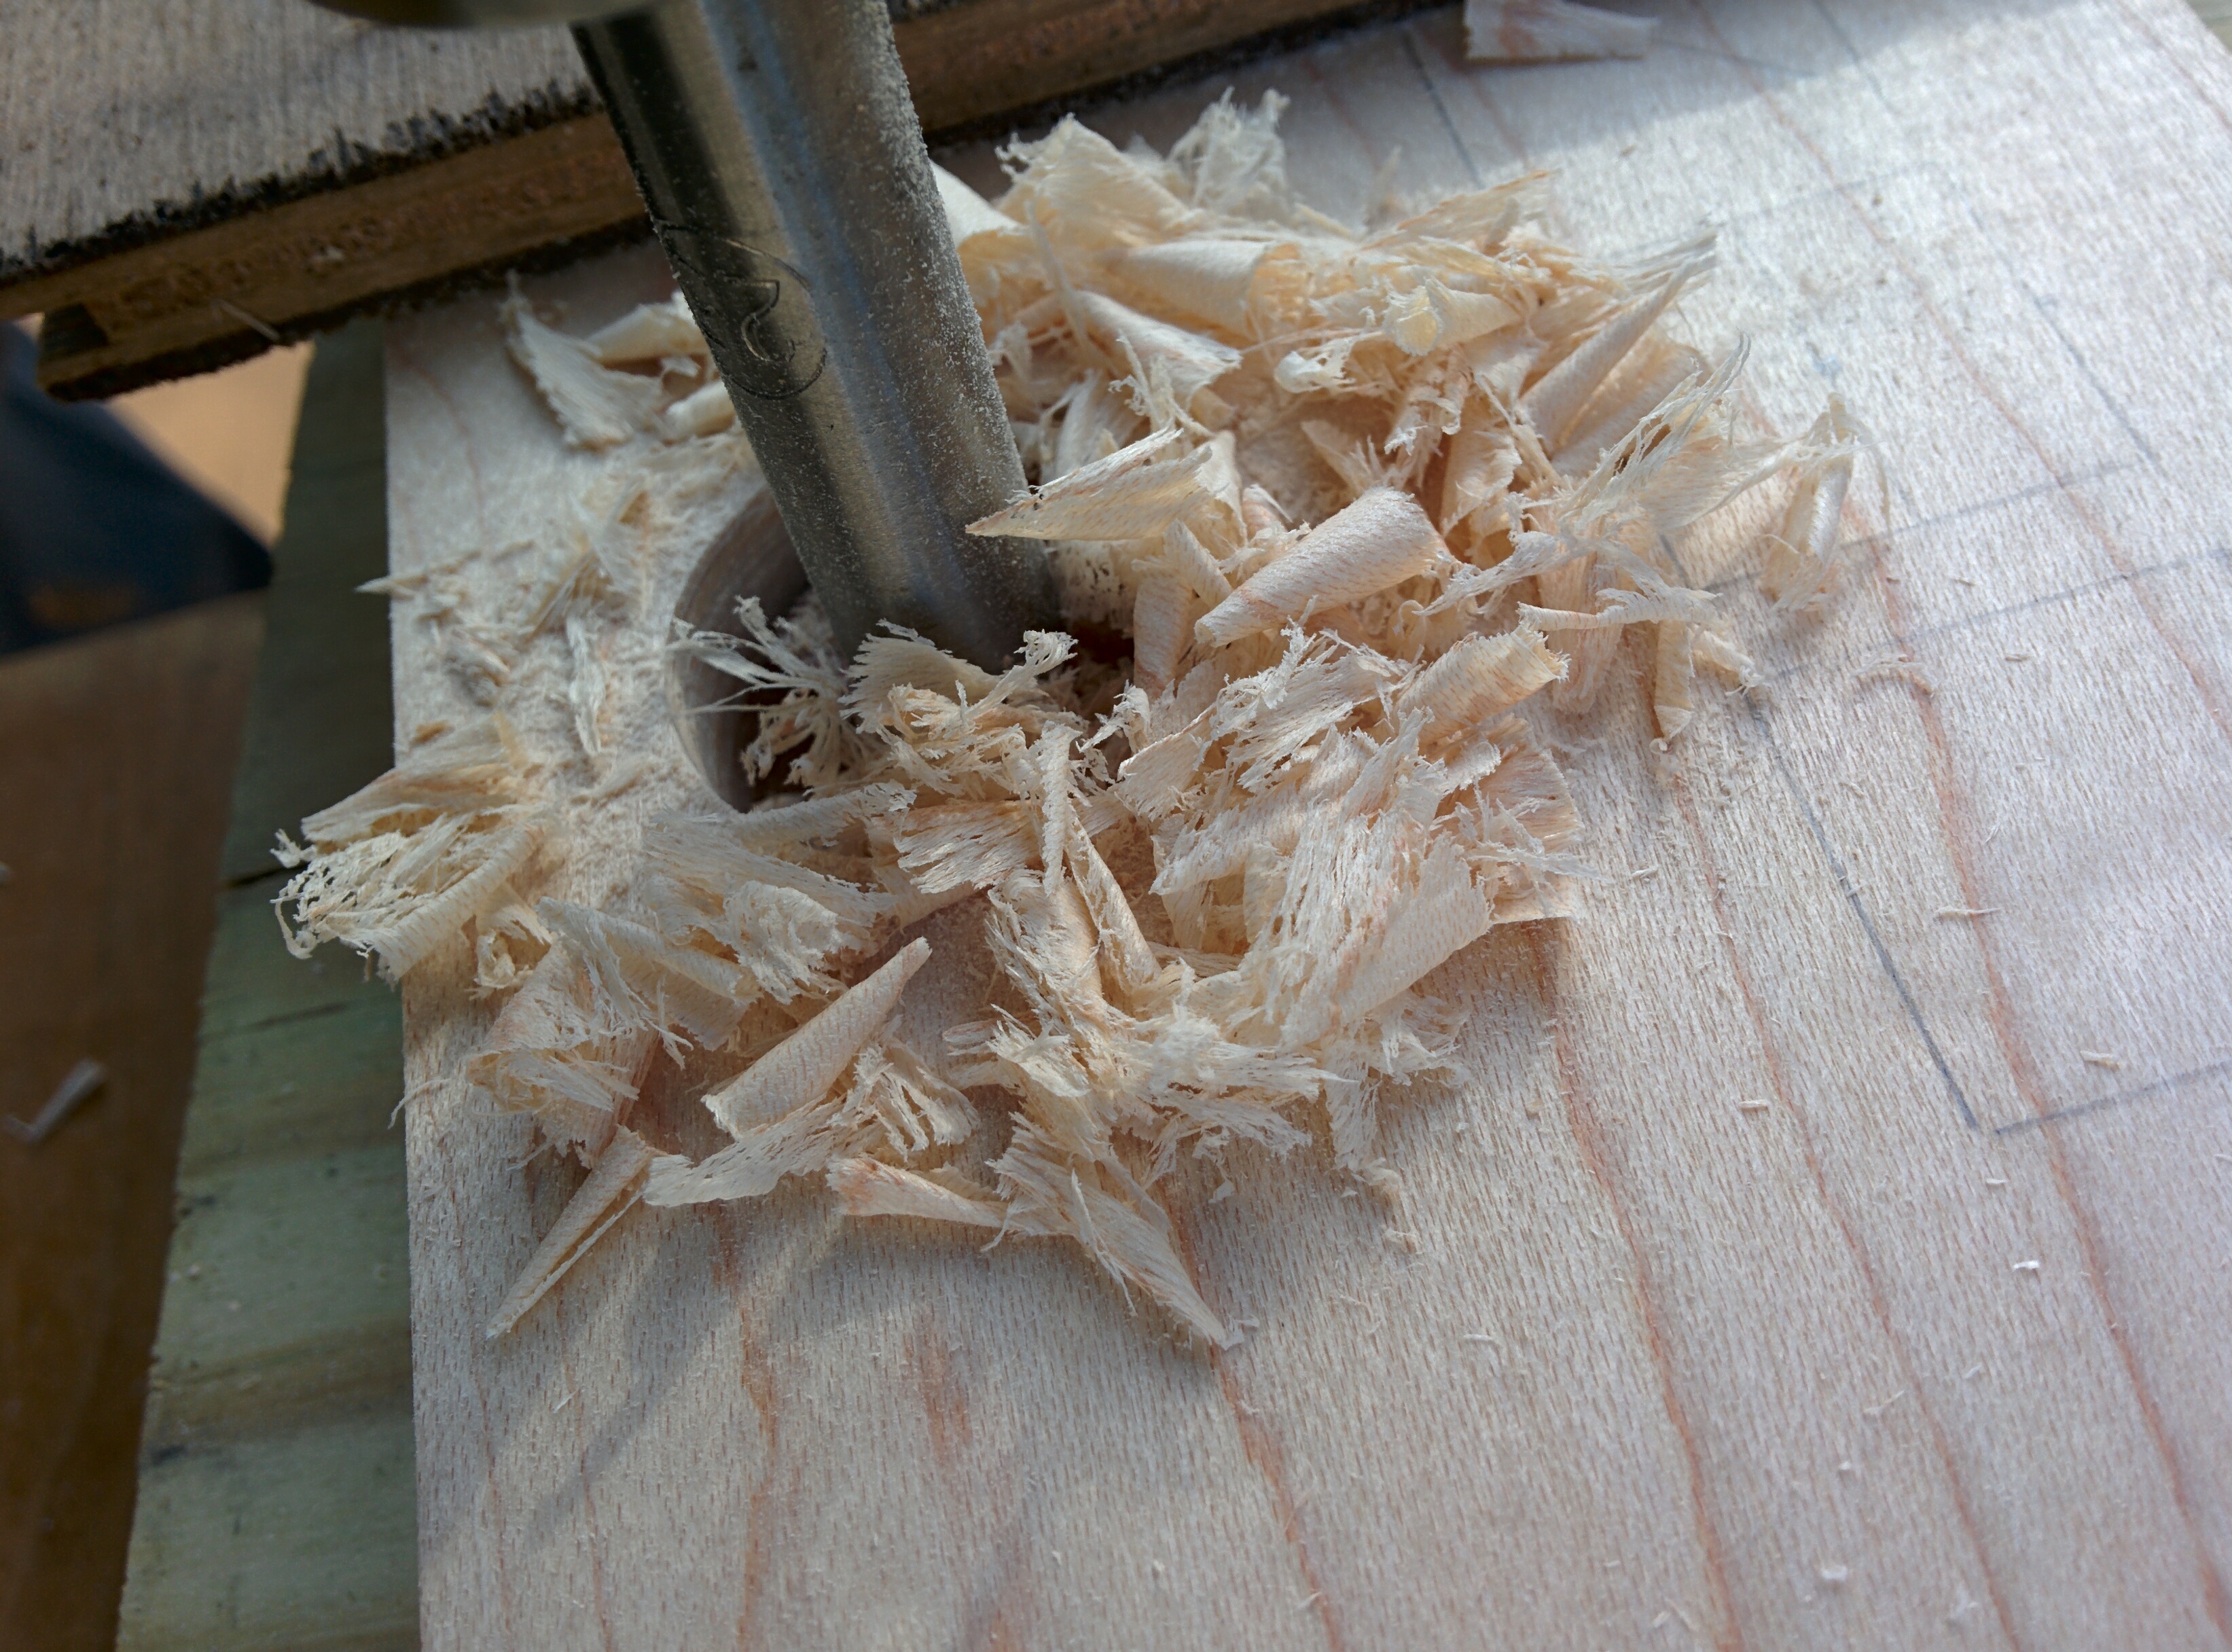
The solid maple from before wasn't too much of a problem when drilling with the Forstner bit, but plywood consists of multiple layers glued together in alternating directions, so expect jolts when the grain of the wood changes as you drill through. Your biggest enemies during this process are hidden branch piths within the plywood layers. They can cause your drill bit to catch or tear out a giant chunk of wood if you drill too fast. Let the drill bit do the work, and let it slowly carve away the wood until you break through to the bottom. Remember to have a piece of scrap wood on the other side to prevent blowout.


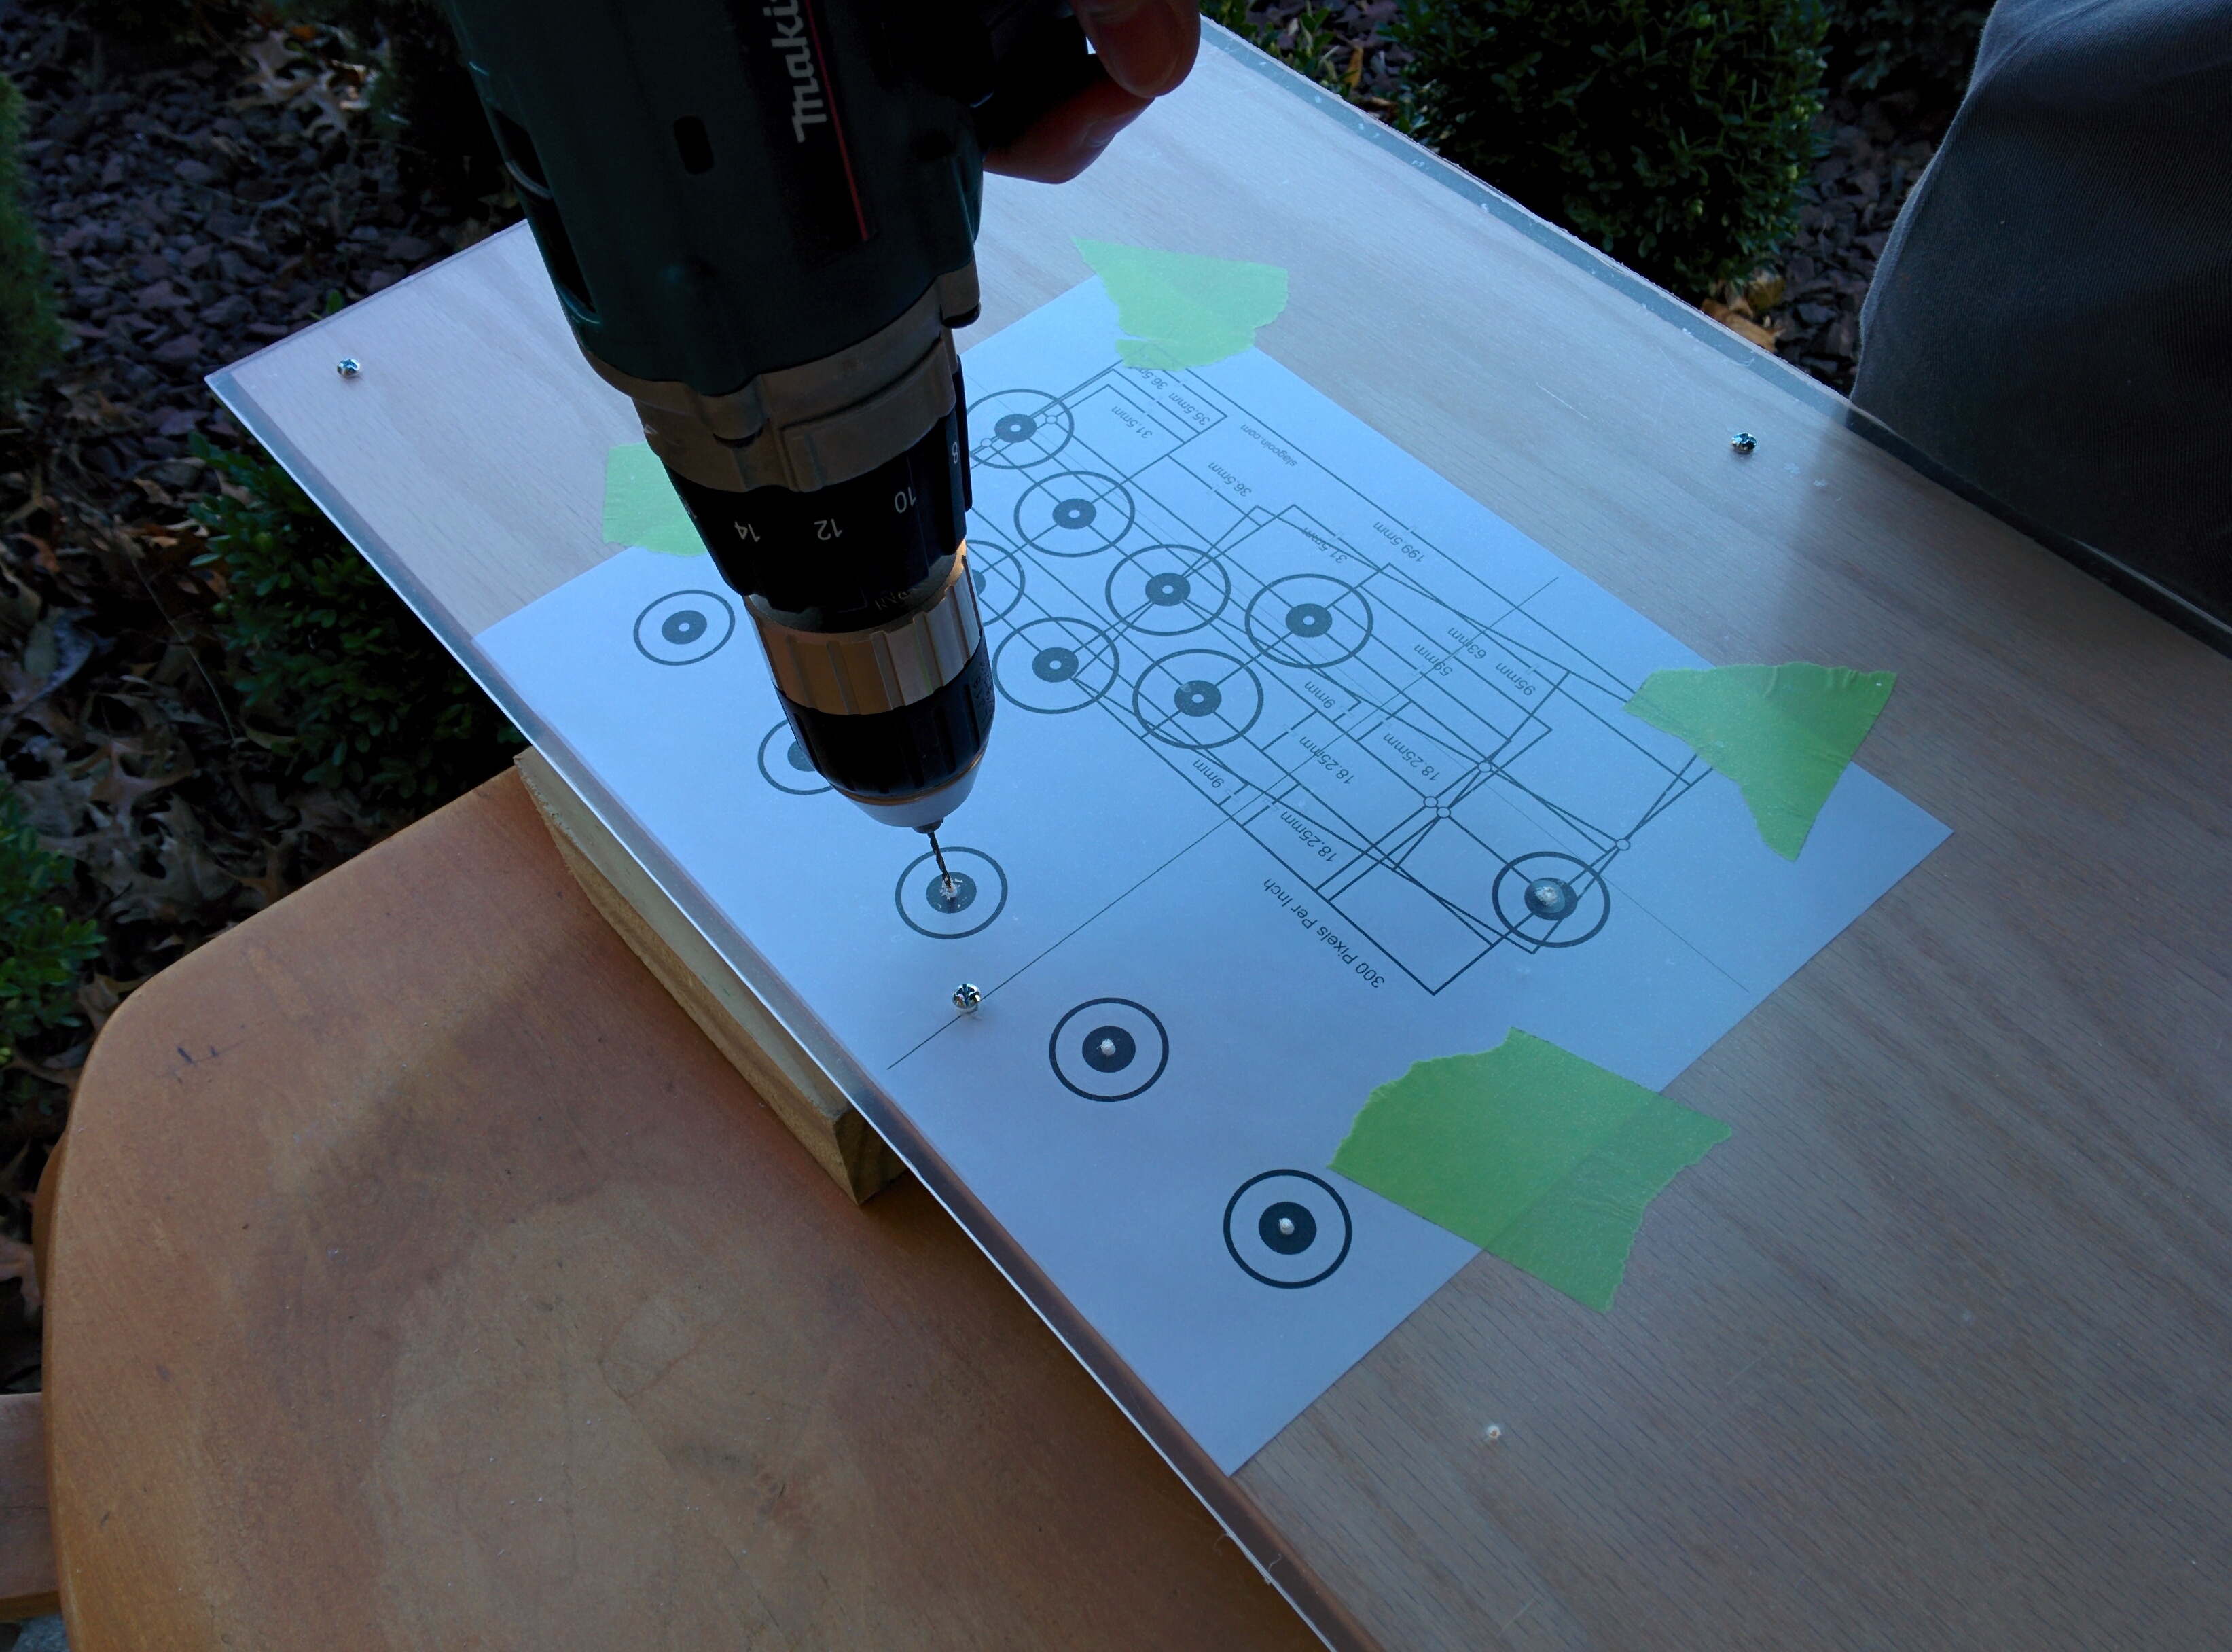
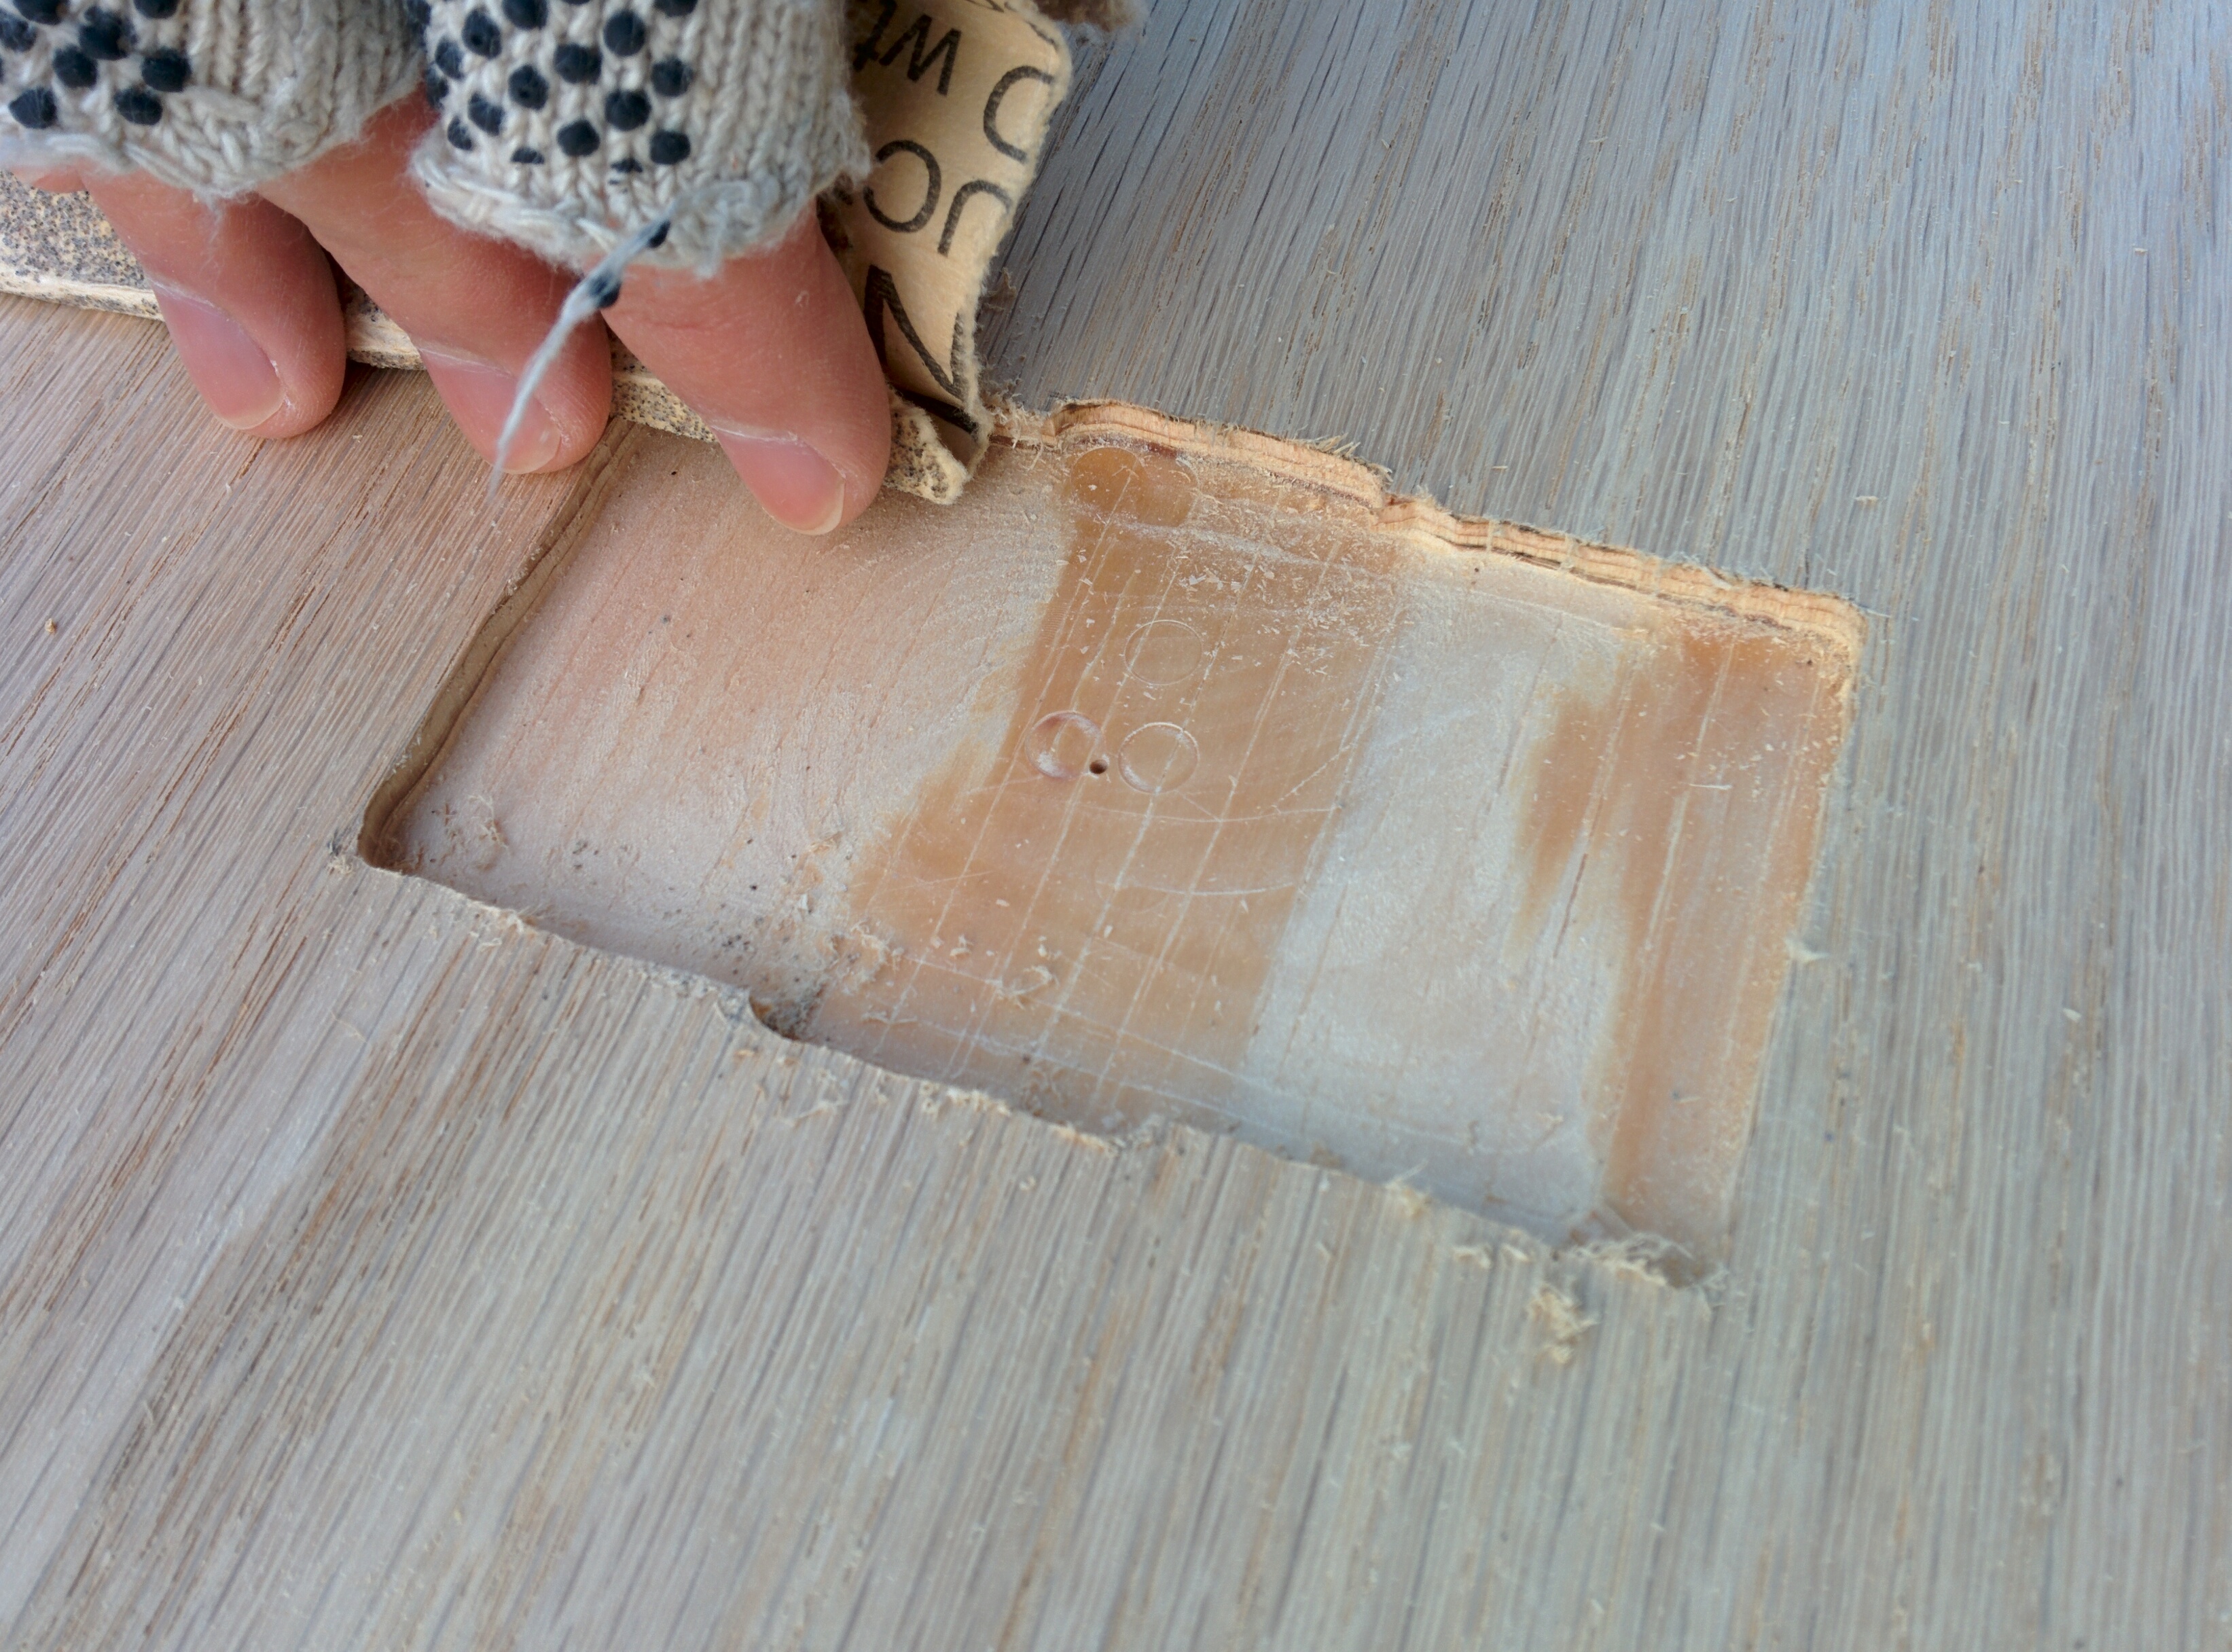
On the other hand, acrylic is much tougher than wood. A simple pilot hole won't be enough, as the Forstner bit will wobble around and grind both the pilot hole and the whole hole larger. Unless you've got a drill press (definitely use a drill press if you've got one), it's practically a requirement to make a jig out of a block of scrap wood to help you out. Drill out holes in a separate piece of wood with your Forstner bit and clamp it on top of your acrylic sheet, using the pilot hole and the center of the bit itself to help you center the jig correctly.
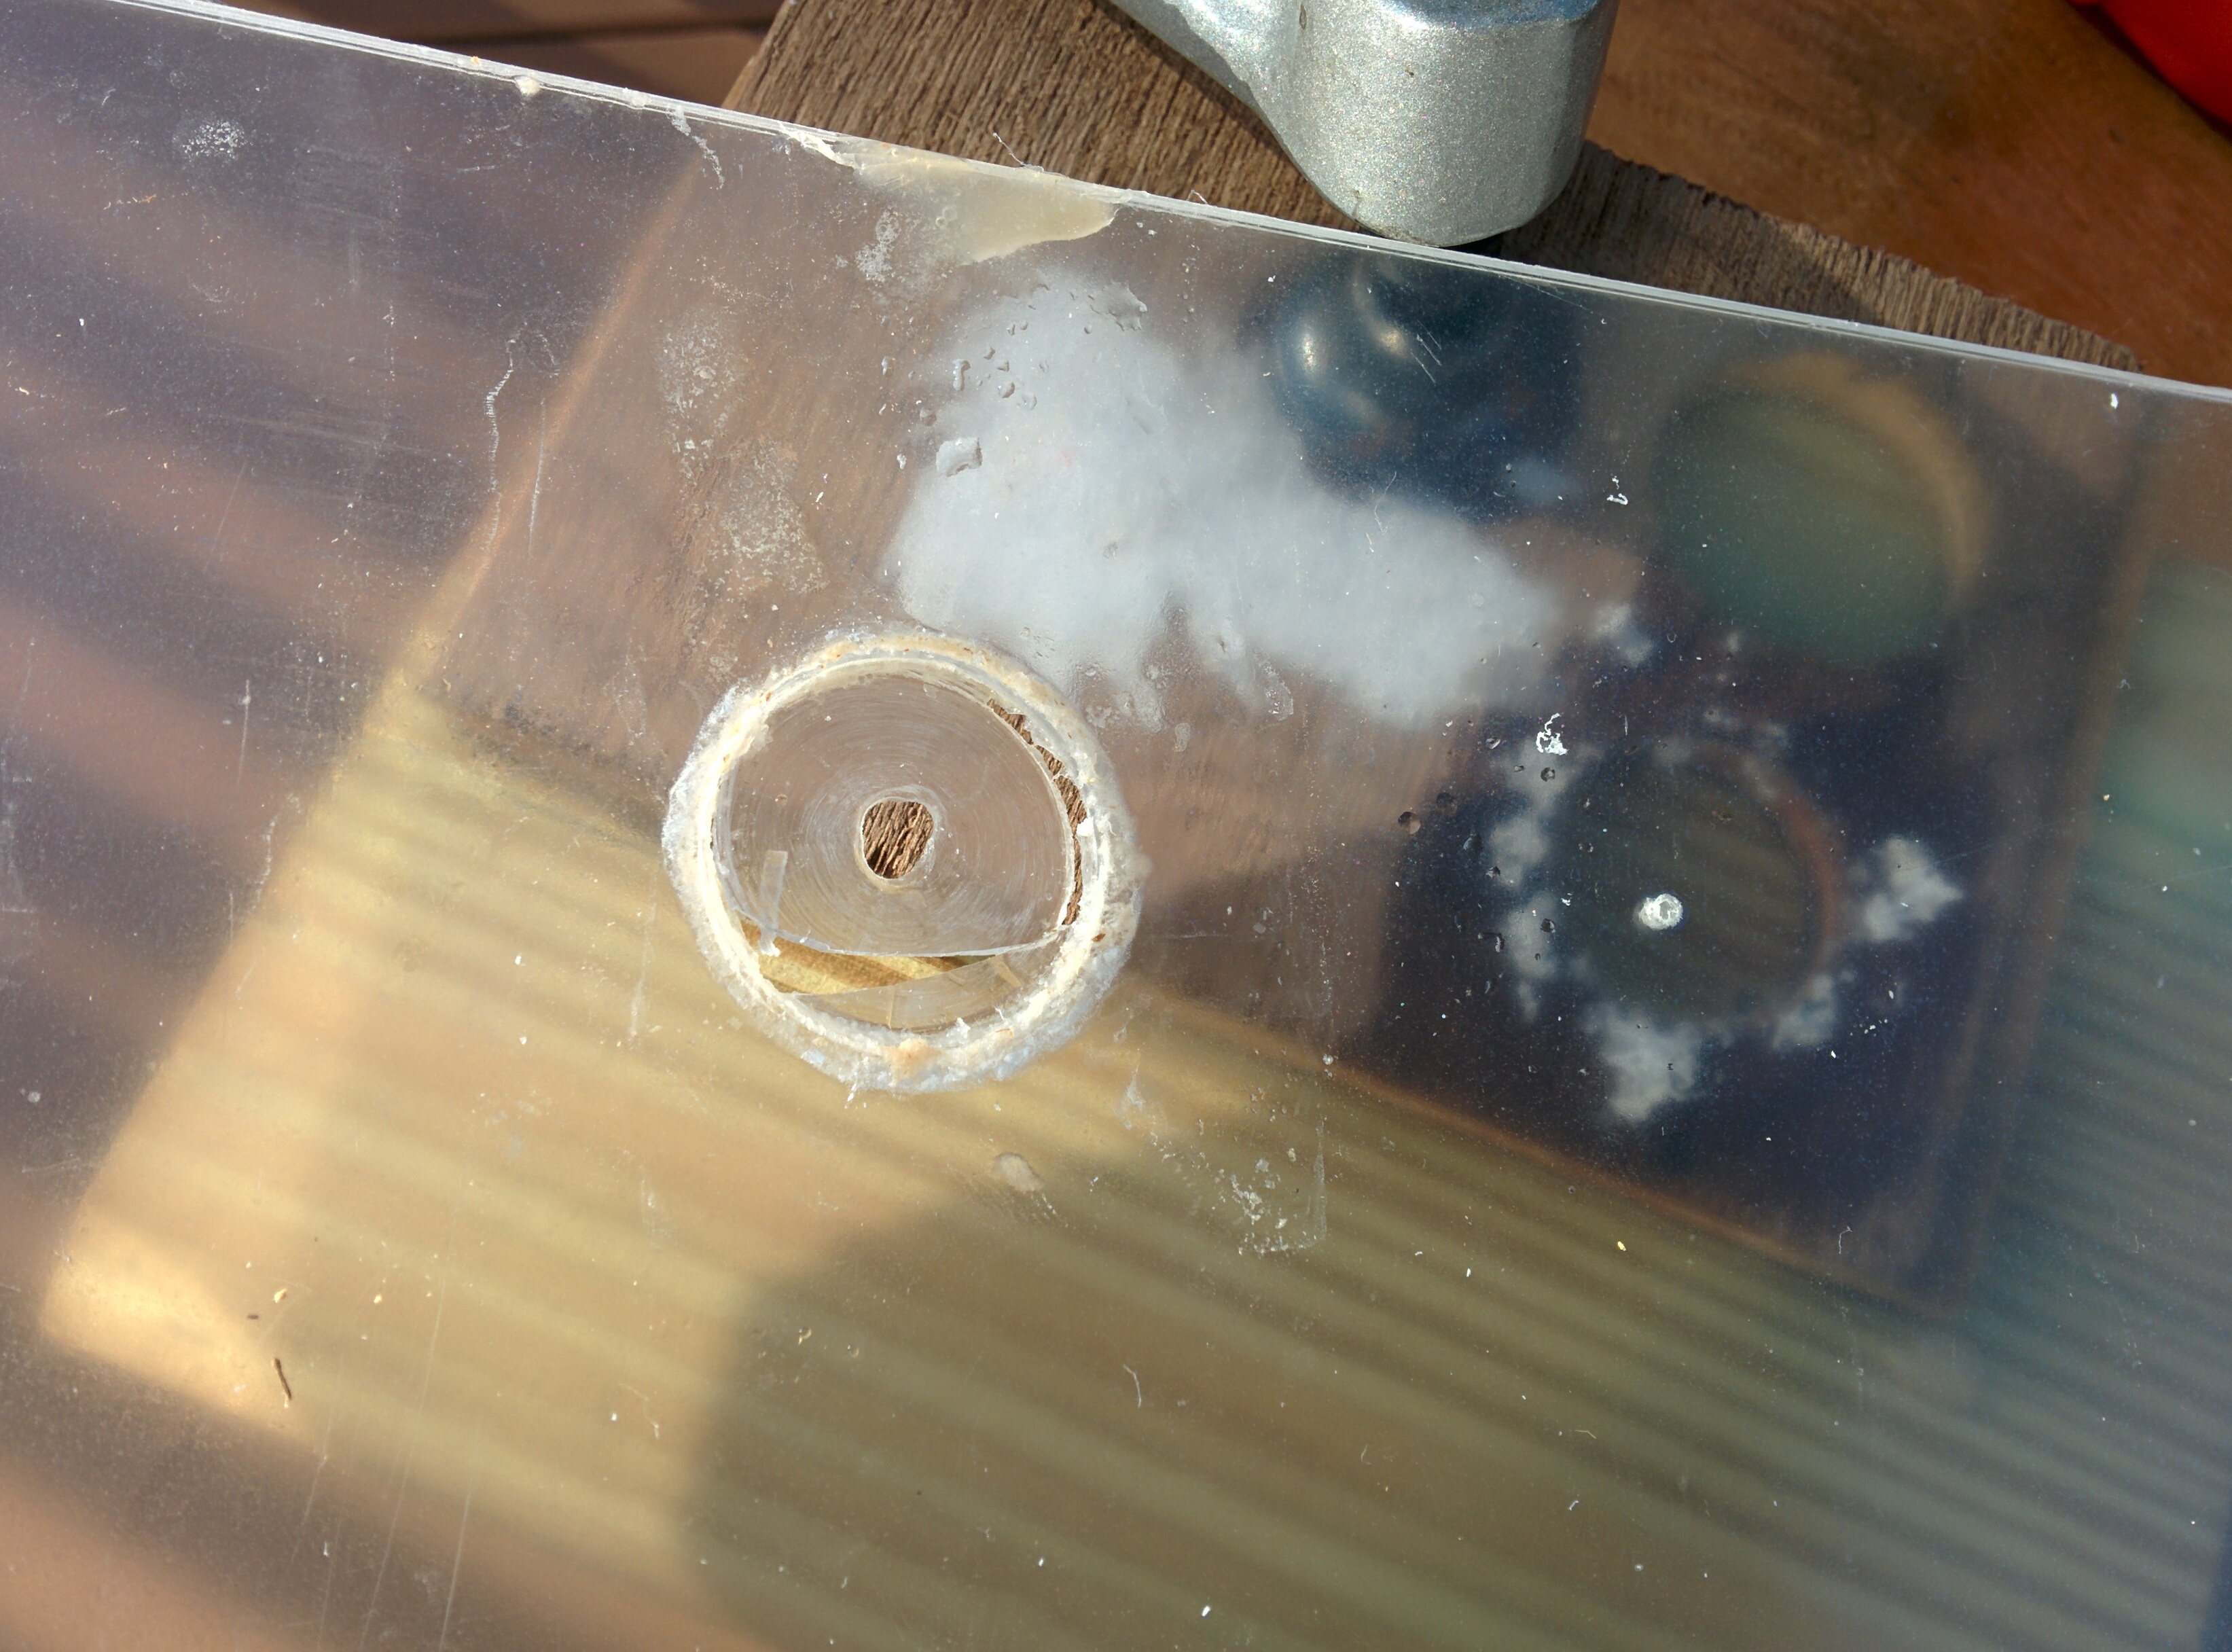
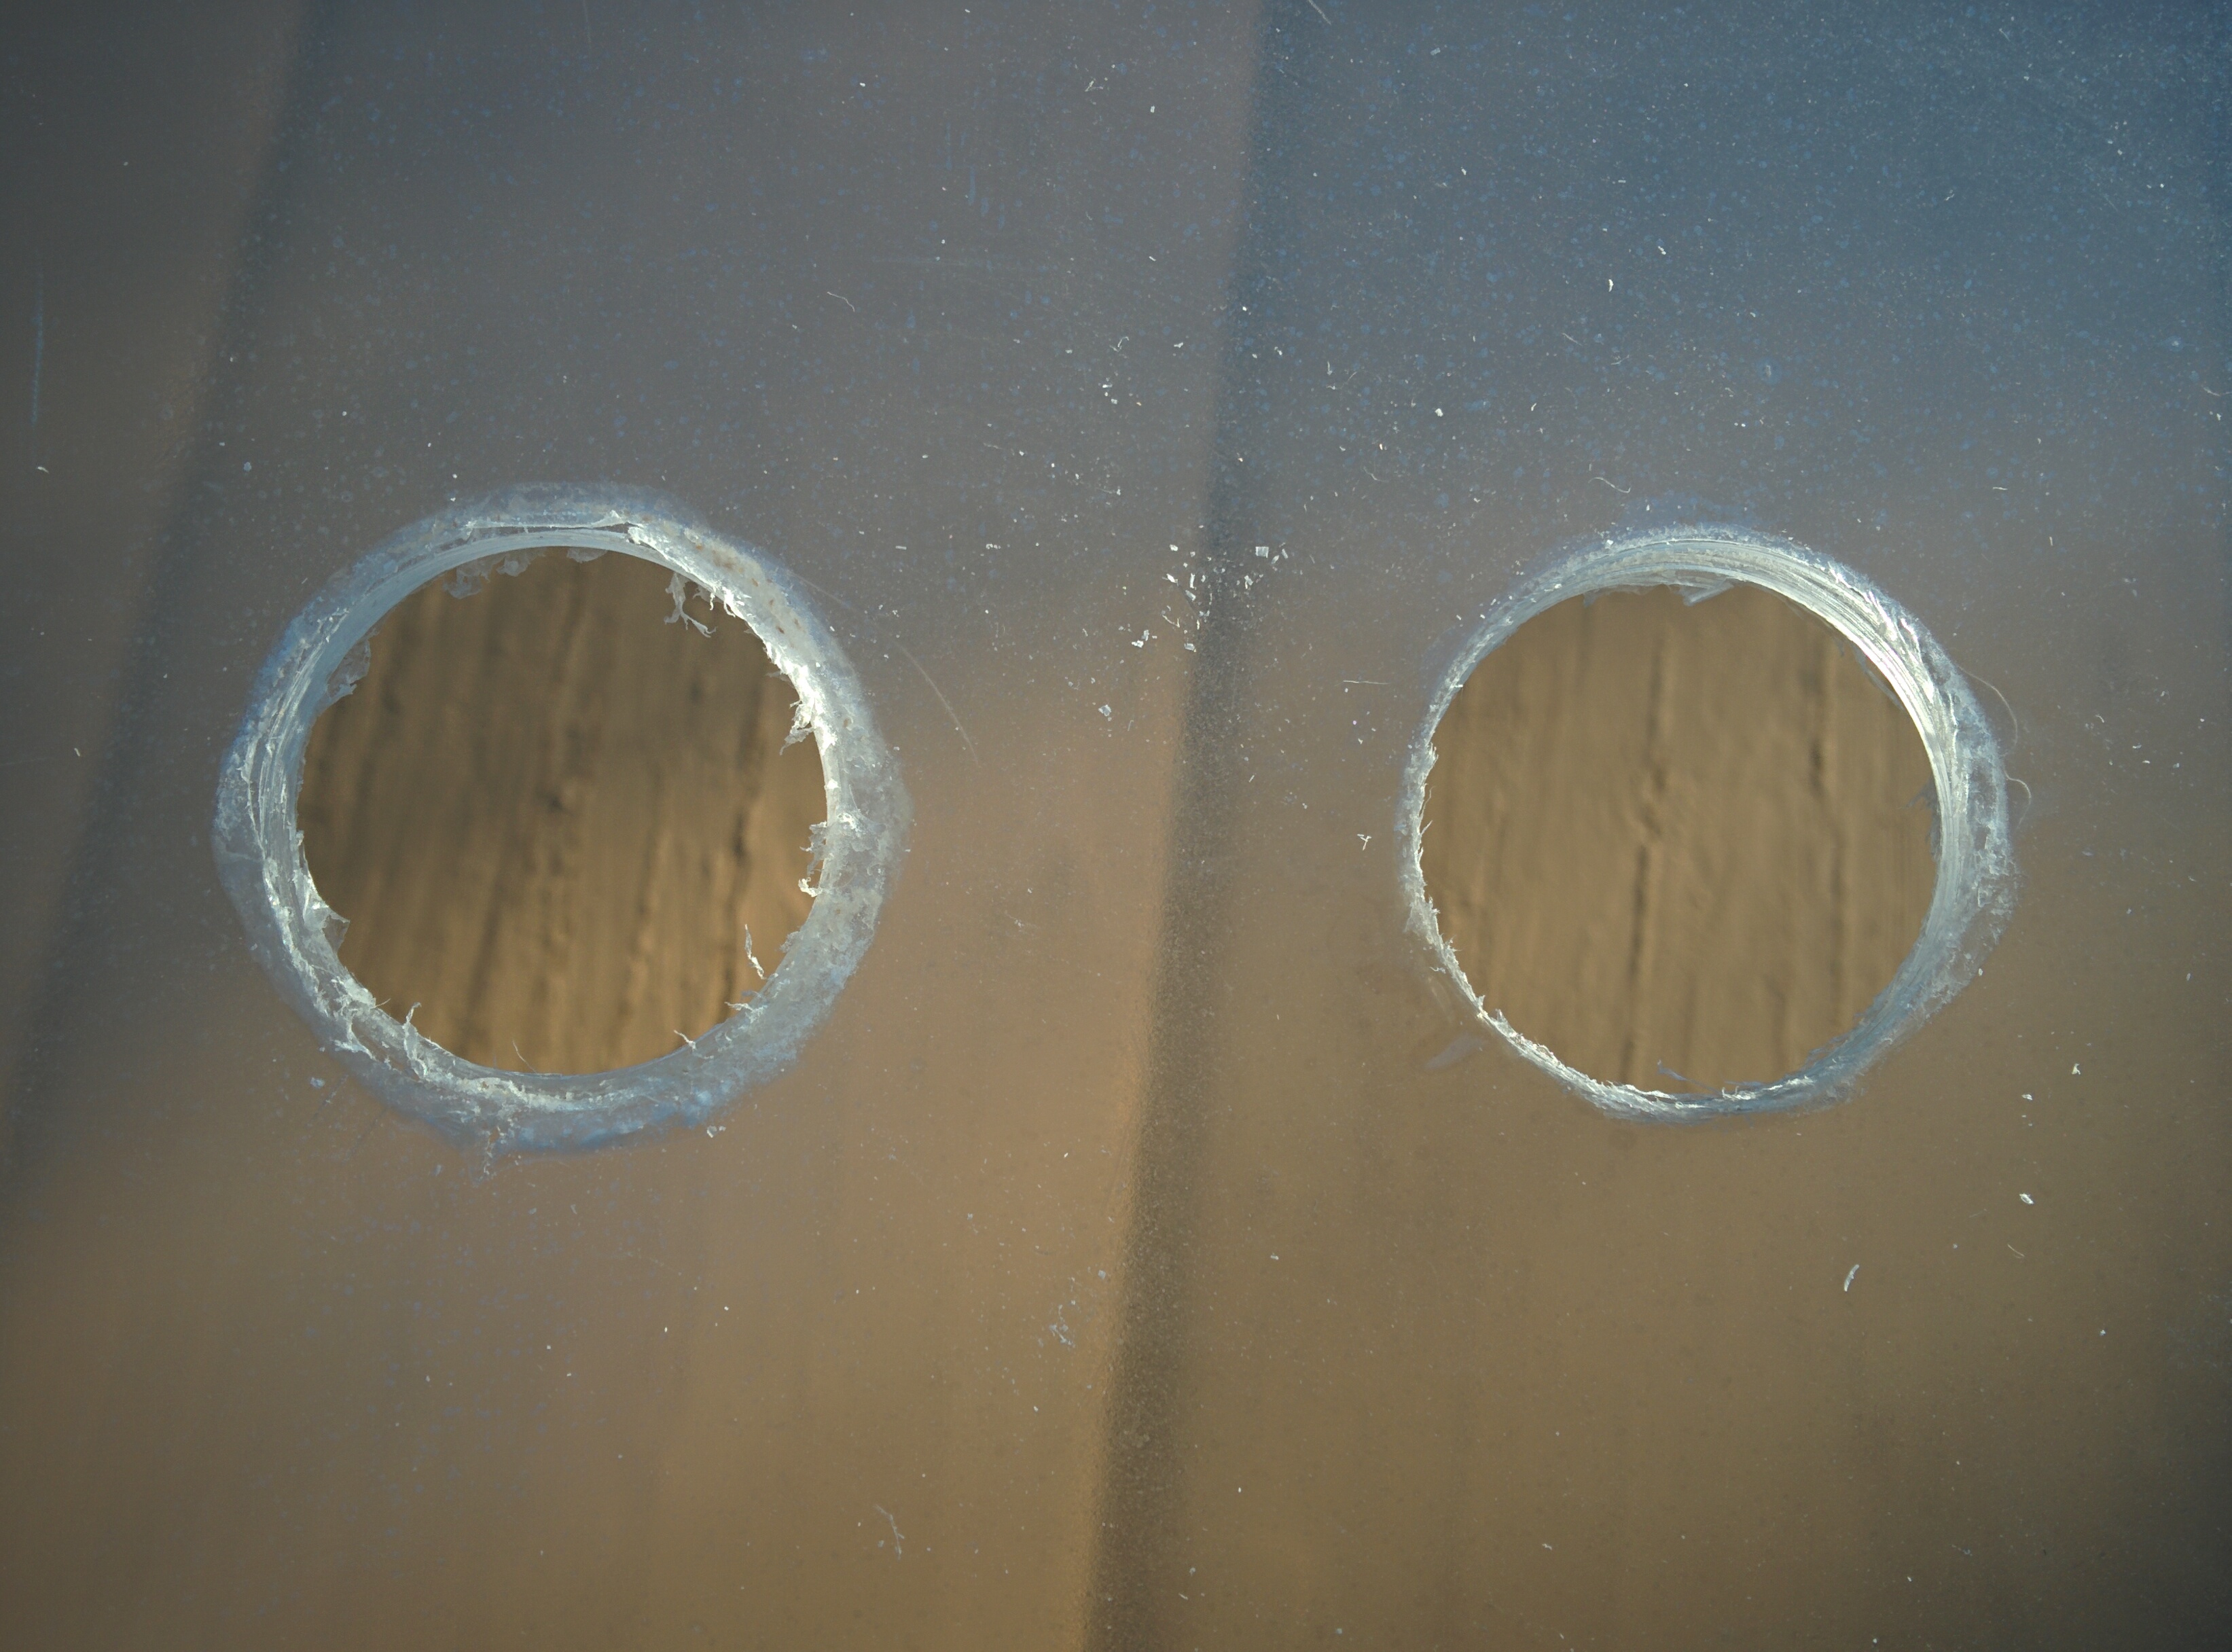
The jig is key. If you don't use a jig, your Forstner bit will end up grinding the pilot hole larger in the process and you'll end up with a hole much larger than you originally intended. This happened to two of my button holes. The first was the top-left 24mm button hole where I didn't have a jig, and the second was the larger 30mm button hole where I got careless and didn't properly clamp the jig down. Make sure your stuff is clamped down tightly, ideally you want one clamp on each side. Since I only had one clamp, the force on the jig cause it to rotate around the clamping point and mess up the hole. You can see the carnage from the pictures, I ended up having to scrap this sheet and buy another one. Live and learn I suppose.
You have two options here when it comes to actually drilling the holes though: you can either drill at a relatively low RPM to slowly shave layers off of the acrylic, or drill at a very high RPM to carve it away. Acrylic is prone to cracking; if your bit catches on the plastic, it can create large cracks in the material and ruin its appearance. To prevent the bit from catching, you need to either have the drill bit spin slowly and carefully, or spin fast enough that the bit no longer has any risk of catching and will instead cleave through your material. As with wood, clear out the resulting debris once in a while to avoid complications, since you will be grinding a lot of the plastic away. A little bit of lubrication can help as well, but in all likelihood you won't need it; I kept a spray bottle on hand when making practice holes but ended up never using it on my actual holes. It made clearing away the debris a messy and annoying job.
If you choose to go slowly, you want the two straight edges of the Forstner bit to do most of the work. Keep your drill as pependicular as possible while you drill, let the Forstner bit do its thing, and remember to lay off a little if you hear it grinding loudly against the surface. Doing it this way is arguably safer, but also takes a very long time. Each hole took me around 10-15 minutes to get through in this fashion despite the acrylic being only 0.093" thick.
If you choose to go quickly, you want the two teeth on the outside of the Forstner bit to do most of the work. Keep the drill bit spinning at a relatively high speed and slightly gyrate the drill and you tunnel into the material. This will allow the teeth to bite into the sides of the hole as you work your way down. Obviously there's a bit of extra risk that comes with doing it in this manner, and the loud cracking you'll probably hear as you breach the bottom of the acrylic sheet can be frightening at first, but the hole itself should not get messed up. Don't hesitate or slightly slow the drill down; that's what causes the bit to catch. My father taught me this method, and so far, none of the holes I've drilled have had any issues. Each one takes me a little under a minute to do to boot.
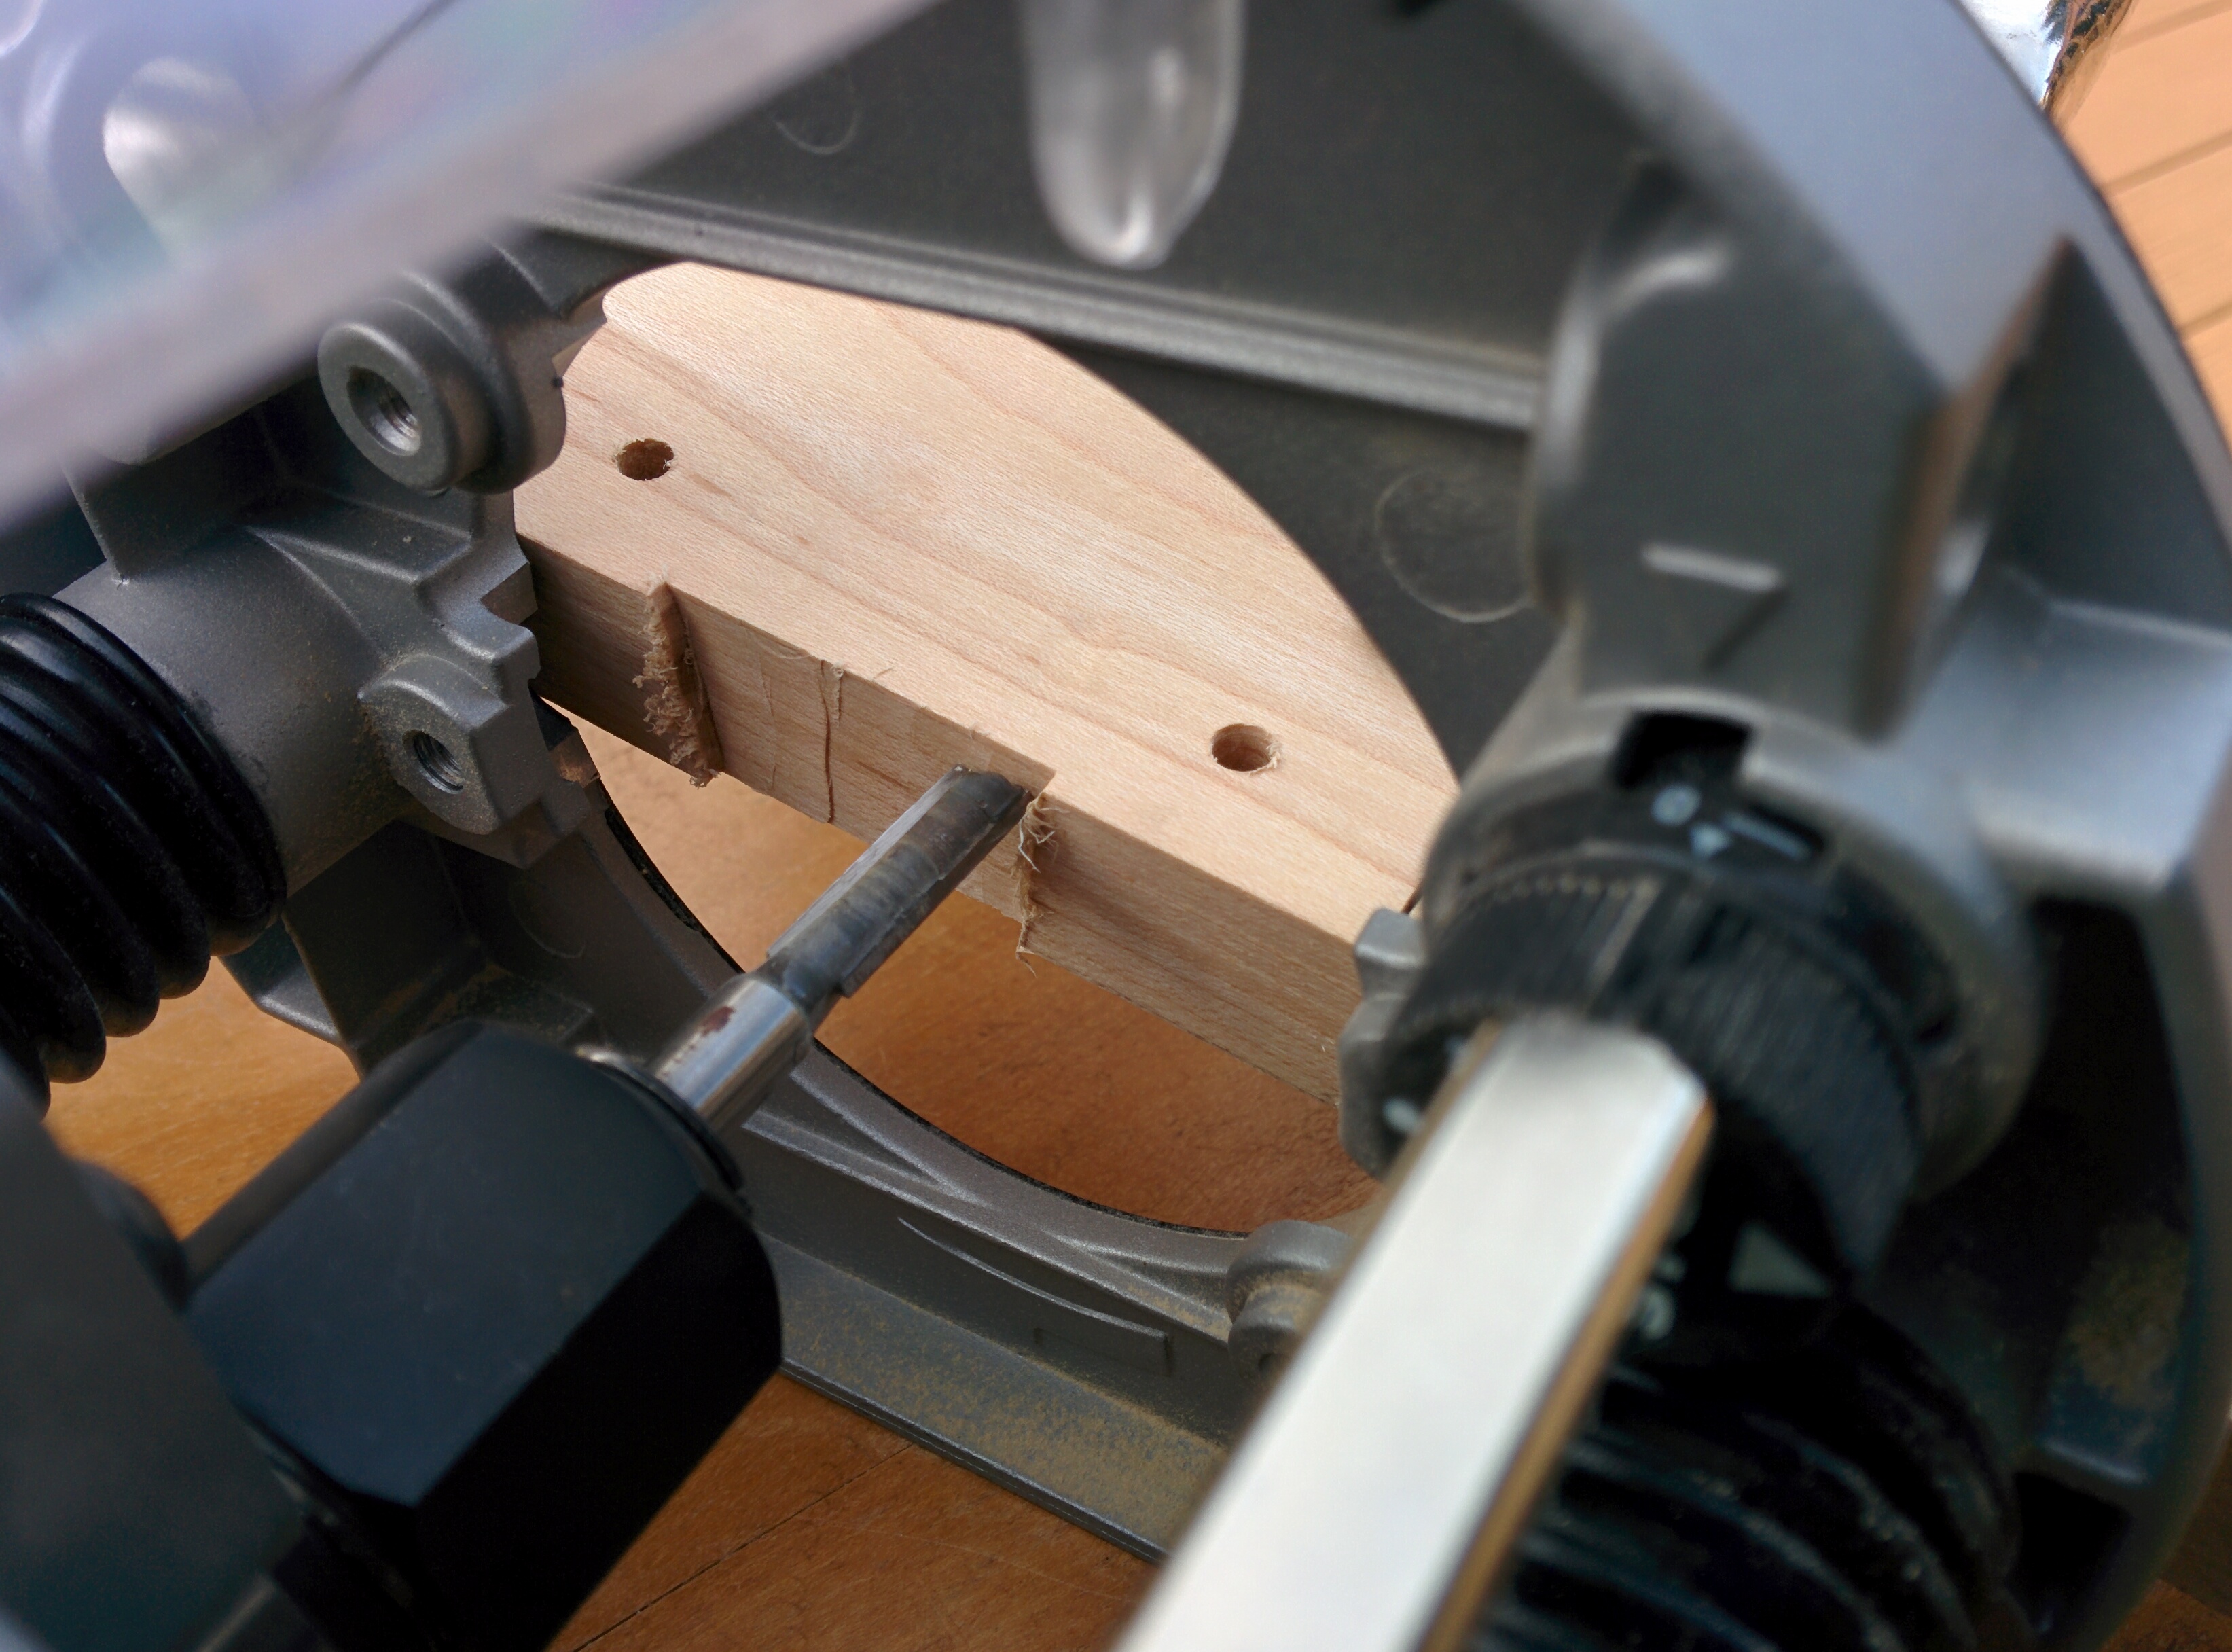
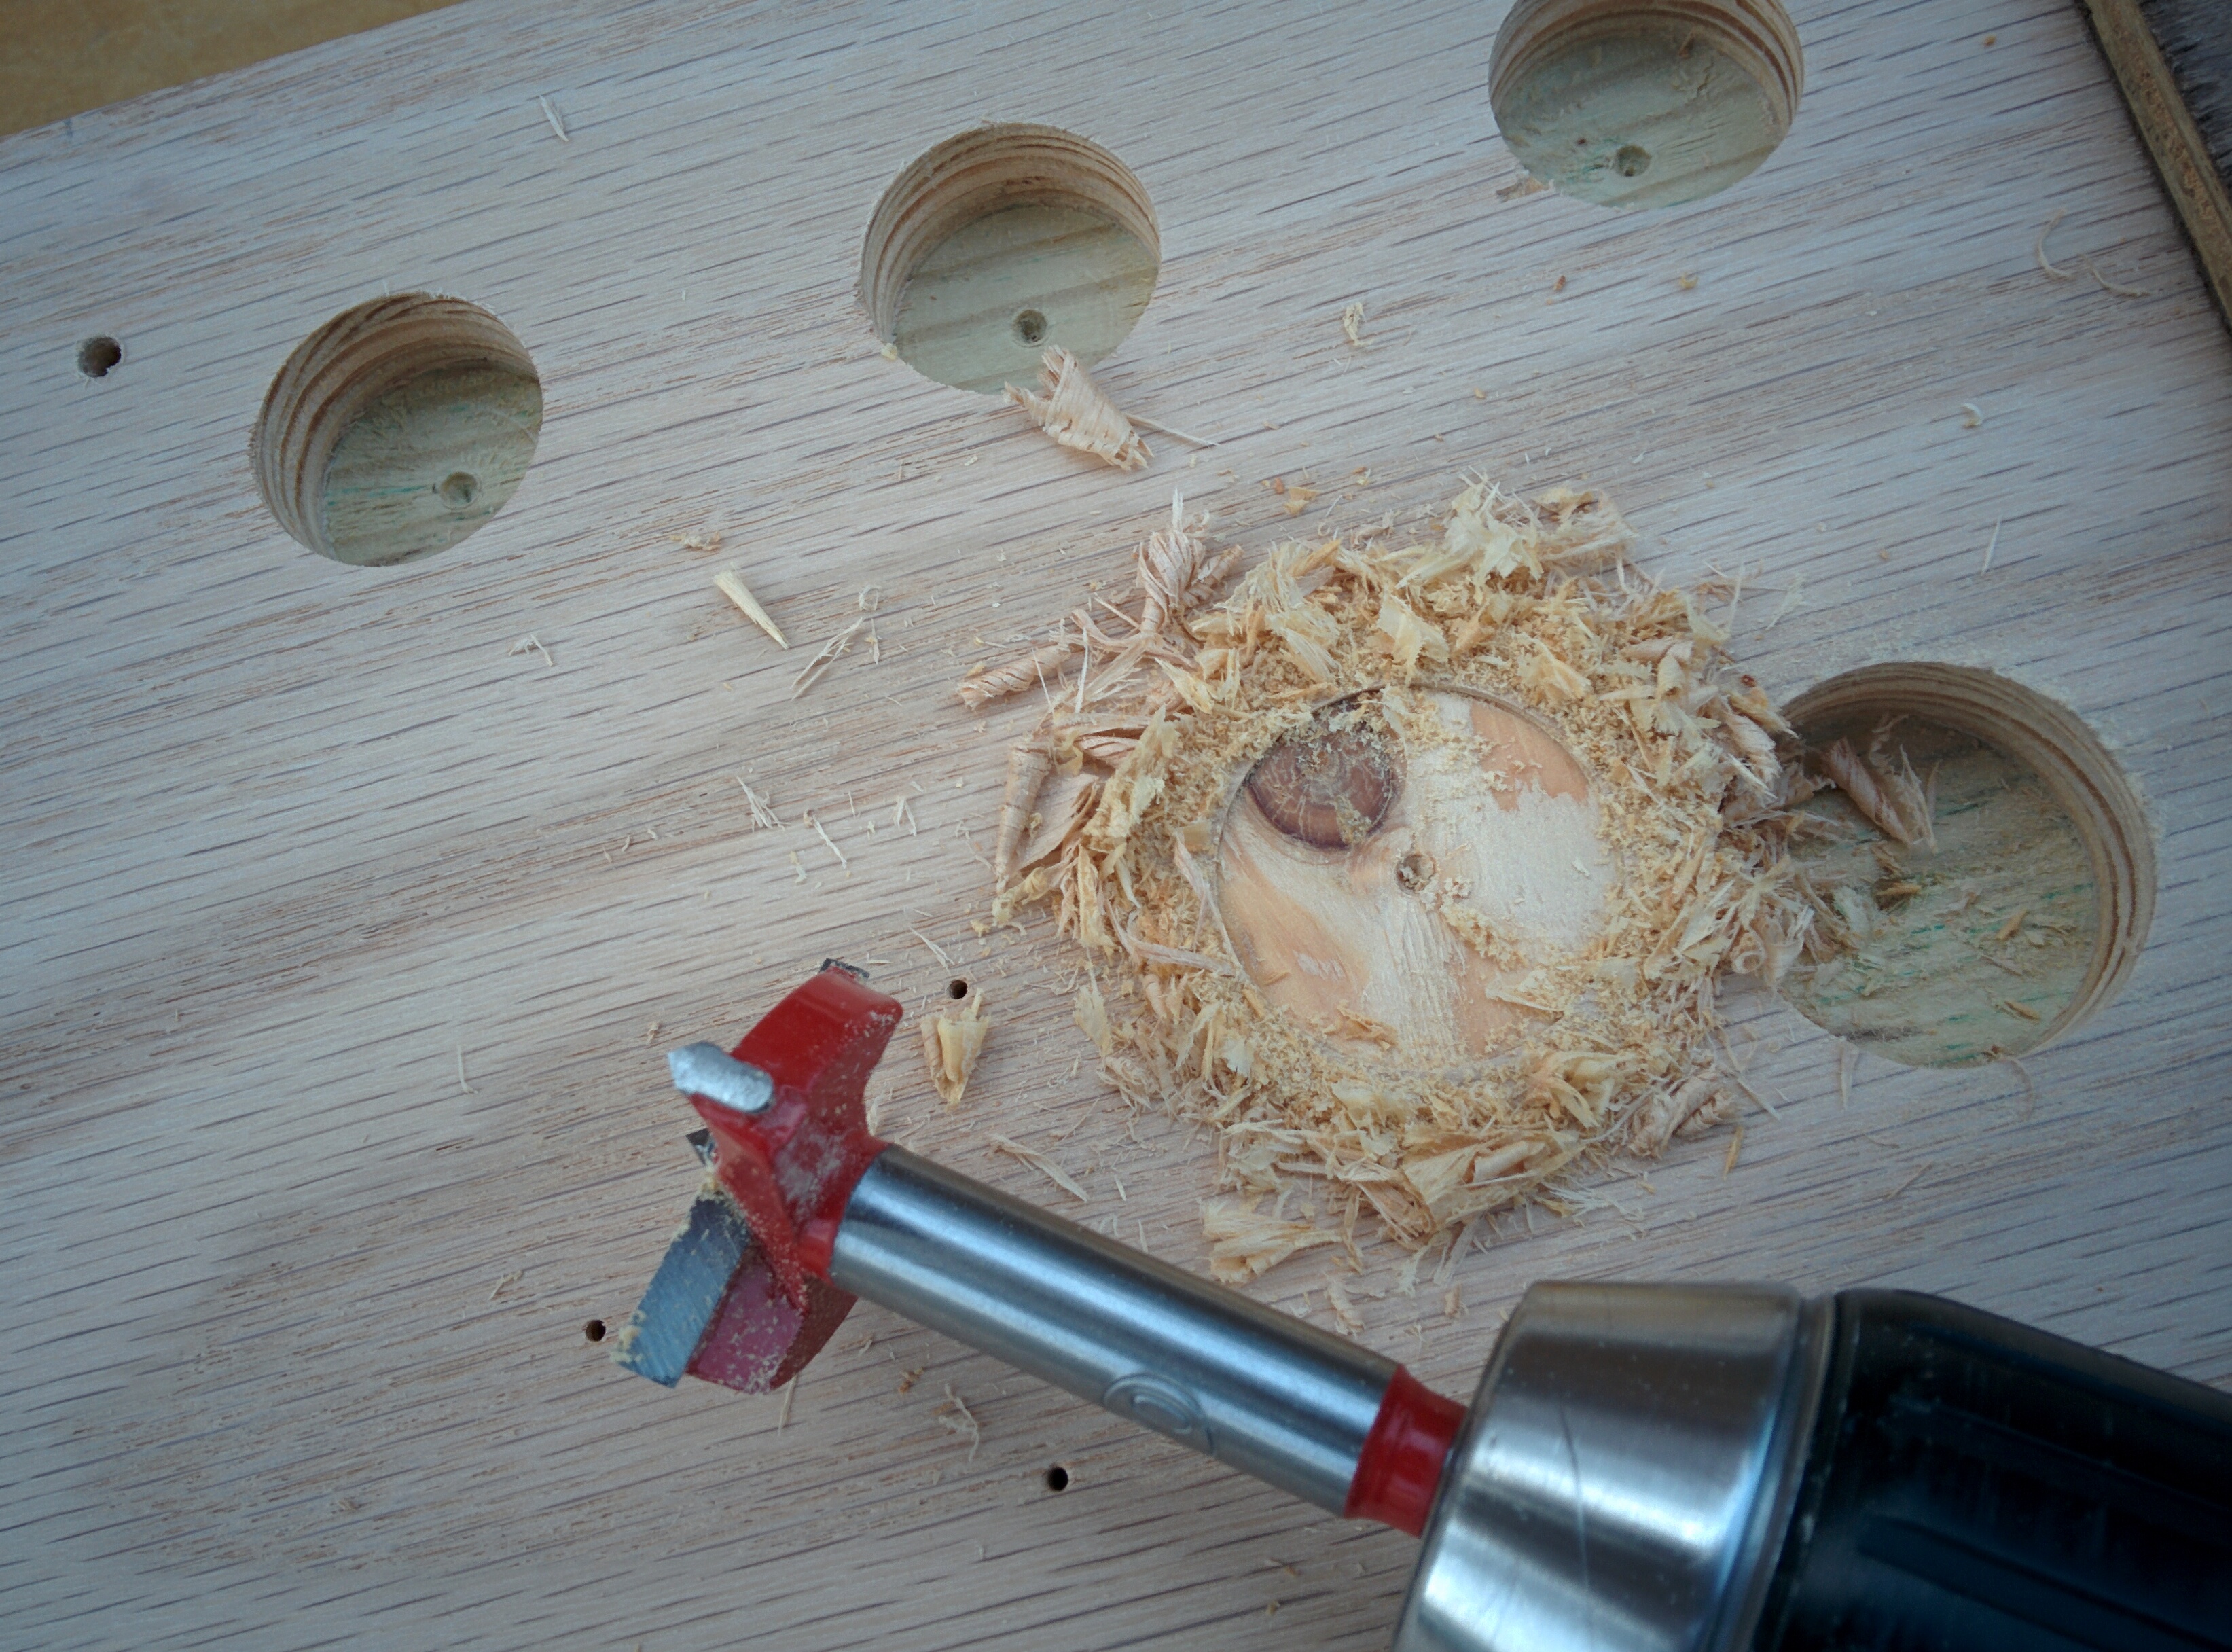
I test-fit the joystick in the slot I had routed out for it, marking out holes for the four M4 machine screws. After drilling them out with a 5/32" drill bit, I used a miniature file to make necessary minor adjustments to each hole so that the machine screws would go straight through them and the joystick plate.
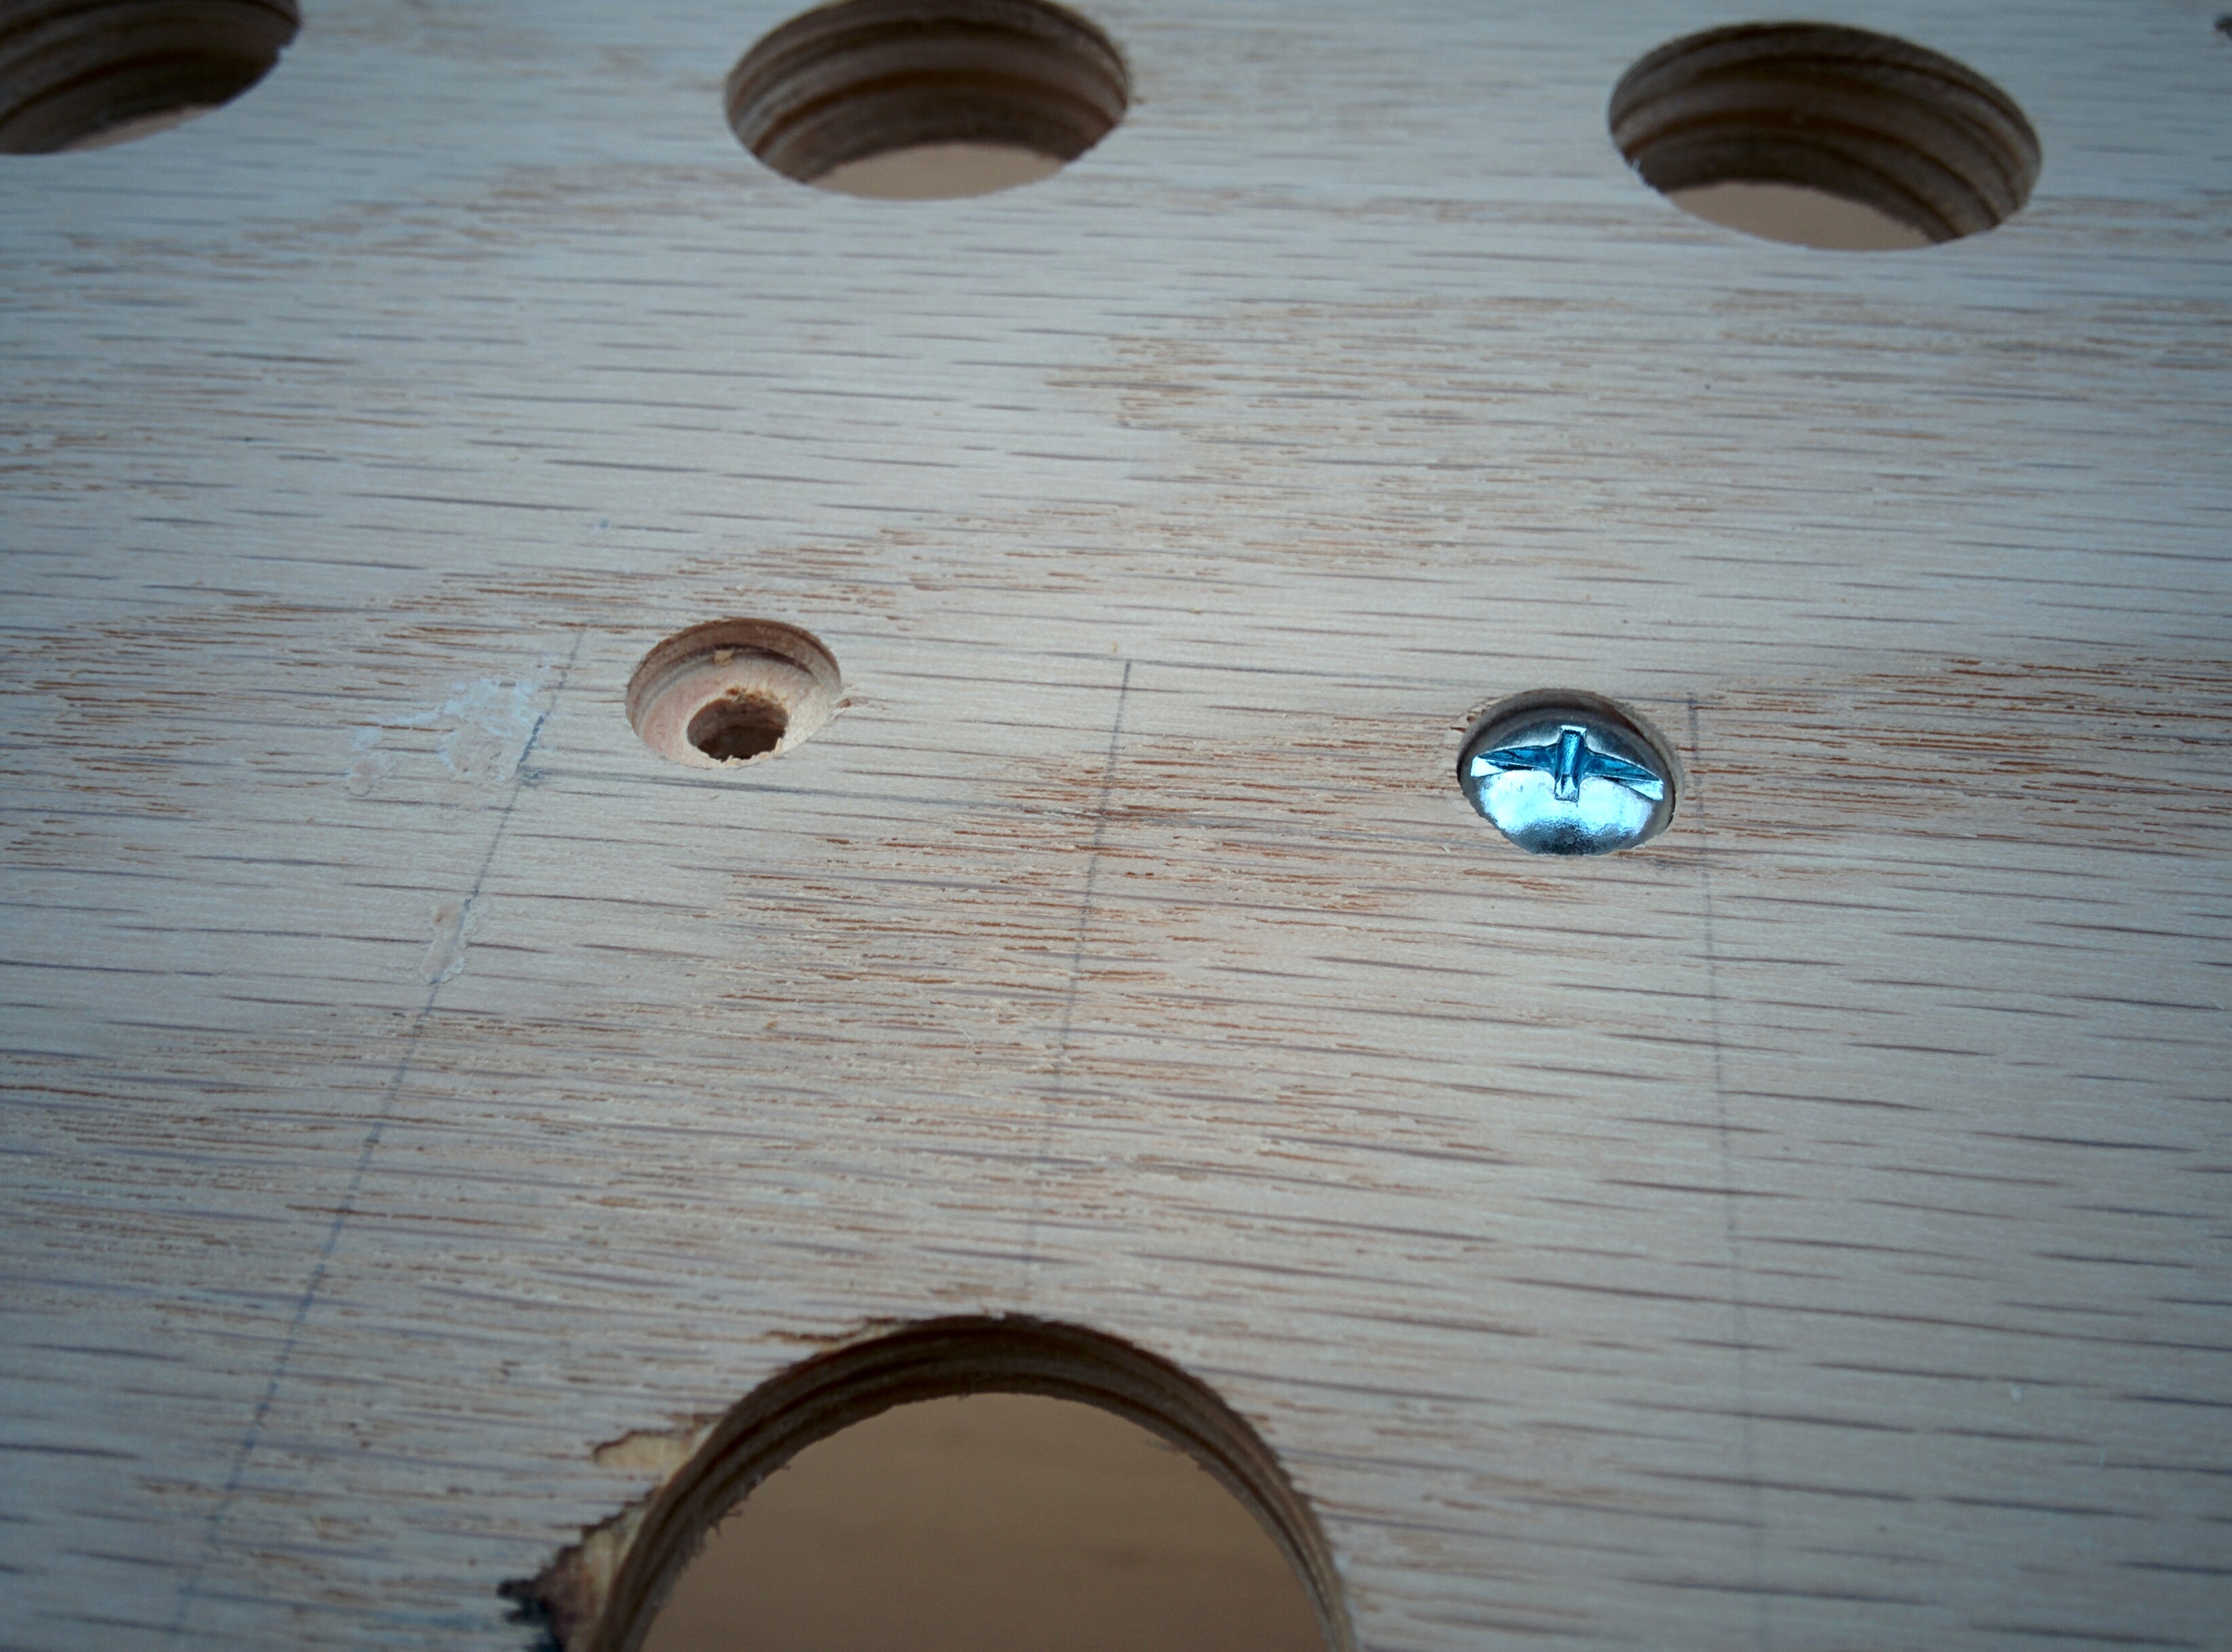
I used the 3/8" straight router bit afterwards on the top side of the panel to carve out recesses for the truss heads of those machine screws. A sunken head would have worked much better for this purpose in hindsight, but when I purchased the machine screws, I was not yet sure how I would be mounting the joystick to my panel.


Finally, I wanted the major edges of my fightstick to be rounded over to make the stick easier to handle. It also has the side effect of making those edges more durable, as finishes like polyurethane are harder to apply and easier to wear off of an edge the sharper it is. I mounted my 1/4" roundover bit to my router and guided it along the edges of the pieces that would end up on the outside of the fightstick.
Typically plywood isn't something you want to round over, as its layered structure causes some of those layers to expand outwards depending on the temperature and humidity of the surrounding environment. I deemed it fine in my case because I would be sealing all my pieces with polyurethane after I glued them together.


↿ Back to top ↾
Frame Assembly & Preparation
Before gluing my pieces together, I checked all faces to be glued to make sure they were flush, sanding any bumps down with 80-grit and 120-grit sandpaper to help ensure a strong bond between pieces. Afterwards, on relevant outer surfaces, I used painter's tape to cover the areas next to glued faces to prevent excess glue from soaking into the wood and affecting my stain later.
Apply glue evenly across the faces to be attached, then press and hold them together. If possible keep the two faces forced together with something like a wood clamp for the strongest bond possible. I didn't have clamps that big, so I just used spare weights and heavy articles to apply that pressure instead.
Joints joined with wood glue are typically stronger than the wood they join, but one thing to note is that if you're gluing pieces together on the end-grain, the bond created will be weaker than if they had been glued together with or against the grain. To prep those surfaces, you'll want to apply some watered-down glue to the end-grain faces so that they absorb some of the glue into the fibers. Then you proceed as normal before the diluted glue dries.
After the glue completely dries, I removed the painter's tape and sanded off excessive glue buildup with 120-grit sandpaper. Wood glues typically don't absorb stain well, and when paired with a dark stain like mine it would have left ugly yellow streaks on all my wood joints. If this is a major concern for you, there are darker and transparent wood glues available for purchase that you can use instead, but it wasn't a high priority for me. After that, I gave all wood surfaces a light sanding with 220-grit sandpaper to get rid of any small burrs and raised fibers, then used a vacuum and paper towel dampened with mineral spirits, followed by a microcloth wipe down to get as much dust off as possible in preparation for staining and finishing. Ideally you would use a tack cloth to do this, since this is specifically what they're designed to do, but I didn't have any on hand. Microfiber cloths will generally work just as well though.
↿ Back to top ↾Finishing with Stain & Polyurethane
Blotching is when a wood absorbs stain unevenly, resulting in unsightly dark and light patches on the wood grain. It's generally not something you want to happen to a piece. If you're working with softwoods, you'll typically want to apply a coat of pre-stain wood conditioner first before applying your stain to help lessen the blotching that occurs.
Hardwoods are a mixed bunch. Species such as oak and walnut tend to absorb stain fairly evenly, but maple not so much; you often hear tales of maple hardwood floors coming out less than desirable from a stain application. I'm not a woodworker, so I did some research and tried to look up ways to prevent this from happening on my pieces. Although the whole blotchy aesthetic doesn't really bother me much, I figured that wasn't much of a reason to just wing it either.
Before opening my can of stain, I shook it for a while to mix its contents together in case they had separated inside the can. It also helps to guarantee that the color of the resulting stain will be consistent across the whole piece. give open end grains a little extra? apply with sponge brush will run off vertical edges, so either do those first or do them separately leave on for 5-15 minutes wipe off with rag if applying second coat, wait 4-6 hours before doing so wait 8 hours before first polyurethane coat oil-based polyurethane will produce finishes with a slightly yellow tint, use water-based ones if you want to avoid this not too big of a deal in my case don't shake the polyurethane can, produces bubbles, only stir gently 3 parts oil-based polyurethane to 1 part mineral spirits (water if water-based) dunk brush in mineral spirits and press bubbles out of bristles let it sit a while inside the spirits then pull out and slowly paint the spirits out onto some spare paper/cloth after 220 sanding, wipe down wood surface with paper towel with mineral spirits to get rid of final bits of dust (use tak cloth after if you got it) for fewer bubbles and brush stroke marks, the thinner the coats the better dip brush slightly into poly, don't shake, tap once on side of container to get rid of excess drips start in middle, slowly brush to edges, let weight of brush do the work, don't go back and forth go with the grain feather if poly mix is rather thick if miss a spot, get it in next pass let dry overnight lightly sand with 220 grit repeat from mineral spirits wipe down
↿ Back to top ↾Wiring Components
↿ Back to top ↾
Paracord Handle & Latch
↿ Back to top ↾